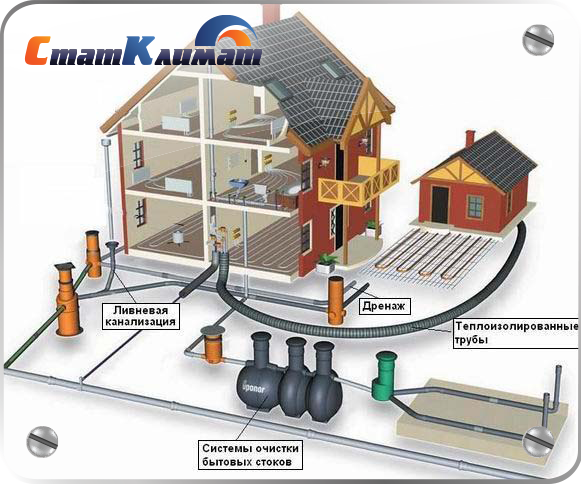
From internal pipelines, drains are transported by external ...
Wall panels for the kitchen are in retail chains in large numbers. They are excellent in composition and mounting options.
Today we will consider this material by its parameters and select the option you need. You will also learn what installation methods are on the video in this article and the photo can see additional information that will help you make the right choice.
Kitchen panels on the wall, despite the different components of manufacture, are mounted on the wall in two versions. This is what we must begin with.
Let's look at these options:
|
Glue the panels to the wall |
The panel for the walls of the kitchen can simply be glued to the wall. But this option is suitable if your plane is flat. In this case, it will be enough to remove the old coating and apply putty (see). After complete drying, you can mount. |
|
Fasten the panels to the frame |
Also, panels for the walls of the kitchen can be mounted on the crate. This option is suitable for uneven walls. In this case, you can not even do the preparation of the plane. From this, the final price will be lower. But then you take the usable area of \u200b\u200bthe premises. But if this is not a heated room, then a heater can also be placed in the frame, and in this case it will be useful. |
Any of these options is acceptable. You just need to choose the right one. Here, just proceed from the roughness of the walls. Pull the forest along the diagonals of the plane and attach the building level.
If the deviations are less than two cm, then everything can be completely aligned simply with a solution. If more than this parameter, then it is better to attach the panels for the kitchen wall to the frame.
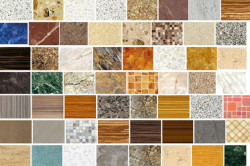
If for the first time you have to choose which coating to use for kitchen walls, then most likely immediately in your head is the question that most people who decide to make repairs ask themselves - what are the general types of modern panels used for walls?
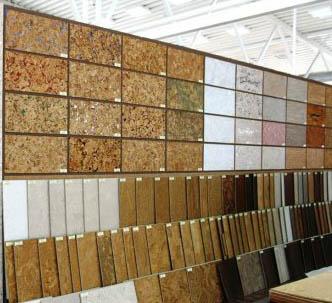
Generally speaking, they are all divided into four types:
Definitely, each of the types of panels is distinguished by its shortcomings and advantages. Below are the three best materials that are most often chosen if it is necessary to protect the walls or their decor.
Walls in a kitchen made of panels are best made of this material. But these are walls, not the working part. They can be different in their structure, the product in which only one side is covered - the front, but more and more often there is a variant in which both surfaces are laminated.

Attention: The latter option is preferable, since it is more reliable, but the price will be slightly higher.
If you compare a simple sheet with a laminated material, then after lamination, the surface will be much easier to clean, and in addition, it will in principle repel dirt in any form.
Some of the differences between laminated MDF:
If we talk about various disadvantages, then first of all it is worth noting the fact that the material is not able to tolerate in principle the ingress of any amount of moisture and ignites quickly enough. Also, despite the fact that it is coated on each side with a special protective coating, it can change its appearance after exposure to moisture.
If you have to wash a drop of fat from a previously laminated MDF, then the best option is to use a brush or soft sponges.
This option is the most famous today and it is accessed especially often if the room is not heated. Just five years ago, it was the builders who most often used plastic exclusively in various state institutions, but today the material has already become the most universal and convenient for everyone. This was largely due to an increase in textures and color solutions offered to the consumer.

The advantages of plastic:
Attention: It is not advisable to hit the panel with direct sunlight. As a result of this, they can emit an unpleasant odor, change color and warp.
This option is among the most affordable ways for most financially.

The material described above also has minor flaws:
In addition to the well-known panels made of plastic, chipboard or MDF, the walls of the kitchen can be trimmed with panels and more rare options, which can also be used to decorate kitchen walls. Definitely, they will cost much more, but if you want to achieve a certain atmosphere in the room, then there is no other option.
Wood panels are the most expensive material, but they look extremely respectable. The tree is difficult to wash, because it is very easy to damage its original structure during the process. In addition, the tree often undergoes deformation and, in principle, is afraid of moisture.
True, today there are such modern models that manufacturers additionally coat with high quality wax. Thanks to him, you can easily increase the life of such a material.

Also, products made from postforming are also used. In principle, these are ordinary sheets of chipboard, but covered with plastic on top.
Such products do not have any drawbacks, and there are many different advantages, among which the most important thing is that you can easily install this type of panel on any wall, including the one located directly above the sink or tile. Neither constant moisture nor high temperature will be afraid of her. For washing the panel, any modern tool is perfect. The only drawback is the higher cost.

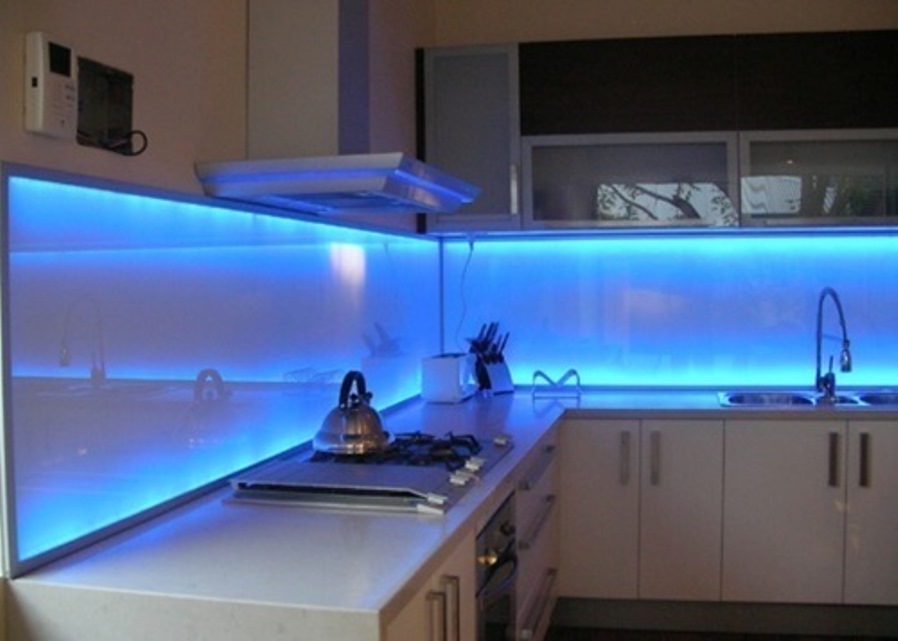
Not so long ago, the glass kitchen panel on the wall began to be used. From the point of view of practicality, such glass has a lot of advantages. It is highly durable and is not afraid of mechanical impact.
Just a point of view of fire safety claims can not even be. You can do your favorite cleaning means available and the coating will not be damaged. Also, this type of finish is quite attractive from an aesthetic point of view.
How the kitchen panel is attached to a wall of any kind you can find on the pages of our website. After all, each of them is attached in different ways, and for this you need a separate article., Most importantly, even you make a false panel on the wall in the kitchen, or any other, it should not just be written out to the interior.
First of all, decide on the mount. After all, after the purchase will need to do the installation. And the instruction will help you with this.
Kitchen decoration often involves the use of special finishing materials, which cover certain areas of the room. Today, increasingly, to solve such problems, they began to use wall-mounted kitchen panels made of various types of materials.
These sheet products appeared on the modern market quite recently, but at the same time they already managed to get positive reviews from many housewives. Wall panels are increasingly replacing quality materials like ceramic tiles in the kitchen.
There are several advantages of such products:
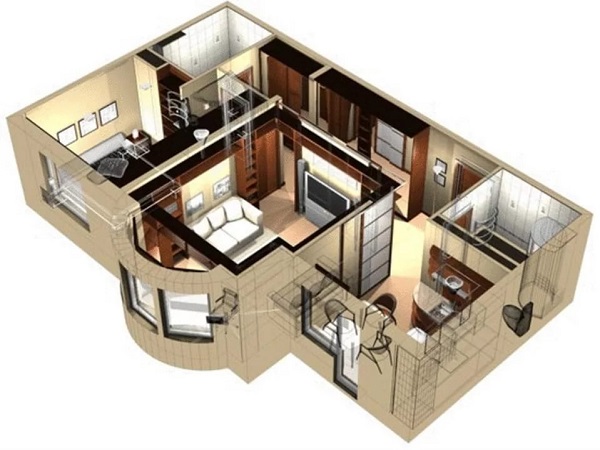
Wall panels can be used in various conditions, but most often they are used in the kitchen. When buying such products, you should consider such features of the kitchen as:
Please note that such products should not only be persistent, but also beautiful. This forces manufacturers to create a unique design that will be highly practical. Among all this diversity, several types of wall panels can be distinguished:
![]()
Please note that high-quality wood-based panels should be equipped with a moisture-resistant layer that will protect products and extend their life.
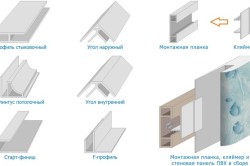
Installation of wall panels begins with the acquisition of the required amount of materials and several additional tools:
![]()
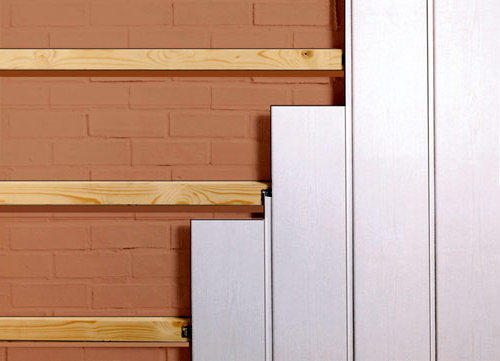
The next stage of repair of this kind is the calculation of the number of planks and the marking of their future location. In most cases, the frame under the wall panels looks like a rectangle with jumpers. Between the vertical planks, experts recommend leaving a distance of no more than 50 cm. When plastic materials are supposed to be fastened, this value is reduced to 20-30 to reduce the likelihood of their slight bending from insignificant physical efforts.

The number of vertical and horizontal strips depends on the size of the walls and the type of panels selected for installation. Based on this, you can pre-calculate the approximate amount of such components.

Before fixing the wooden planks will be carried out, experts recommend treating them with special moisture-proofing impregnation. This will significantly increase the life of the frame and increase its resistance to environmental influences.

The process of mounting supports for sheet panels correctly divided into several successive stages:
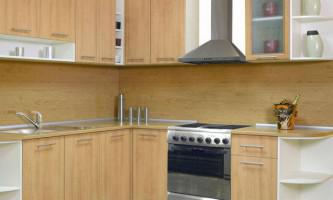
Facing the work surface in the kitchen is an important element of the interior. Its purpose is purely practical, but now much attention is paid to the aesthetic appearance of this unchanging kitchen attribute. The variety of suitable materials is simply amazing, traditionally considered as ceramic tiles, artificial stone and plastic wall panels. An important place among similar materials is occupied by MDF boards, which will be discussed in our article.
Such material appeared relatively recently, but has already gained great popularity as a relatively inexpensive analogue of natural wood, which also has improved strength and performance characteristics.
Pros of using MDF:
On the video - kitchen aprons from mdf:
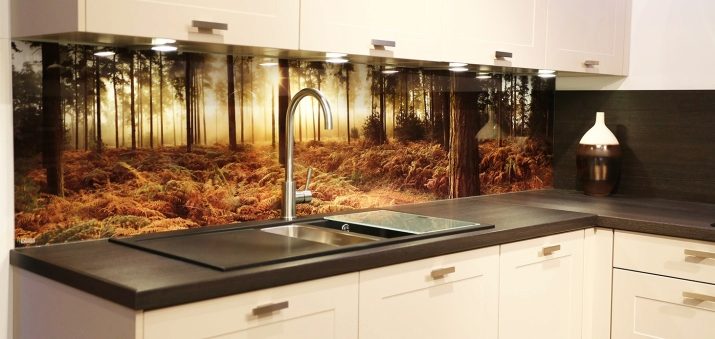
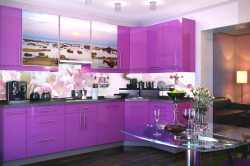
Kitchen aprons with photo printing will have a great decorative effect - a relatively new service that has not yet received wide distribution. In addition to aesthetic appeal, such panels have additional surface protection thanks to a special top layer. Unique special effects will allow you to get additional depth and brightness of the color, while it is possible to beat tones with additional lighting.
All commercially available boards may vary in thickness and raw materials used. Typically, boards have special grooves in length, thanks to which you can make an almost seamless surface. Some types of plates include cutouts from the end so that you can lay boards on any area. The main feature of MDF is the top coating, according to which the main types of this material are classified.
Types of surfaces of MDF boards:

A separate category of such material includes drawing or photographs applied using special technology. Such decor will significantly increase the attractiveness and aesthetic appearance of the chosen option. In most cases, the ability to apply photographs is used for furniture facades, for kitchen sets, including. To create a single composition with furniture groups will help and the appropriate choice of an apron.
Nuances of choosing a color scheme:
In the photo - kitchen aprons from mdf with photo printing:

Gentle cleansing with mild non-abrasive products will allow the coating to last longer without losing attractiveness. In any case, there is always the opportunity to adjust the surface of the slab or replace it with a new one without suffering too much material damage.
One of the advantages when choosing this material will be the possibility of self-assembly. Unlike ceramic tiles and glass panels here do not require special skills and professional equipment. The usual set of a home master will be quite enough:
As wall panels, MDF is preferable for a number of signs:
On the video - a kitchen apron from mdf with photo printing:
Ideal options do not exist, therefore, the MDF board is not without drawbacks. Despite the fairly good strength, the coating can fail under prolonged exposure to steam or high temperatures. Fat streaks and other traces of kitchen operation can be poorly washed and leave unaesthetic marks. Even with the most careful and careful use, a kitchen apron made of MDF is inferior in terms of service life to some other materials.
Despite these nuances, such varieties of wall kitchen finishes occupy leading positions in the ranking of suitable materials. The main advantage is a more affordable cost, so you can afford to more often update the design of the kitchen and create new projects.
How to fasten? Mounting Methods wall panel from MDF:
Even a sufficiently long apron is preferably made from a solid panel. So the joints will not be visible. Installation in this case will require the involvement of assistants, but the result will also be impressive.
The video shows how to install a kitchen apron from mdf:
Selecting quality material is not as easy as you might think. The product must have all the hygienic conclusions on the safe use in residential premises, as well as a quality certificate. MDF for the kitchen should also be completely chemically inert, not react with acids and alkalis, and not release any substances outward.
All these requirements are met by products of trusted manufacturers, a brief overview of which is given below. The approximate prices are for comparison with other options and may change over time.
Estimated cost of a kitchen apron made of MDF:
The cost of exclusive apron models with photo printing will depend on the type and thickness of the panel used, as well as additional functions: fasteners, installation services. On average, we can say that a square meter of apron with photo printing will cost in the region of $ 20 and above.
On the video - more information about how to install a kitchen apron from mdf:
The kitchen is a room that is repaired more often than other rooms. Therefore, the question of how to fix wall panels in the kitchen is very interesting for home craftsmen who decided to make a change in the interior of the apartment on their own. Thanks to new technologies for the manufacture of building materials, such familiar types of finishes as tiles and wallpapers are gradually losing ground. A significant role in this was played by wall panels, the variety of designs of which is simply amazing. The reader is invited to familiarize themselves with the varieties of wall panels and how to install them.
Wall panels in the kitchen, despite the ease of installation, can be selected for any interior design.
Compared to other methods of wall decoration, wall paneling has a number of very tangible advantages. Due to their characteristics and ease of installation, they are becoming increasingly popular.
The advantages of these products are as follows:
There is a wide variety of options for wall mdf panels for the kitchen.
Installing a wall panel in the kitchen is possible in various ways. It depends on the model, type and material of which the panel is made.
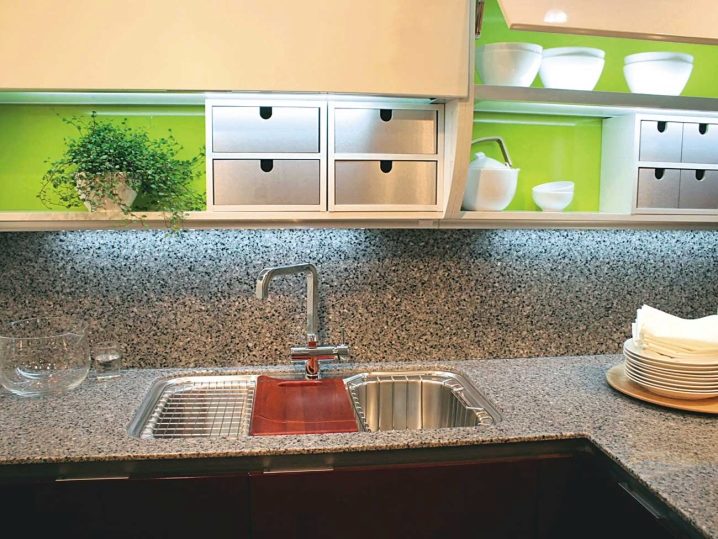
Plastic panels in the kitchen are easy to clean and withstand moisture.
Today there is a large amount of material that can quickly and efficiently sheathe the walls of almost any room. This material has a different appearance, resistance to moisture and temperature, wear resistance and durability.
Modern technologies suggest the ability to install such types of panels in the kitchen:
The construction industry is constantly expanding its range finishing material. Its characteristics and installation methods are being improved.
Most panels require mounting on a frame that is rigidly mounted on the wall.

But such a construction technique is appropriate only for spacious kitchens. For small rooms, the frame structure is not acceptable, it can pick up quite a lot of usable area.
If the area allows, then you can safely mount the frame.
For the manufacture of the frame, the following material is used:
In order to mount the crate, you need the following equipment:
After drawing up the project, the necessary material is procured. Next, marking is applied to the wall. After this, the installation of the crate is carried out.
This is done in the following order:
The crate is ready. You can proceed to the fastening of the panels. You can attach individual fragments using a special lock, screws or brackets (kleimers).
This method is quite common. But it is not particularly reliable, since over time the adhesive loses its properties from constant changes in humidity and temperature. As a rule, this method is used to fasten light materials, such as plywood, plastic or MDF. If it is decided to glue heavier panels, then a strong support is necessary for their lower part.
In order for the panel to firmly adhere to the wall, it must be prepared accordingly.
It is done like this:
Only after that the wall is ready for gluing with panels. A good option is to use polyurethane sealant or liquid nails. Glue must be applied to the entire surface of the panel. After it is applied in its place, it must be pressed tightly and crushed over the entire plane with heavy oppression or struts.
An easier way to attach large panels is to screw them directly onto the wall. To do this, several holes are drilled in the panel and wall, into which dowels are inserted and self-tapping screws are screwed. Self-tapping hats can be masked by lower or upper cabinets. If they are in the middle of the panel, they are closed with decorative caps.
The panels can be fixed without using fasteners. Their lower edge is installed on the countertop and pressed against the baseboard. The top edge is pressed by a hanging cabinet. For tempered glass, steel frames can be made.
Decorating the kitchen is a painstaking and creative affair. During this work, you can combine a wide variety of materials. From this, the quality of the repair and the appearance of the room will only improve. Do not be afraid to fantasize and experiment.
Probably, you need to start with the fact that the wall panel in the kitchen can be made of different materials, each of which has its own advantages and disadvantages. And since the kitchen is the place where a lot of fat and other drops fall on the walls near the working surfaces, you need to carefully approach the choice of material.
Let's figure out what actually you can install the wall panel in the kitchen, and only then we will consider the principles and sequence of installation.
It is important to note here that the decision to apply this or that material or not depends not only on its practical features, but also on the overall design of the kitchen. Try to choose the material so that it harmonizes with the style of the room.
So, we begin the review of materials:
We proceed to the installation of rails.
So, in addition to the panels themselves, we need such a tool and supplies:
Tip: you can save money and not buy a power tool. Rent it for a couple of days - it is unlikely that installing a wall panel in the kitchen with your own hands will take more time.
In principle, with such a "gentlemanly set" you can begin the first stage of work.
First you need to note where the slats will be located. This is the perimeter and vertical jumpers. Jumpers in most cases can be placed at a distance of 40-50 cm from each other - as a rule, this distance is enough.
But of course, if the installation of wall panels in the kitchen is made of thin plastic, it may be necessary to reduce this distance so that the panels do not bend.
We proceed to the installation of rails.
Tip: in order for the frame to last longer - before attaching the rails, treat them with moisture-proof and antiseptic impregnations. With this approach, the increased humidity of the kitchen will not spoil the frame for a very long time.
In general, the frame is ready and the photo below shows how it should look like.
By the way, maybe you are interested in how to glue the wall panel in the kitchen, and not fasten it. In this case, in fact, everything is this way - you can stick it on, only it will not be so reliable, because over time due to temperature changes in the room and high humidity, the glued panels are likely to "move away" from the draft wall.
And before you glue something, you need to prepare the wall very well - level it with plaster and primer, plus be sure to wait until it all dries. It’s easier and faster to make the frame.
So, we proceed to the last stage (as you already understood, as an illustrative example, we consider the assembly of several horizontal panels - not integral). We assemble the panels from the bottom up, so that if the extreme panel does not fit and has to be cut lengthwise, then it was in the upper part of the wall - this moment will not be so noticeable under the lockers.
In principle, that’s all!
We have examined how to install wall panels in the kitchen and from which it is better and easier to do. We hope that the information is useful to you, and if some moments still remain incomprehensible, then watch the video in this article - maybe there will be no more questions.
Good luck with p ”width \u003d” 640 ″ allowfullscreen \u003d ”” frameborder \u003d ”0 ″\u003e
Good luck with your repair!
From internal pipelines, drains are transported by external ...
Each apartment, like every family, has its own characteristics, so it is difficult ...