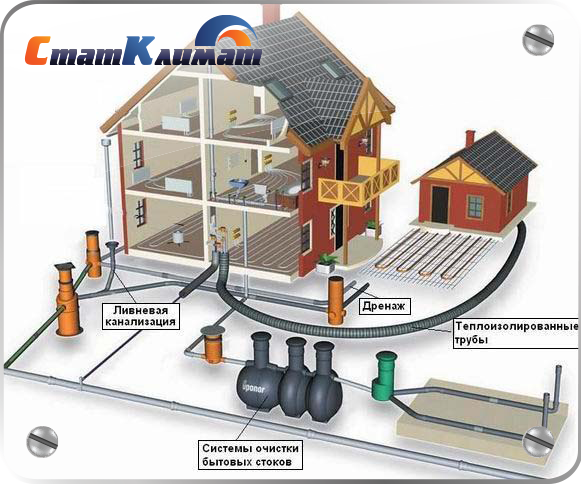
From internal pipelines, drains are transported by external ...

Panels made of polyvinyl chloride (PVC), which is also called a plastic "lining", are used to decorate walls and ceilings in rooms with high levels of humidity. This material is used for interior design on terraces, balconies, in bathrooms, in the kitchen. In order to carry out such work, it is not necessary to attract specialists. If you have the necessary tool and skills to work with it, you can do it yourself.
This material allows you to quickly get a flat surface at minimum cost. Installation is very easy: if necessary, fit the strip to size, the lining can be sawed with a hand hacksaw with small teeth or with a jigsaw. PVC panels are a relatively cheap finishing material.
The sanitary qualities of the plastic lining are especially important: its surface is not the habitat of microorganisms and viruses. PVC panels are not damaged by insect grinders and rodents. This material is easy to care for: in order to put it in order, it is enough to wipe the surface with a damp cloth. Chemical detergents can also be used other than those containing acetone. This building material does not accumulate static electricity, dust does not settle on its surface. Polyvinyl chloride does not emit unpleasant odors, does not emit substances harmful to the human body. He is not afraid of water and temperature extremes, inert to most household chemicals.
Under the plastic lining you can hide the wiring, water pipes and other communications. If necessary, insulation can be placed between the wall and the facing material.
Before installation, it is not necessary to level the base (wall or ceiling), to dismantle the old finish, which greatly simplifies repair work.
Lining should be chosen in accordance with the general concept of interior decoration. In this case, the color of the material and its type should be taken into account (PVC panels come in different widths, seamless joints and with a seam).
High-quality material should not be damaged on the front surface (dents, scratches, sagging). Decorative panels should not have defects in the pattern on the front side. All panels should be even: to make sure of this, you need to connect several strips into the lock. If docking occurs without problems and no curvature is visible, the material is suitable.
You should pay attention to the internal structure of the material: the more transverse jumpers are in it, the stronger it will be.
To clad a wall or ceiling with a plastic lining, you will need an electric drill or punch (for fixing the crate), a hacksaw with small teeth (or a jigsaw), a building level, a plumb line, a tape measure, a hammer (or a construction stapler with brackets), and a construction pencil. A screwdriver, a miter box and a shoe knife may come in handy. If you plan to mount the panels at high altitude, you need a stepladder.
Most often, PVC panels are attached to a pre-arranged crate made of wooden battens or bars. The crate is installed in level and attached to the wall using dowels, nails or screws. It is very convenient to fix with brackets using a construction stapler: this greatly simplifies the work and shortens the time for its completion.
When choosing a material for the crate, dry materials should be preferred. If the slats are supposed to be attached to an external, cold wall, the wood must be treated with an antiseptic composition.
The bars are oriented perpendicular to the position of the panels: if the facing material is installed vertically, then the lathing is horizontal and vice versa. The distance between the slats is selected about 0.5 m. In addition to materials from wood, metal profiles can be used (if necessary) for the crate.
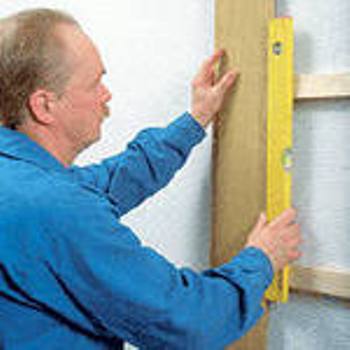
When facing the walls, it is important to monitor the observance of the vertical when installing the lathing: this is necessary for the correct joining of panels in the corners. Installation begins from any of the corners, where the finish bar or corner is first installed. If the panel should cover the wall to the ceiling, then in the upper part a special ceiling plinth is attached. The panel is installed in such a way that its upper edge fits into the groove of the baseboard.
 The material is attached to the crate with nails using special brackets, but lining can be fixed without the use of brackets. If the crate is made of metal profiles - self-tapping screws for metal are used. After fixing the first strip, the next one is pressed against it, while its locking part should fit tightly into the mating part of the adjacent PVC panel. This continues until the entire surface is lined. In the lower part of the wall, near the floor, a plinth is attached.
If the wall surface is perfectly flat, all the corners are of the correct shape, then the plastic lining can be glued directly to the wall. For this, “liquid nails” are used: such glue is applied to the back of the panel, which is then pressed firmly against the wall.
Correct installation of PVC panels with a careful attitude and proper care will allow the material to serve for several decades.
Video on the installation of PVC panels.
In this article we describe the process of installing panels with your own hands (PVC or MDF). The instruction itself is not considered complex and can be performed by a person who does not have knowledge in construction. The main thing is to do everything according to the level so that the walls do not turn out to be crooked.
As a rule, the installation of pvc panels is performed on a slat lath made of beads with a volume of 50 mm x 25 mm. With the appropriate preparation of the plane, the panel can be personally attached to the wall or ceiling with nails, staples or glue. Lathing bars are fastened at a distance of approximately 0.5 m between themselves by means of screws or nails. If the panels begin to be mounted horizontally, then the bars must be located vertically, and vice versa.
For a specific combination of panels, the bars must be installed at the level. The installation of the panels comes from one of the corners, in which the corner or finish strip is first attached. If the panels begin to cover the wall to the ceiling, it is necessary to install a ceiling plinth. Then we install the panel so that a small strip of the panel goes into the corner.
After this panel is fastened with nails to the crate for the mounting strip. We mount the upcoming panel, tightly pressing it to the previous one, and in addition we fasten it to the crate. Installation lasts until a close opening or corner, in these places you need to install the corner or finish components that come with the pvc panels. The final panel with little effort is inserted into the finish component and latches. The places where the panels are joined to the floor are covered with a skirting board.
Facing the building with plastic panels is a less complex and more “spotless” method of finishing the building. One of the main positive aspects of this finishing material is the highest technological effectiveness of installation. The assembly is carried out similarly to the childish designer and to cope with this task in strength, including the amateur. Another advantage of this finishing technique is the actual inaccessibility of any dirt, dust, waste and other "secondary phenomena" when repairs are done with your own hands.
Plastic panels are simply cut both along and across, as a result of these difficulties with the adjustment of volumes during installation should not be. A friend from the other wall paneling is connected as a groove-groove. With this type of connection, the layout may not be similar in bloom with panels, or even be mirrored.

For fastening the pvc lining and finishing moldings, use a technique that is more suitable for you. Below are the most famous mounting methods. wall panels:
When installing on vertical planes, fasten the crate for attaching the panels in steps of less than 60 cm, when installing on the ceiling to avoid sagging, fasten the panel in steps of less than 50 cm. The material is attached to a clean and smooth plane.
The installation process itself is not complicated and can be easily done by yourself. Most often, the panels are mounted on a wood crate installed perpendicular to the direction of the panels, with nails, screws or staples using a stapler. If the walls are insulated, then between the surface and the panels are installed one after another: vapor barrier, thermal insulation, windproof membrane.
Also consider the following rules when installing PVC panels:
To carry out installation cases, you will need to have the following devices:

Judging by these instructions, we can safely say that the installation process does not require much knowledge in the field of repair. If you decide to do it yourself, then go ahead. The main rule, just do not forget: measure once - cut seven times.
From internal pipelines, drains are transported by external ...
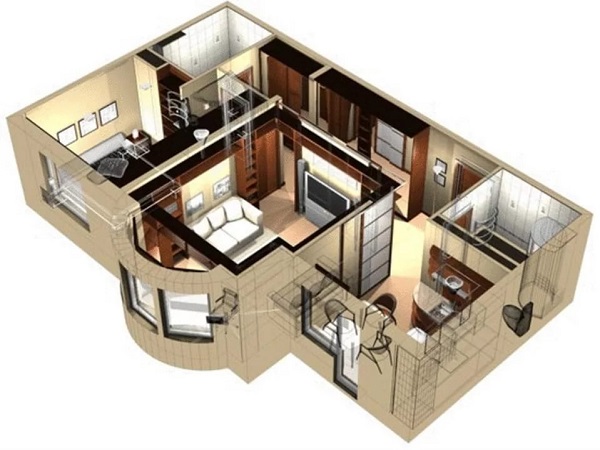
Each apartment, like every family, has its own characteristics, so it is difficult ...