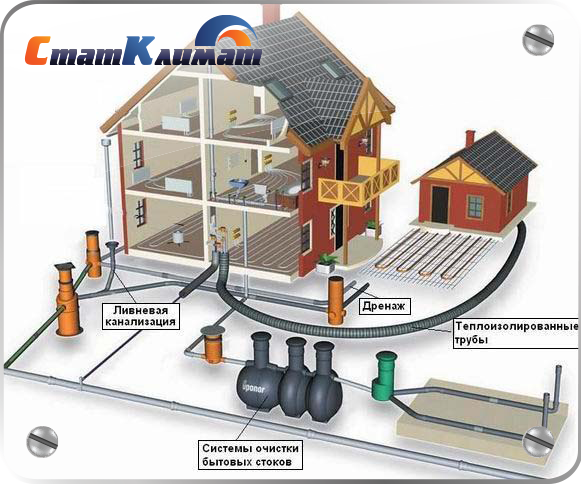
From internal pipelines, drains are transported by external ...
You replaced the doors and do not know where to “attach” the old. A familiar problem, isn't it? Many regretfully throw out the old doors, but few know how to give them a second life. Still strong wooden doors can become the basis of new interior items.
What door panels are suitable for creating furniture? First of all, wooden and without serious defects. You can use both deaf and glazed (the glass will need to be removed). As for paint or varnish, this does not play a special role, because we will create vintage furniture with our own hands. And here, as you know, scuffs are only a plus. If desired, it will be possible to enhance the effect of antiquity or paint it in a new color - in accordance with the idea.
Usually during reincarnation to old door one or more elements are attached (shelves, legs, etc.). For a harmonious look, decorators recommend painting the entire structure in a single color. If you also prefer patina, it should appear on all elements (with the exception of metal parts).
What furniture can be made from an old door? Almost any! Racks and shelves, console racks and hangers, tables and headboards. In a word, if you feel sorry for parting with a door that has outlived its age in its familiar role, this gallery will tell you how to give it a new life.
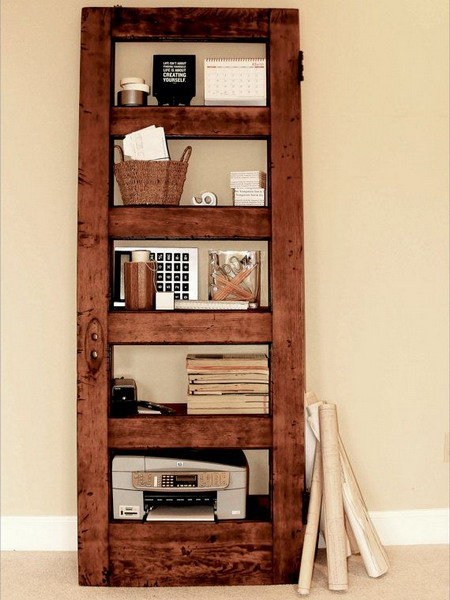
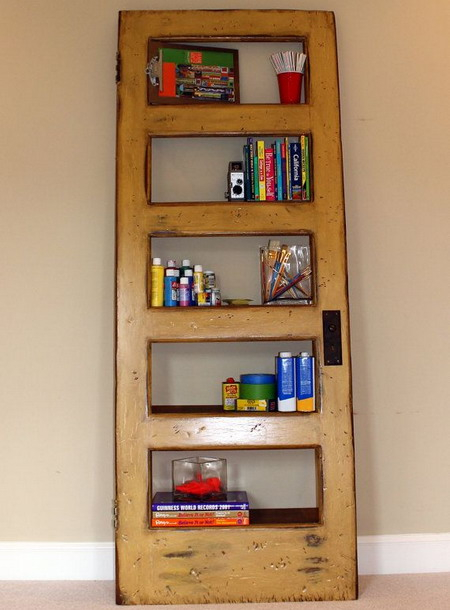
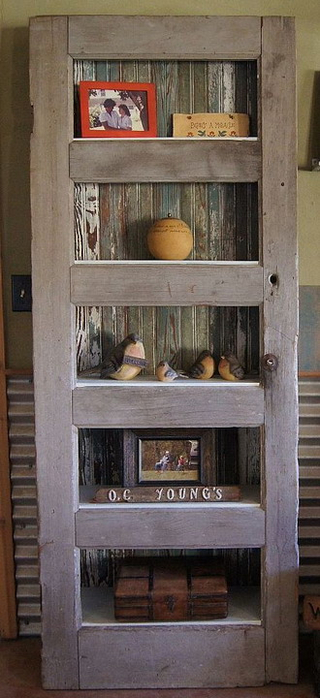
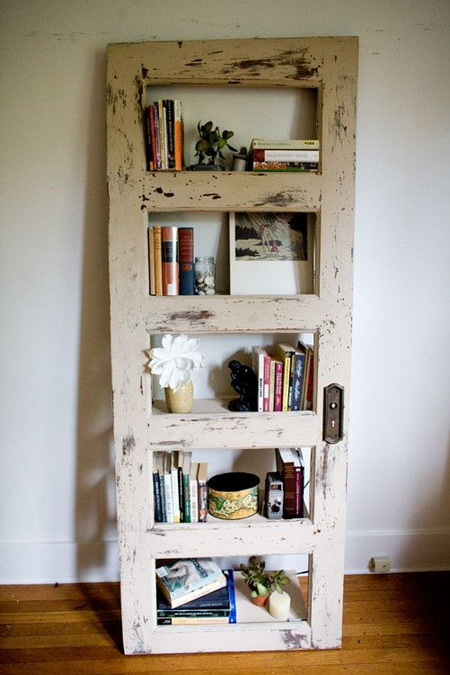
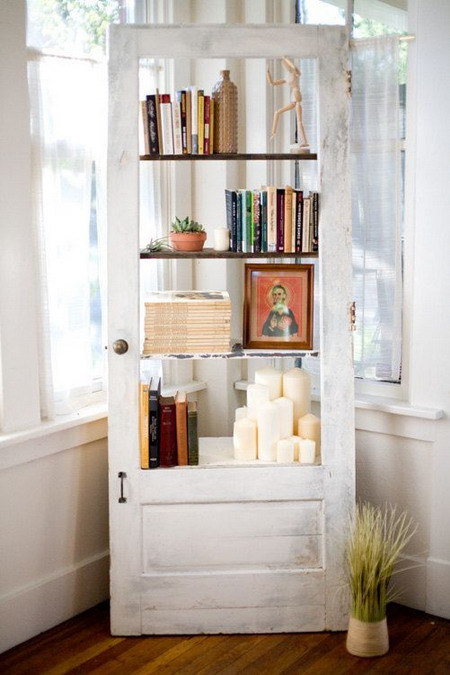
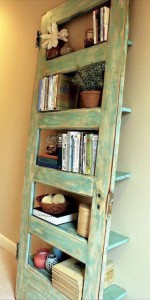
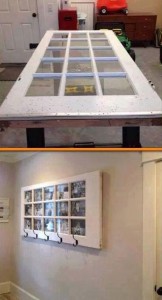
Did you know, for example, that from a door leaf it is possible to make ... a rack? Yes, a real high-grade bookcase for books, paintings and all sorts of little things - decorative or placed in boxes. The best option for the door is glazed.
We take out the glass, and in its place (perpendicular to the canvas) we place wooden shelves cut to size. We attach the shelves with corners or hang them on chains. The depth of the shelves depends on the position of the rack. If it is tilted with respect to the wall, the depth of the shelves gradually decreases from bottom to top.
If you prefer maximum capacity - make shelves of the same depth, and set the rack to the level of the wall. In this case, it is necessary to attach the back of the shelves to the wall (for stability). However, if you have small children or pets, it is better to attach any design of the rack to the wall.
Also, to increase the reliability of the design, the rack can be equipped with a box at the base, either with a shelf on legs or wide legs, they will hold a massive canvas well.
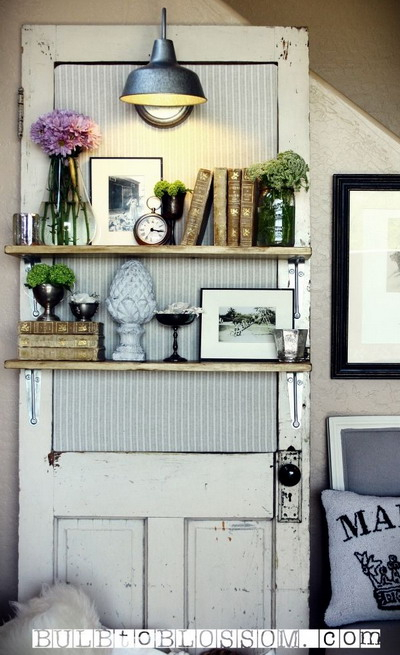
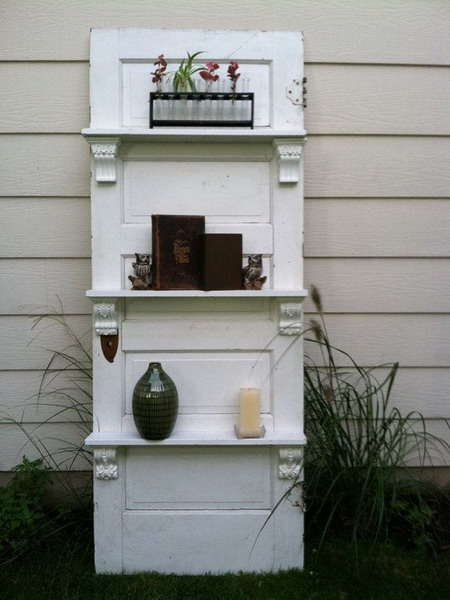
In addition, you can use blind doors - shelves are attached to the front with the help of consoles.
1. 2.
2.![]()
3.
4.
5.
6.
7.
8.
9.
10.
11.
12.
13.
14.
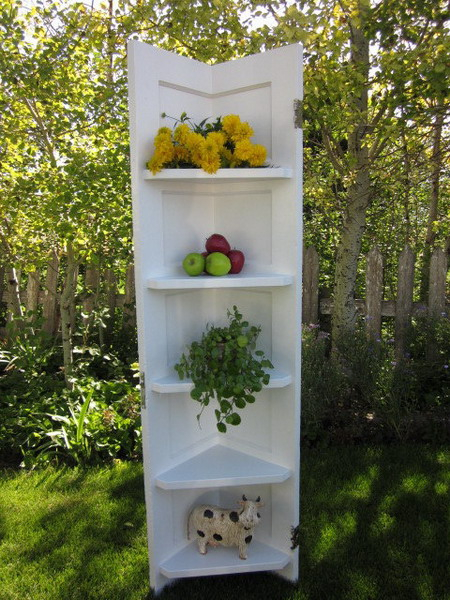
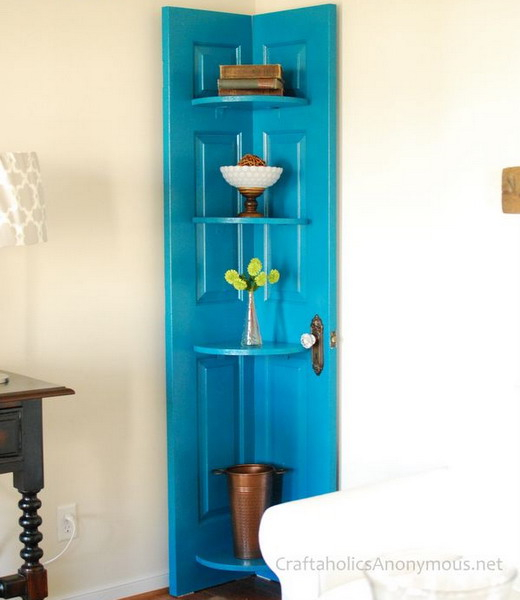
15. corner racks:
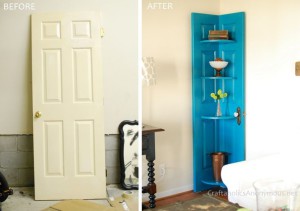
Not enough room in the room, hallway or kitchen? Is there a small free corner? Saw the door along the long part of the canvas, connect the halves at an angle of 90 degrees and hang the shelves - the corner rack is ready!
16. 17.
17.
18. retro shelves from old doors:
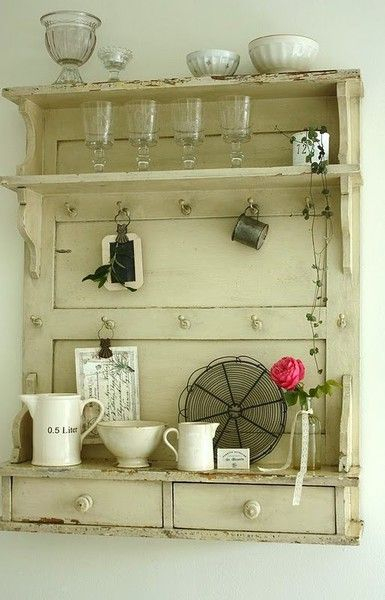
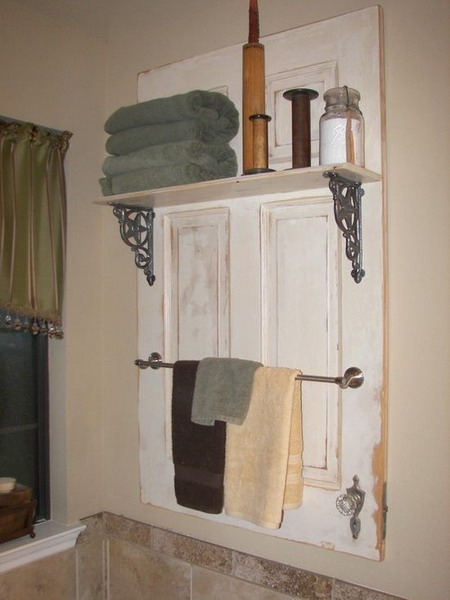
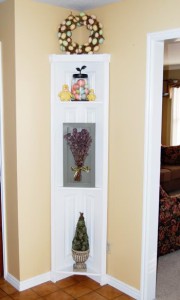
By the same principle, you can make an original shelf module. Attach wooden shelves, roof rails, hooks to the door, and attach to the wall with the back. By the way, in this case, the door can be sawn across the canvas and used to the height that is appropriate.
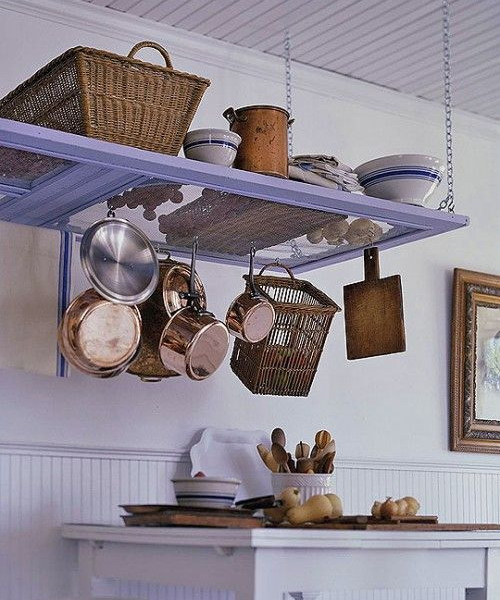
If you hang a lightweight balcony door with a net horizontally on chains, you will get a spectacular kitchen shelf in a vintage French style.
19. 20.
20.
21.
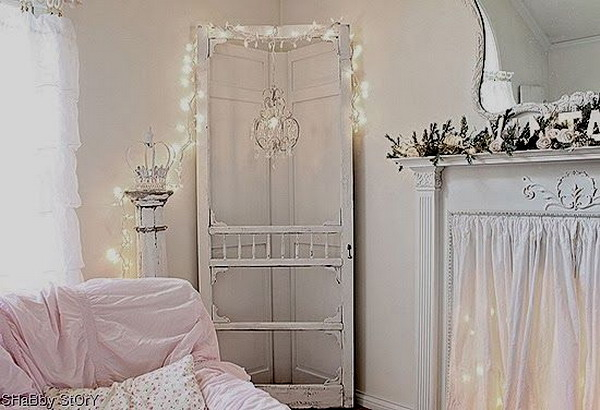
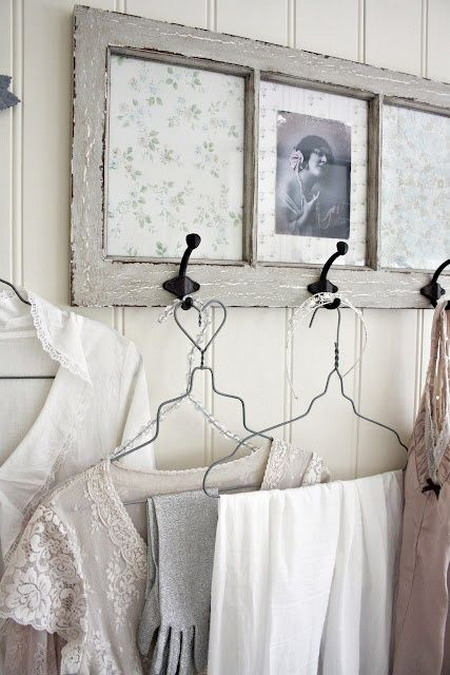
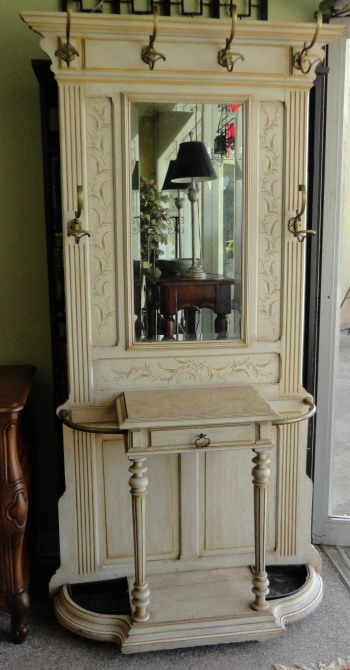
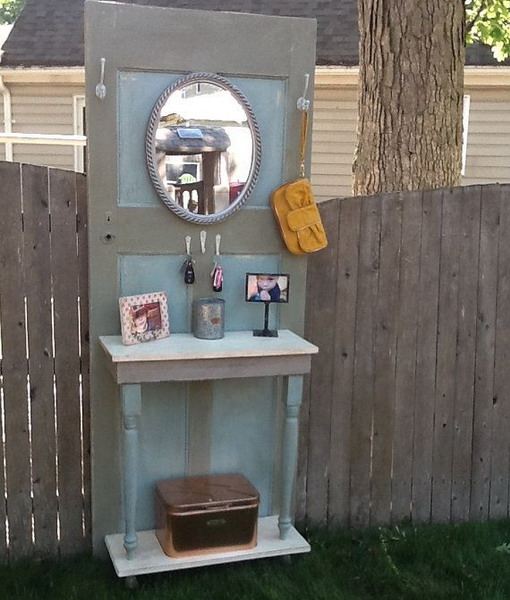
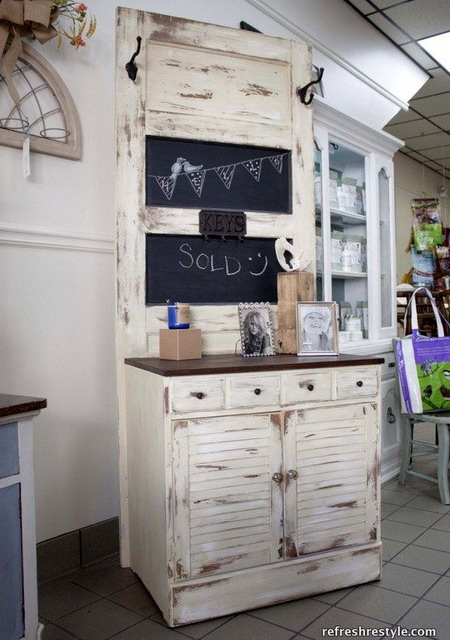
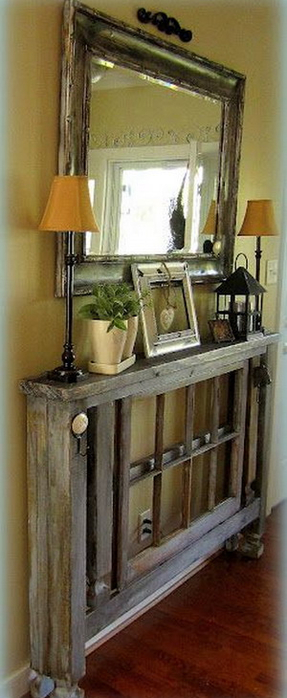
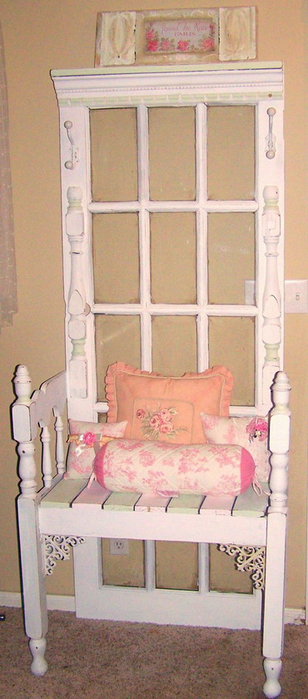
From the old door you get a compact hanger for the hallway. Complete it with a mirror, shelves and hooks. Between panels, place photos, the remains of wallpaper or mirrors. Can be positioned horizontally by attaching to a wall. Or - vertically, for example, with support on a pedestal, which will serve as a drawer for shoes and a bench.
22. 23.
23.
24.![]()
25.
26.
27.
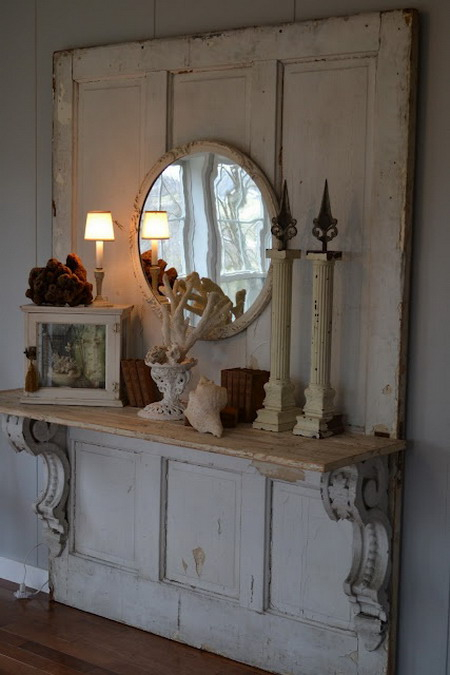
A spectacular vintage console in the spirit of French antiquity can be made from an old wooden door + shelf + legs. Or - a narrow console table, from which 2 legs out of four were disconnected. This rack is quite stable.
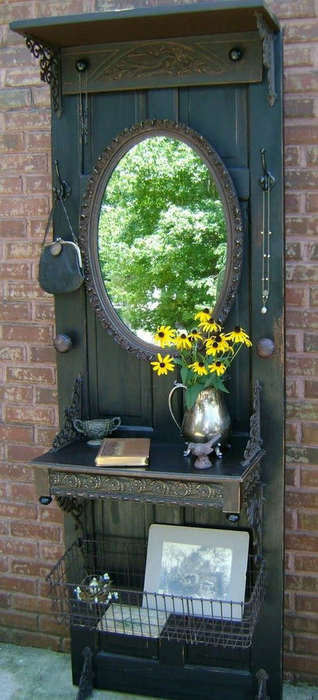
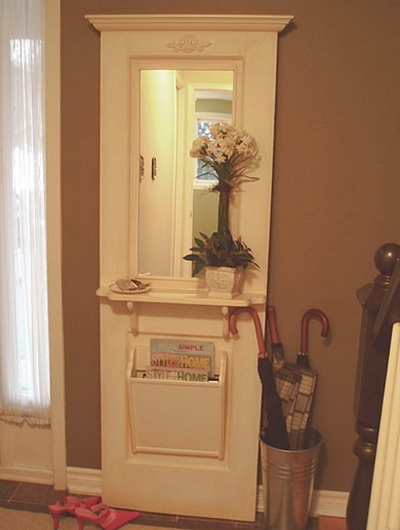
If there is not enough space on the floor, attach the shelves to the brackets. Under such a shelf, you can attach a basket or hanging container for magazines, you get an additional place to store small things. The mirror looks organically from above. This design is suspended on the wall.
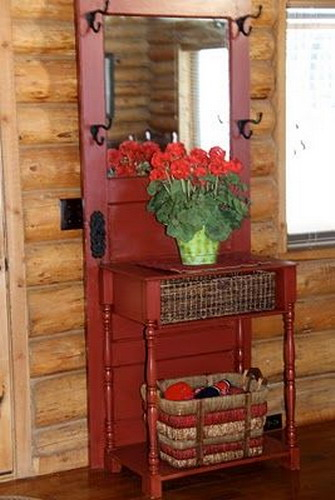
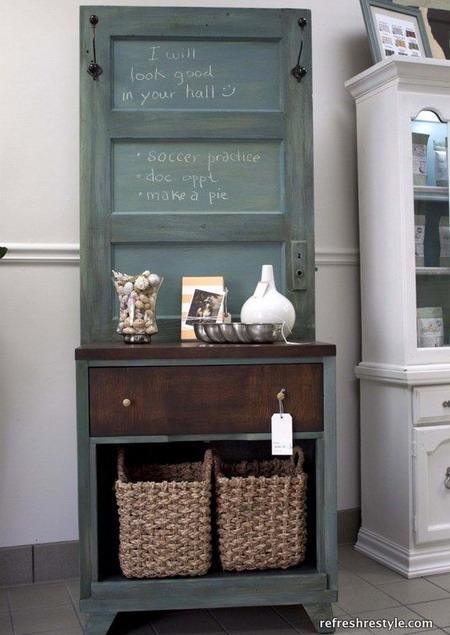
To store things in the country, you can attach an old wooden bedside table or a narrow chest of drawers to the door. You will get roomy furniture, the upper part of which can be designed to your liking (mirror, slate, mesh, etc.).
28. 29.
29.
30.
31.
32.
33.
34.
35.
36.
37.
38.
39.
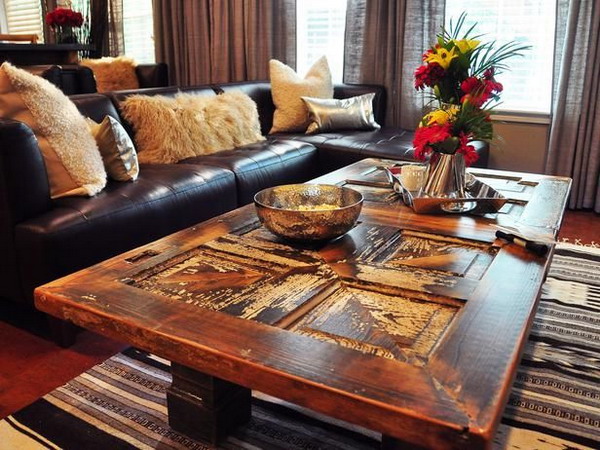
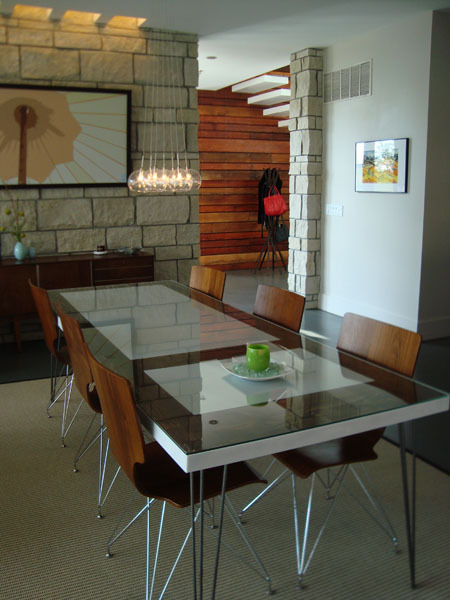
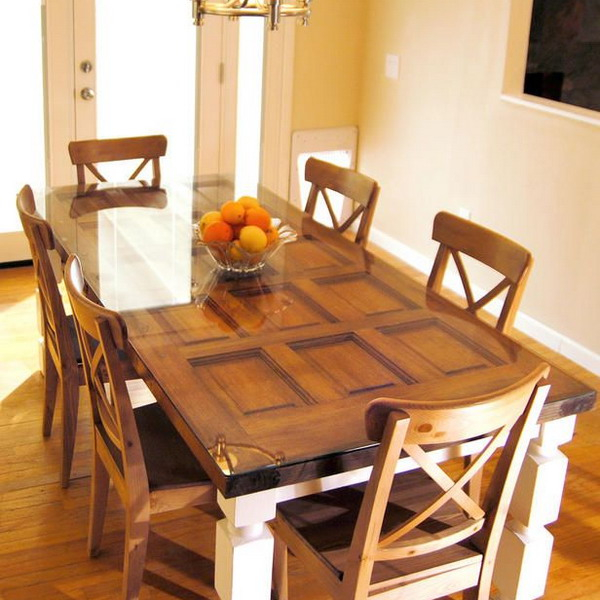
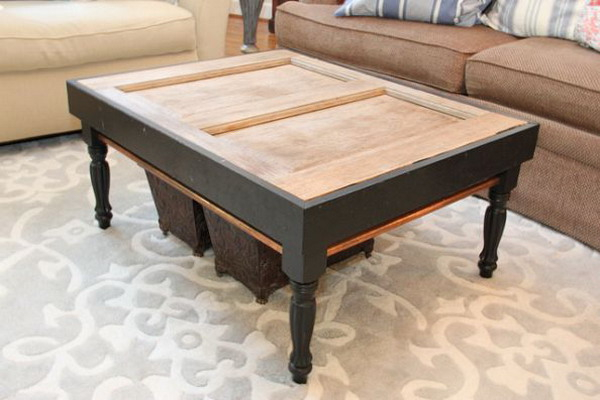
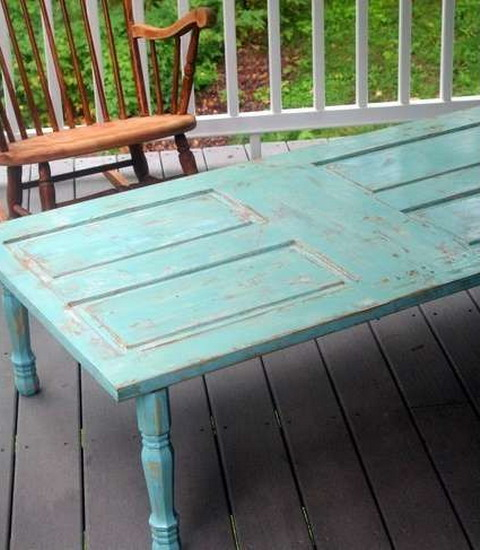
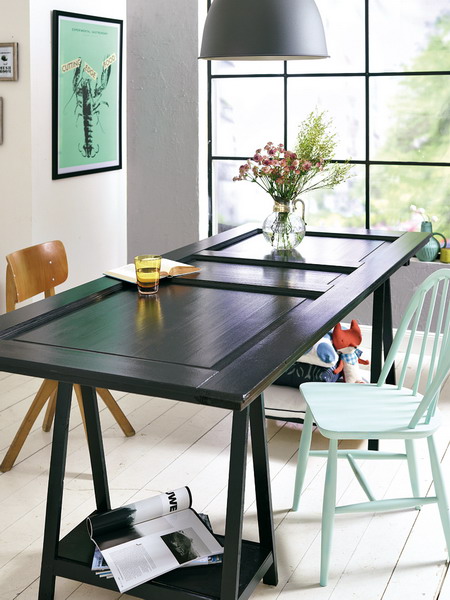
From the door leaf you can make an unusual design table - in a modern, rustic or colonial style. It is enough to attach to the canvas legs or base with legs. The paneled blank or previously glazed sheet is usually covered with tempered glass. Under the glass, you can place a graceful, spectacular decor (for example, shells or pebbles).
If you decide to make a coffee table, you can do without glass. For the garden and terrace, paint the door leaf and legs in a bright or pastel color.
40. 41.
41.
42.
43.
44.
45.
46.
47.
48.
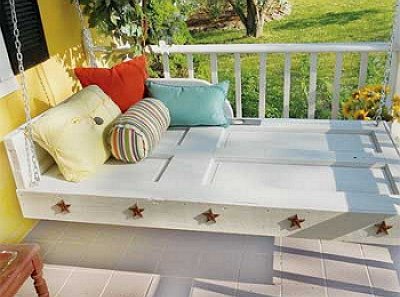
This section contains ideas for creating armchairs and sofas. Old doors turn into backs and armrests.
49. 50.
50.
51. headboard of an old door:
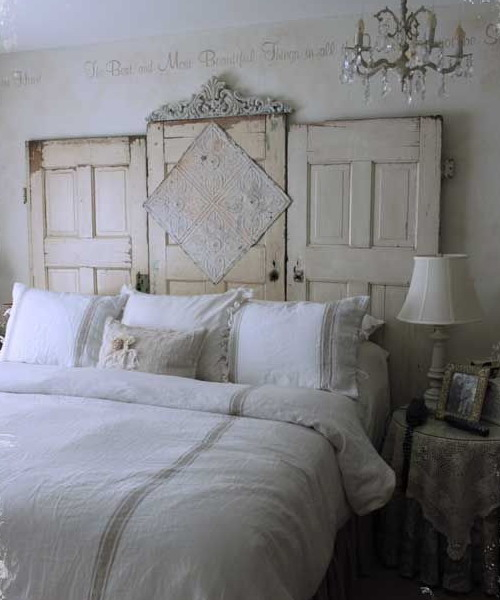
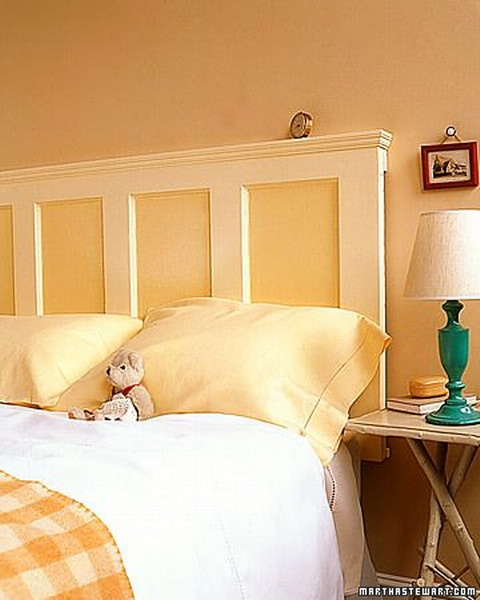
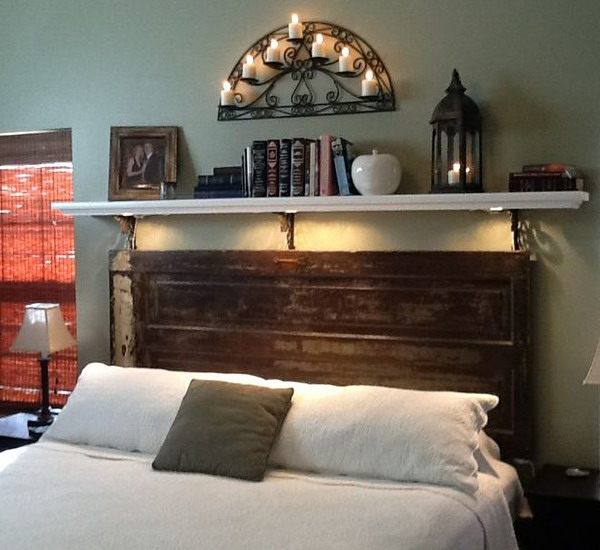
One old door or several at once, blind or glazed, natural color or painted. If you include the fantasy and design it in an original way, you get an unusual headboard. Once decoration is complete, securely mount it to the wall.
52. 53.
53.
54.
The recent trend is the extension of the “life” of things and their secondary use in completely unexpected roles. For example: a cabinet in the bathroom from an old suitcase, a chic shelf from a guitar case and similar ideas - give room for creative imagination, pushing to create unusual household items from ordinary junk.
Today we suggest you create one of these trendy things: a table from ... a door that has expired. Moreover, the options for manufacturing tables can be different, as well as the types of doors. The main thing that we need is inspiration, a minimum of tools and some auxiliary materials.

How to make a comfortable dining table out of an old door if its surface is usually uneven? There is nothing simpler: such a flaw can easily be turned into a stylish “highlight”. For this we need:

Glasses can be left removable - niches under them can be decorated, each time changing the appearance of the tabletop; You can glue the glass with sealant or glue, smoothing the joints with tile grout.
It remains only to wax the countertop to improve performance. Stylish and comfortable table ready for your kitchen.
Another option, how to make a dining table out of the old door is similar to that described above, however there are some differences in the preparation of the countertops:
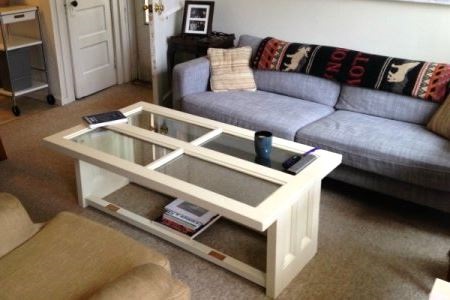
An original coffee table from an old door can turn out if the door consists of two narrow glazed doors (photo 7).

However, the design of such a table is universal for any doors, and its production will take very little time - and even less money.
Approximate dimensions of a coffee table from an old double door: 700x1000 mm, height 600mm - however, these sizes can vary.
For its manufacture, we will need furniture corners (4 pcs.), 4-8 confirmations, acrylic putty and opaque acrylic paint.
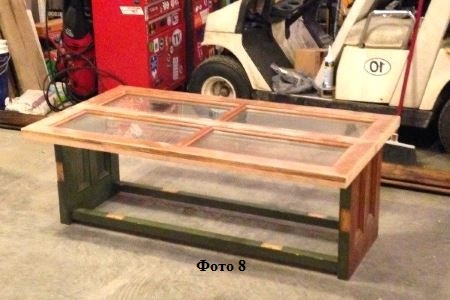
The finished table can take its place in the living room - becoming a real stylish decoration of the design of the room.
For what? Today I will offer you many ideas for both the garden and the country house.
Let's start with the interior.Pictures are clickable
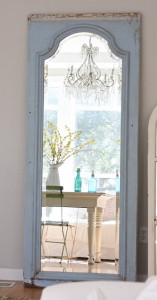
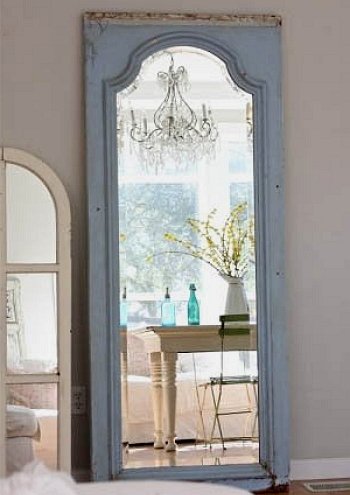
With a simple cut, the old door can easily turn into an exclusive frame for a large mirror. And it’s completely free! Whereas baguettes are getting more expensive in stores ...
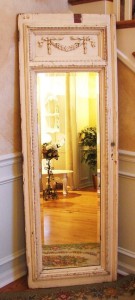
A slightly more complex composition will find its place in the hallway:


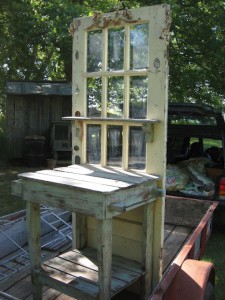
And combining the old door with the old table, you can get such an interesting work surface, supplemented with shelves:

Very creative! Is not it?
And how do you like these “door” racks? Make them not so difficult.


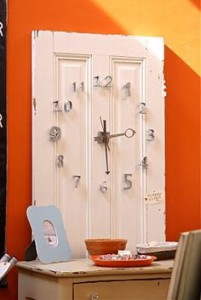
Did you notice that in the last photo the master left the keyhole and the handle on the door? This is done on purpose to emphasize that this thing is not just a frame with shelves from the store, but a real art object. You will see such “special” errors in more than one photo.
For example, on this corner:
And one more corner in the continuation of the topic:
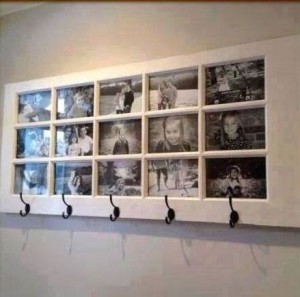
The following photo once became a real find for us. So can you imagine the old door as a frame for family photos? We liked the idea so much that we already rushed in search of a suitable door.
A small door or part of a large wooden door can serve as a good material for a handmade watch. These will look very good on a large shelf above a fireplace or chest of drawers.
Transforming a vertical surface into a horizontal one and attaching suitable legs to it (today you can buy them in almost all departments of furniture fittings) we get a dining or coffee table.
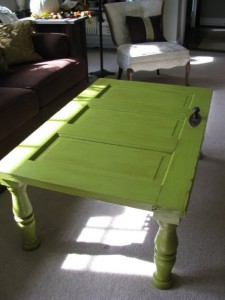


It can be placed not only at home, but also in the garden.
So we gradually moved to the exterior, i.e. to what can be made from old garden doors.
Without going far from horizontal surfaces, let us recall one more thing - the one on which you can sit.
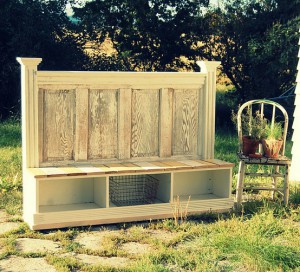
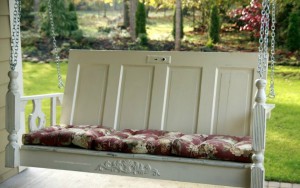
Here is an example of a successful connection of a door (in the role of a back), pilasters and the lower part of the hallway. The result is an interesting garden bench.
Another winning option is a garden swing:

But the most beloved summer gardener thing made of old doors is the arch. There are many examples of its various designs.


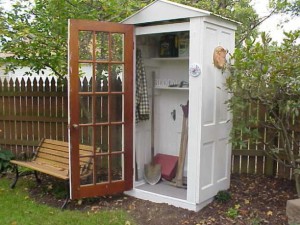
And supplementing the arch with the back wall, you can get such a wonderful and cozy corner for relaxing in the garden.

Having improved the design a little more, and at all “get to” the household block.
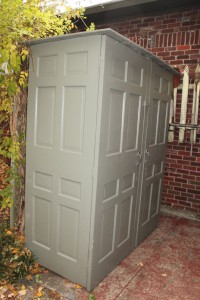
The following use case can be considered an economic necessity. A door that has served in the interior of a house can still serve as a gate in the exterior.
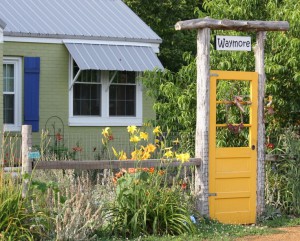

But it is not necessary to use the door to create some necessary things in the household. You can simply decorate it with flowers and place it in the garden as a separate art object.
To print
Vera Kukushkina 09/22/2014 | 9900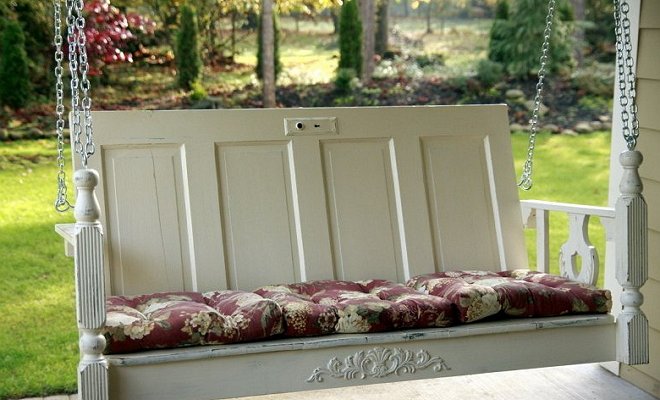
Replacing doors is a common procedure. But what to do with the old? If you attach a little zeal and imagination, you can get vintage things. We offer 7 options for using old doors to create interior items.
If you have several old doors, then you can easily make a unique screen. Doors can be different in decoration and color, with a variety of glass inserts, but they must be the same in length, width and height. To make the screen, door hinges and wheels will be required in order to provide mobility to the screen. With the help of door hinges we connect the doors at the bottom and at the top (stepping the same distance from the upper and lower edges of the door). We fasten the wheels to the extreme doors of the screen, for example, from a vacuum cleaner or an old washing machine (for example, Volzhanka). All 4 wheels should be the same size. Excellent screens will be obtained from 3 or 4 doors.

The next art object will also require several doors. Of the two identical ones, you can make an unusual headboard for a double bed. Artificially aging the doors, we nail them next to each other to the wall in the place where the bed will be (the bed should be picked up without backs or made by yourself). Such furniture will fit perfectly into the interior, made in the style of country.

An old door can be the basis for a new mirror. The color scheme depends on the master’s imagination: painting under a tree, using bright colors (yellow, green, blue and even red) and so on. Carefully fasten the prepared door to the wall. Pick up a mirror of the suitable size and fix it on a door. This can be done with glue for the mirrors. If the mirror is rectangular and corresponds to the upper transom of the door, then for fixing it is possible to use a glazing bead window or door and small nails. If the mirror hangs at the entrance to the house or apartment, you can nail hooks for bags and keys to the right and left of the mirror, and arrange a shelf for other small things under the mirror. As such, the old door will decorate your home and become a universal place to store small things in the hallway.
An old wooden door can be used in a modern kitchen interior. A large number of equipment is convenient to use if it is suspended next to a stove or a desktop. The door can become the basis for fastening various hooks, on which tacks and graters, pushers or knives, waffle or linen towels, strainers, small buckets or shortbreads will be held. Before fixing the door, paint it in a bright color. Hooks can be used in various shapes and from any material. Such a rack with hanging equipment will appeal to any housewife.

Even from a wooden door and plywood (or very thin boards) you can assemble a beautiful cupboard for dishes or books. To do this, we cut the door in half from top to bottom. Got side walls for our closet. Plywood pieces are the back, top, bottom walls of the cabinet and shelves. You can do without the back wall. Paint the cabinet red - and the stylish piece of furniture is ready.

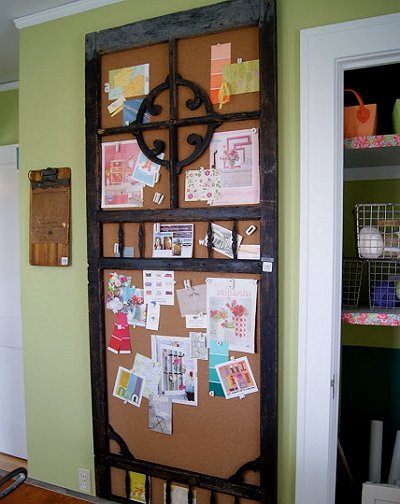
An old door is a great option for creating a board in a nursery. Attach it to the wall, and your children will not spoil the wallpaper with stickers, posters, idol photos. All this children's wealth will be placed on an improvised board. There you can also attach notes with instructions for your children, leaving for work.
An old wooden door can be the basis for a beautiful bench in your garden. Use the door as a seat, securing it to logs buried in the ground. For convenience, make the back of a well-crafted board, securing it with self-tapping screws and two wooden blocks. It remains only to cover the resulting bench with varnish or paint with paint for outdoor work. The bench is ready.
Quite a bit of money and time - and the old doors turn into unusual furniture and unique interior items.
To print

Greenhouses Greenhouse "Kremlin" - express-growing vegetables in your garden
While the seedlings on your windowsill are still growing, and the summer season is not open, there is time to think about what kind of greenhouse for ...
In one of the issues, we talked in detail about the fact that from old wooden doors you can make stunning vintage interior items. Including - tables (dining and coffee, for relaxing on the terrace and home office). And here we offer to learn how to make such tables with your own hands.
The selection includes 3 workshops, as well as new inspirational ideas on this topic that can become a source of inspirational ideas.
Guides differ slightly in level of difficulty, and also in terms of outcome (including style). Choose and create a unique table from the old door that you will not find in any store!
__________________________

Materials and tools:
old door leaf made of natural wood, 2 table supports of the shade of “light wood” (for example, FINWARD beech from IKEA), fine-grained grinding block, primer and white acrylic paint, brush, paint roller, screwdriver or screwdriver.
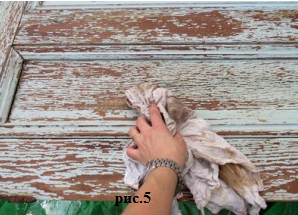
Remove old paint from the door or varnish, and then carefully sand the canvas. Wipe the surface with a damp cloth to remove dust. If necessary, cover up irregularities.
Before painting, apply a primer, and then apply the first coat of paint. After drying, sand again, remove dust and paint a second time. It is more convenient to paint the flat part of the canvas with a roller, the protrusions and ends - with a brush. It is necessary to paint on both sides.
Select the flatter side of the door and attach the supports to the back. A country-style dining table is ready to receive your guests!
Tip: it looks especially beautiful with wooden chairs of a shade of “mint”, try to color them too.
__________________________
This method is slightly different from the previous one in technology and is possible in two versions - (1) more time-consuming or (2) even simpler than in the master class No. 1. We will describe the first, since it is he who guarantees the best result. And then (for those who do not like difficulties) we will offer a simpler option.
Supports can also be chosen different. If you focus on IKEA (look in the " workplace»), You can choose OVALD black (suitable in color, but without a lower shelf) or FINWARD (with a shelf, but will have to be painted, because they are only white and beech).
Materials and tools:
wooden door leaf in laconic contemporary style, 2 table supports (see above), grinding paste, putty knife, grinder, spray gun, black acrylic paint for wood with a satin sheen.
Clean the door from dust, put it on a horizontal surface and put the grinding paste with a spatula, trying to completely fill the bumps and holes from the handles and keyhole.
When the paste has dried, sand it with a machine (preferably) or a fine-grained block (permissible). Wipe with a damp cloth to remove dust. Repeat with the other side.
Coat the canvas on both sides and the table support (if required) with paint using a spray gun. After drying, connect the resulting countertop with supports.
SIMPLER OPTION:
As you already understood, the role of the grinding machine can be played by your hands in alliance with the grinding bar.
And the staining step can be replaced by gluing a black vinyl film (matte, with a light wood texture).
If you do not want to get involved in painting at all, buy the IKEE support OVALD black.
Want to be in touch with us every day? Welcome to our Vkontakte Inspiration Planet! Look, scroll through! Like? Join us and get inspired every day!
__________________________

This method has some affinity with the master class number 1. But there are significant differences, and the main one is the purpose of the table. Now you will learn how to make a desk from an old door.
Materials and tools:
old door, tempered glass 5-6 mm thick (according to the size of the door leaf), 2 cabinets with HELMER red drawers from IKEA (powder coated steel), wood screws (for joining countertops and support stands), drill, screwdriver.
Do with the door leaf all the actions described in the workshop №1 until the moment of connection with the supports.
In the upper part of both curbstones, mark the joints with the tabletop and drill 4 holes in each. Install the worktop door on the pedestals from which the drawers were removed. Connect with screws, threading them from the inside of the cabinet through the holes and twisting into a tree.
Lay the glass on top of the resulting desktop.
From internal pipelines, drains are transported by external ...
Each apartment, like every family, has its own characteristics, so it is difficult ...