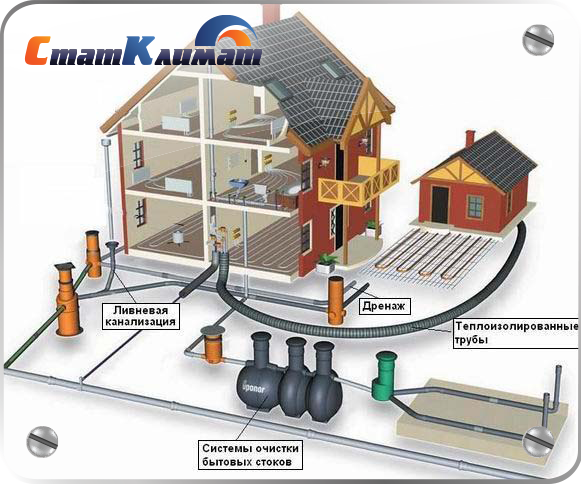
From internal pipelines, drains are transported by external ...
Surely every person starting a repair thinks that it would be nice to somehow ennoble that part of the room where the heating or water pipes. Of course, you can just hang beautiful curtains, but as they say, if the repair, then the repair is 100%.
Drywall will help mask unsightly communication pipes. Today, perhaps, there is no simpler and more effective way to decorate the premises. This material is a rather large sheet (2.5 × 1.2 m), which consists of thin layers of paper and gypsum, forming a dense structure.
This building material is popular for several reasons:
In order to hide unprepossessing pipes using sheets of drywall, you do not need to be a master builder. The installation process is simple and can be carried out independently. If you do not know what and how to do, then the information below will help you figure out how to close the pipes with drywall.
For the construction of the protective structure, sheets of drywall, a metal or wooden beam, to which building material, putty, polyurethane foam and tape. Experts advise choosing galvanized steel as the basis for the frame, as it will not be destroyed by moisture and rust. However, wood is the most environmentally friendly building material, in addition, subsequently, it will be easier to attach to the tree, for example, a boiler, if necessary.
To work, you need:
The process of constructing a decorative duct for pipes takes place in several stages:
Before sheathe pipes with drywall, care should be taken about their technical condition and appearance. It is very important that the pipes serve as long as possible, because they will be closed with a tight box of drywall, which, frankly, can be easily dismantled, but the repair in the room will be hopelessly damaged, and the lining procedure will have to be repeated again. You can save yourself from unnecessary trouble in advance. To do this, thoroughly wash the pipes, remove old paint and rust (if any) from the surface and re-paint them. After drying, the paints proceed to the assembly of the drywall frame.
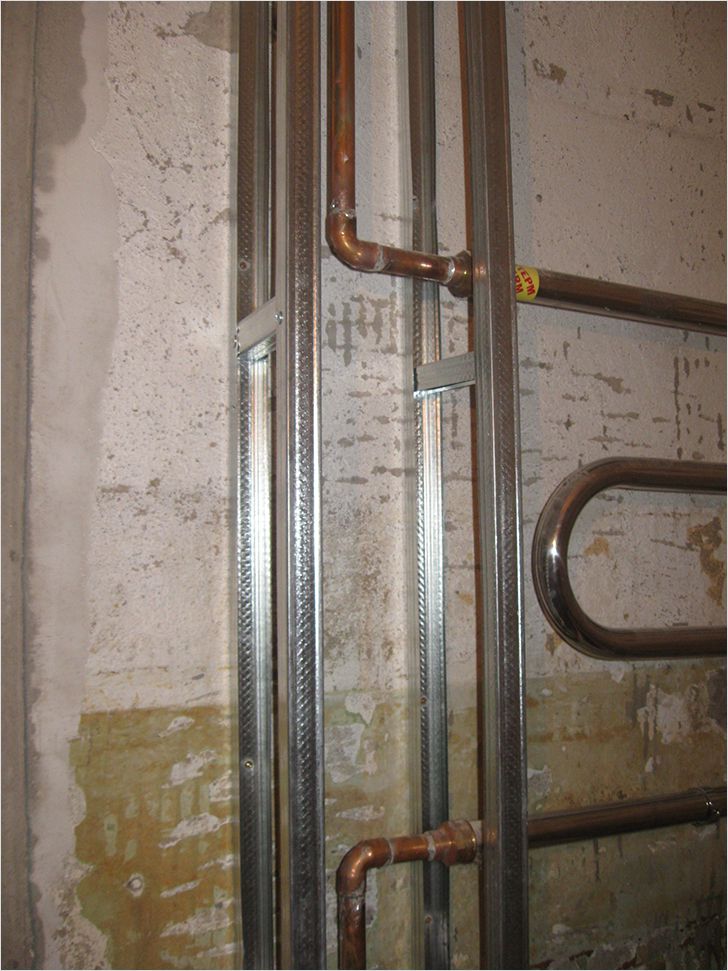
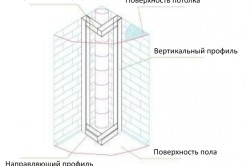
First you need to install rack profiles. Their number and length will depend on the room where the repair is made. For example, to isolate pipes in the toilet (there is usually a riser in the corner), three profiles are required; if the pipes are located vertically or horizontally in the middle of the wall, four rack strips must be fixed. That is, pipes are either either a square or a triangle - it depends on the wishes of the owners and the characteristics of the room.
The construction of the rack profiles is fastened with transverse inserts for strength. Sometimes lay a cushioning tape. It is believed that it absorbs vibration, so that the frame will last longer.
Then proceed to fastening the sheets of drywall to the racks, using self-tapping screws for metal or wood.
It doesn’t matter if you cut a piece from a sheet that is not sized. If the fixed sheet of drywall is slightly larger than required, then the excess can be easily removed with a jigsaw or saw. If less, then you can combine the two parts, but in such a way that they dock on the crossbar.
Note! Drywall needs to be fixed so that the self-tapping screws protrude no more than 1 mm above the surface of the sheet. Screwing the screws too deeply can loosen the drywall fastener, while overhanging hats will add work to the subsequent finish. In order to disguise them, it will take more primer and time.
Before closing the box with the last piece of drywall, it is recommended to fill the interior with a layer of mounting foam.
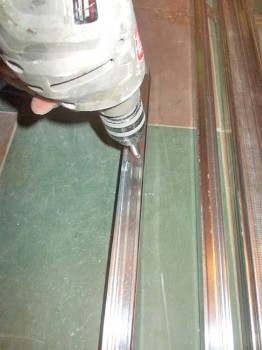
If you are constructing a plasterboard box in order to hide the radiators, it is very important to make several holes in it at the end of all installation work, or to leave an opening in which the screen will be inserted. This will allow warm air from the radiator to enter the room.
You can make holes using an electric drill with a special nozzle. The diameter can be any, as well as the number of holes. The main thing is not to overdo it and not spoil the interior of the room with too large openings. A good option would be to drill many small holes that repeat the shape of the box.
The finished box is covered with a layer of putty, carefully masking the caps of the screws. Before this, it is advisable to glue the joints of the sheets of drywall with a special tape - a serpentine.
To obtain clear and even angles, use a metal corner. A putty solution is placed inside it and, tightly pressing a corner to the edge of the box, stretch it over the entire surface. Then the wall is leveled with a thick spatula, cleaned and primed. The resulting surface becomes suitable for subsequent finishing with paint, wallpaper, tile, tile.
This video demonstrates everything that was said above:
There are pipes in every room, and especially a lot of them in the bathroom, toilet and kitchen. And often they only spoil the appearance of the room, and do not decorate it. Therefore, the question "how can I close the pipes" today is more than relevant.
You can sew pipes with a wide variety of materials.
Today, there are many options to mask indoor communications. The most common of them:
Note! The choice of a way of a covering should be made taking into account your financial opportunities, and also being guided by own preferences.
With so many options, you can mask the hated pipe, even the gas pipe, in the most appropriate way for you. But most often, a box made of drywall is chosen as a disguise, since it can be easily done with your own hands.
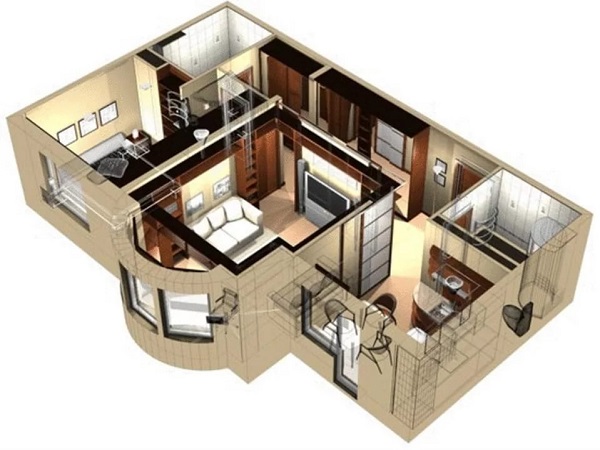
Creating a box of drywall for masking pipes requires calculations and the creation of a scheme according to which the installation of the structure will be carried out in the future.
We do the drawing as follows:
Box drawing
Note! In the drawing, the dimensions of the frame and the thickness of the drywall sheets must be laid.
The drawing will help you accurately calculate the amount of materials needed for the job.
Preparing to create a drywall box or a false wall involves the following steps:
Now you are ready to install the structure.
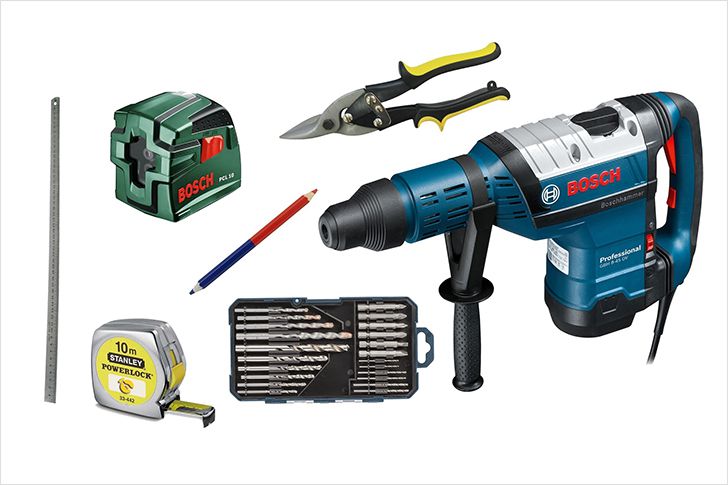
A plasterboard box can only be made with the following tools:
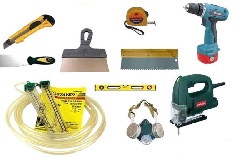 Tools for work
Now you can certainly proceed to the disguise itself.
For many people, the question of “how to close the pipes with drywall” is quite complex. But if you follow our instructions, this question will stop worrying you.
Installation of such a design always begins with the creation of a metal profile:
Note! Instead of metal profiles, wooden slats can also be used, but they should be pre-treated with special tools.
 Box frame
In a situation where the elements that need to be sheathed are in the corner, we begin to install the frame from the corners. All stages of the installation of the frame should be carried out using a building level.
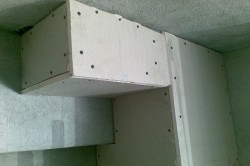
 Sheathed pipes
If necessary, then at the end of the installation of the metal structure we fasten soundproof materials. It is best if you carry out these actions at the same time as plasterboard wall covering.
Upon completion of the installation of the frame, it can begin to sheathe drywall. Sheathing happens as follows:
At the end of installation, you should get a perfectly smooth design.
At the end of the work, you should give your design an aesthetic and beautiful appearance. To do this, you will need to do the following:
Then we give the design the final look with the help of painting, wallpapering, etc. That's it, your communications disguise is ready!
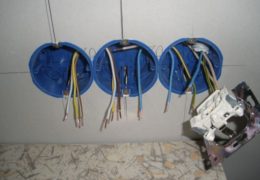 Podrozetniki and the secrets of their installation in drywall
 Drywall Planers, Options, Pros and Cons
Communications passing through the walls can be hidden with the help of a plasterboard box. This is an inexpensive and easy way to finish yourself. Consider how to sew pipes with drywall so that the box is attractive and neat. Plasterboard can sew up water pipes, sewer riser and other communications.
To solve the problem of how to sew pipes with drywall with their horizontal arrangement, first of all, it is necessary to create a framework of metal UD profiles. The UD profile (guide) is sewn with screws and dowels on the floor and wall along the laid communications (if they pass horizontally). It is necessary to check the horizontal profile using the level. Guide profiles must be placed as close to the pipe as possible so as not to “eat” the free space.
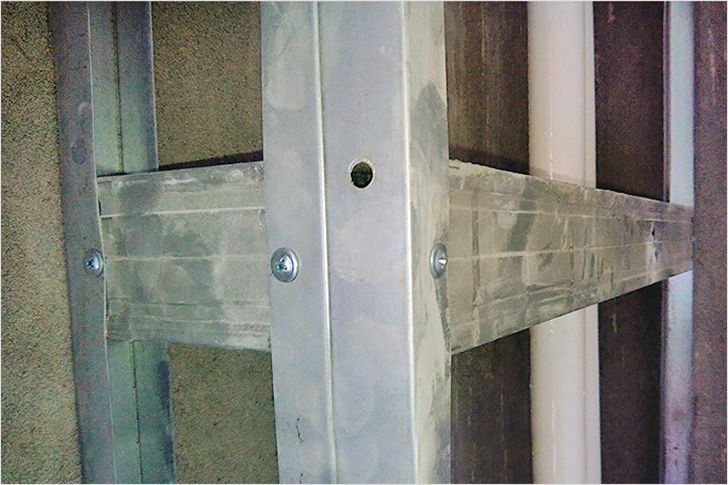
After that, it is necessary to form the corners of the frame from CD and UD profiles. To do this, the height of the box is accurately measured and pieces of the profile equal to this height are cut from the CD. After this, it is necessary to cut off the side parts of the profile by 30 cm from either end. With the whole end, such a piece of the profile is inserted into the floor guide, and the UD profile will be attached to the trimmed edge, which will form the corner of the box (let's call it the "corner profile"). Cut profiles are inserted into the guide every 30 cm, after which UD can be attached to them using LM-screws. In the "corner profile" and the guide attached to the wall, pieces of CD are inserted perpendicularly every 30 cm.
The next stage of solving the problem, is the skin of the frame, for which you will need a screwdriver, 25 mm metal screws and drywall itself. Cutting of pieces is carried out using an office knife in accordance with the actual dimensions of the box. First, the vertical side of the box is sewn, and then the horizontal.
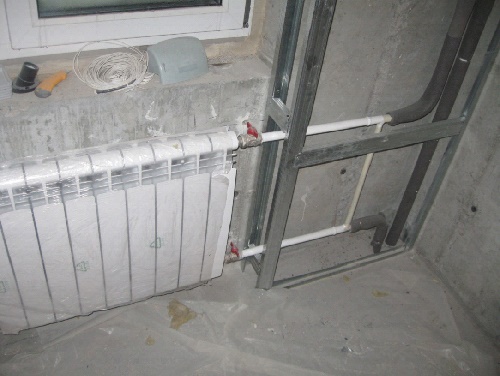
Batteries and pipes in most buildings are mounted externally.
And a large number of people have a question: how to sew pipes with plasterboard or other material? For these purposes, you can apply a lot of building materials, but the most common still remains drywall.
The main characteristics of drywall sheet
The use of drywall sheets in order to hide ugly radiators and pipes has many advantages:
These are the main advantages in using gypsum plasterboards, but, in addition to them, there are many more. It is advisable not to allow moisture to get on the ordinary (gray) drywall, since cardboard can move away from the gypsum.
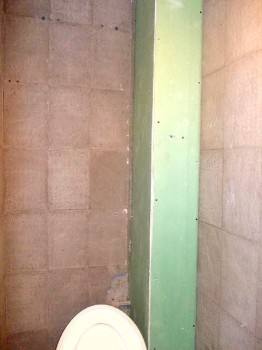
Rooms where there may be a lot of moisture (kitchen, bathroom) should be sheathed with moisture-resistant plasterboard. It has a greenish tint. Of course, it costs a little more, but you can not be afraid of moisture getting on it, because it is not able to spoil such material.

What will be required to make a box of plasterboard material?
Without these materials, sheathing of pipes with drywall is simply impossible.
Before you start to make a drywall box, you should prepare the batteries and pipes themselves. To do this, remove the old dye from them and re-paint.
This is done so that the batteries and pipes do not rust and do not deteriorate prematurely. Since, after their lining is completed, there will be no access to them.
After the dye has completely dried, you can begin to manufacture the frame for the future.
Back to the table of contents
In order to make a frame, guide and rack profiles are required. These profiles are made of specialized galvanized sheet, which makes them quite durable, as well as resistant to rust.
First, it is necessary to note the contour of the future frame on the floor, surface of the walls and ceiling, in case the pipe goes up. To do this, we need a level, a pencil and a plumb line. The contour line should be set guide profile. It is attached to the wall by means of dowels.
Ideally, each place where the profile is connected to the work surface should be laid with a shock-absorbing tape specially made for such purposes. This is done so that during the seismic activity of the wall surface the drywall structure does not suffer the slightest damage.
The shock-absorbing tape is designed to absorb absolutely all vibrations without transferring the latter to the frame of the structure. But this method is often used in the construction of partitions from plasterboard sheets, and for the duct under various pipes it is not necessary.
After the guiding profiles have been fixed, rack elements must be inserted into them. Then they should be fastened to each other with the help of special screws of a small size, designed for metal.
Back to the table of contents
Drywall is attached to the box using self-tapping screws, depending on the type of profile.
After the metal frame has been safely installed, it's time to start lining it with drywall blanks. Plasterboard sheets should be cut and edges processed. Drywall is cut by the following method.
It is necessary to measure the required size, draw a straight line on the GCR and, without removing the ruler, draw a clerical knife several times along this line. Next, the sheet is simply taken and broken by hands along the line. All burrs formed at the edges of the slices must be processed with sandpaper.
The sheets should be secured with screws so that the cap is recessed into the material by no more than 1 mm. Otherwise, the cardboard layer of the plaster may be damaged, which in the future will lead to poor-quality fixing of the workpiece.
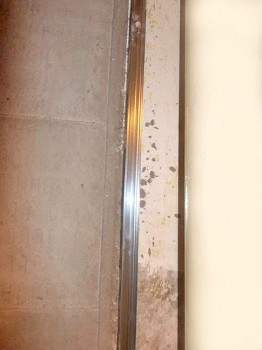
In many apartments of the old layout, and in particular in bathrooms or toilets, there are plumbing communications from floor to ceiling. The risers of water supply and sewerage, which have long fallen into disrepair, pretty much spoil the whole appearance of the room.
It’s rare that anyone thinks to sew pipes into a box made of drywall or plastic, and, basically, as they say, the gimmick of inventing cunning is the worst of the solutions that caught my eye, a concreted riser, which was later tiled with tiles. Can you imagine what a time bomb it is? All cement mortars they simply eat the metal and after a few years the risers begin to leak, and flow in places where, in general, they should not.
With water pipes it is more or less clear that you can hide them in the wall if you wish, but the sewer riser, no matter how you twist with all its dimensions, can not be placed inside the wall. Here you need a different solution to the problem. And the most suitable is to sew pipes into a box of drywall or. What do you decide to revetment this box, there is no significant difference, and in both cases the work will have to be performed almost the same. Differences are observed only in the material and the final result.
If you choose between plastic and drywall, you should pay special attention to the features of these materials. If sewer or water pipes are sewn with plasterboard and tiled, then in case of an accident, without damaging the box, you will not get access to the riser. What is the conclusion? There is no need to sew old metal risers into a drywall box - first of all, they need to be replaced with modern and more durable material (at least for). If you decide to sew old struts in a box, then it is best to use plastic panels - At least you can calmly dismantle them and subsequently restore everything, as it was.
In general, this is understandable, and now let's figure out how this notorious box is made of drywall or plastic PVC panels. And for starters, we will make the frame - it is he who is the most important element in the whole structure.
For the frame we need: ud profile - 4 pieces, cd profile - 1 or 2 pieces depending on the size of the structure, texa - pieces 50, dowels ø6x40mm - 10 pieces. and self-tapping screws for attaching drywall (if we are talking about plastic, then it is attached with texes, in this case, get them 100 pieces). Well, and, accordingly, a tool that you can not do without: a puncher, screwdriver, level, metal scissors and a knife for cutting drywall or plastic.
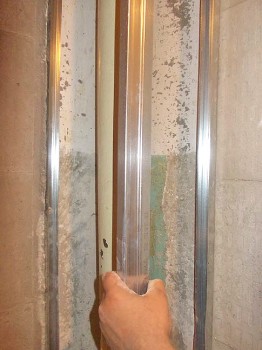
To begin with, we denote the contours of the box. To do this, parallel to the pipe on one and its other sides, with the help of a puncher and dowels, we attach ud guide profiles to the walls. Here it is worth paying attention to the location of these profiles - do not put them far away from the riser, move them further - you will get a large box that will steal the lion's share of your space.
When attaching profiles, the level must be used - otherwise you will get a curved box. In general, throughout the work, the level should become your best friend - without it, in such works, there’s simply nowhere.
 Now the outer corner - it is formed from two ud profiles twisted together. They need to be twisted so that their internal cavities look in different directions from the corner and are located at an angle of 90 ° relative to each other.
We take screwed profiles and set them in a corner. I almost forgot, on the floor you will need to determine the location of this corner. To do this, it will be enough to draw two lines running parallel to the walls and originating from the ud profiles nailed on the walls. The intersection of these lines will indicate your angle. For convenience, these pieces can even nail small pieces of ud profiles to the floor. But you can, in principle, do without them.
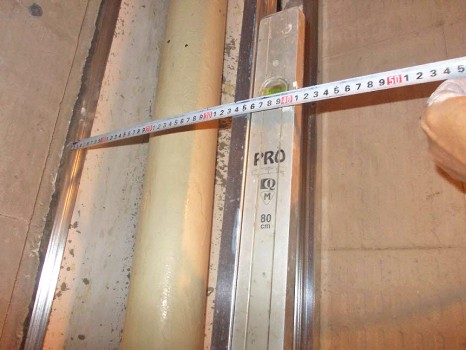 And again the level - now it will be needed in order to determine the length of the jumpers from the profile. Holding with one hand the profile with the level in a clearly vertical position, measure the length of the jumper at the bottom of the box and at the top. First you need two mounting points on one side of the corner.
 We cut out the measured profiles and install them using texes in those places where you measured them. We perform the exact same procedure on the other side of the box.
 Something is already looming, only the rigidity of the frame is not enough. You need to add at least a couple more jumpers on each side. It’s easy here - we measure, cut, install and fix!
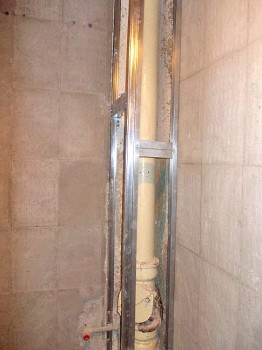
That's basically all - the frame is ready and you can sheathe it.
 Oh, it seems to me that here you can figure it out without me But just in case, I will outline some nuances.
Firstly, in order not to waste time looking for profiles hidden under the drywall and to not uselessly make gypsum, make marks for yourself on the walls at their locations.
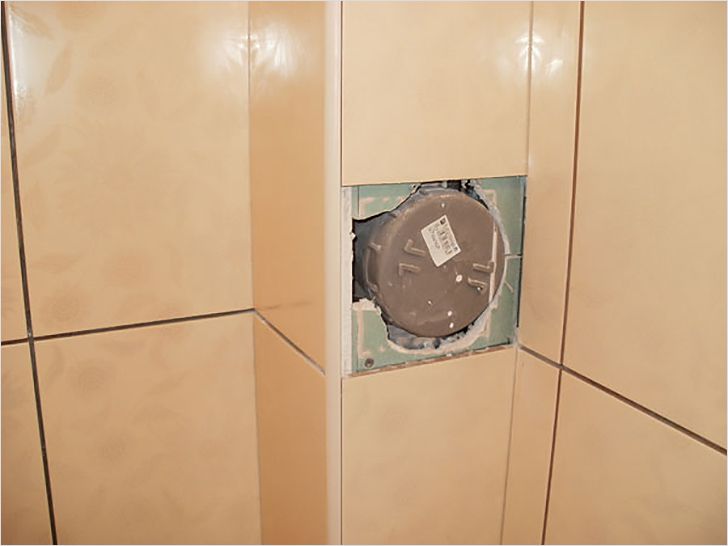
Secondly, do not forget about the revision hole - its location will also not be amiss to mark on the adjacent wall.
Especially for the hatch, additional profiles do not need to be laid, if it is a gypsum board lined with tiles, then the plastic door is remarkably fastened with silicone. If we are talking about the skin of the frame plastic pvc panels, it is simply necessary to lay additional profiles for its fastening.
Was this article helpful to you? Subscribe to site updates to receive the latest articles on repair and interior design before anyone else!
From internal pipelines, drains are transported by external ...
Each apartment, like every family, has its own characteristics, so it is difficult ...