The Ministry of Finance of Russia for the first time disclosed data on the salaries of employees of federal...

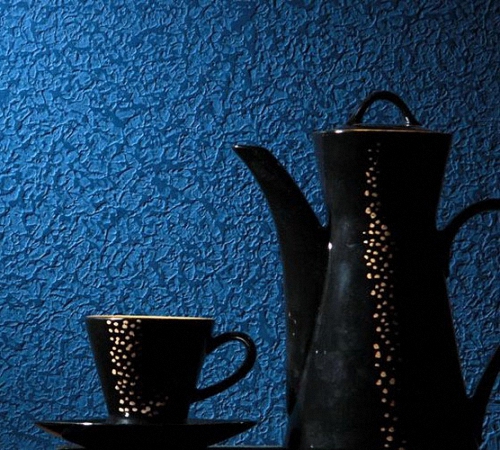
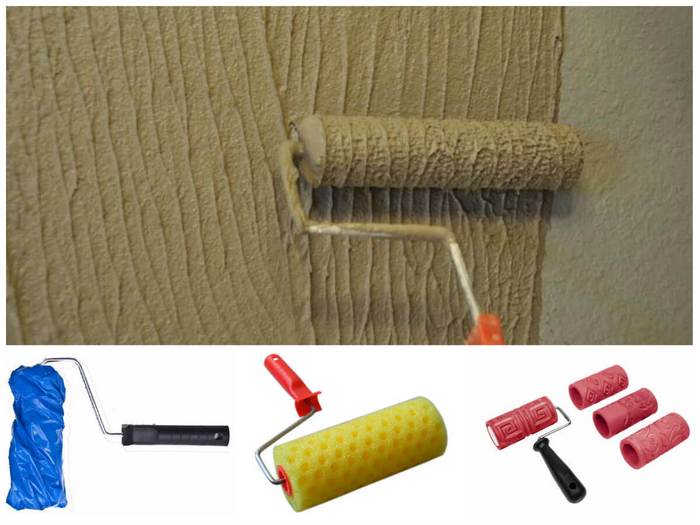
Structural paint is a fairly popular finishing material used to cover walls or create a laminated layer. The service life of structural paint depends on compliance with the technology of its application. Learn more about how to properly apply structural paint.
Previously, the most popular type of finish was wallpapering or covering the walls with putty and painting them. Modern hardware stores offer a range of finishing materials new generation, with the help of which, with minimal financial resources, it is possible to create an original and attractive coating.
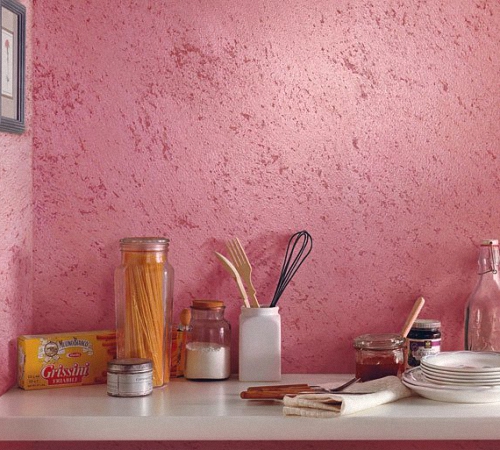
Structural paint is also called textured or textured, this is due to the fact that this substance contains structuring fillers in its composition. The type of filler determines the type of paint used in the work. Structural paint is applied to concrete, wood, brick surface. Since it contains an acrylic filler, the paint is particularly durable and practical to use.
In addition, this material is hypoallergenic and is used for wall decoration in children's rooms. Also, the paint is resistant to moisture, so it can be easily cleaned with a damp cloth. Some variants of structural paint are used for finishing walls outside the room.
There are two variants of paints - structural and textured. In order to understand the features of structural paint, we suggest that you familiarize yourself with its varieties:

Among the main options for textured paint, we note:

Structural wall paint has the following advantages:
1. Ideal viscosity is provided by a certain composition of the paint, due to which it has a stretchy texture. Because of this, the structure of the paint is unique and deep. A variety of textures is provided by the combination of different color enzymes. Further surface treatment with a spatula allows you to achieve the original structure.
2. The ability to tint the paint in different colors is performed both in the store and at home. The color of the paint is individual and unique.
3. After the paint dries, a strong, elastic film forms on the wall surface.
4. Structural paint tolerates moisture well and does not dissolve under the influence of water. Therefore, this material is used for both exterior and interior wall decoration.
5. The high level of vapor permeability of the material allows the walls to breathe and provides natural ventilation in the room.
Before applying structural paint, read the instructions from the manufacturer for its application. The instructions, as a rule, indicate the drying time of the material, the features of its preparation for work, the properties of the paint and the technology of its application to the surface.
Structural paint is most often packaged in buckets and has a rather thick consistency. In order to ensure high-quality application of the material to the wall, plain water is added to it and the paint is mixed with a mixer. Please note that there should not be a lot of water in the paint, since the liquid composition is not able to stay on the wall and ensure its complete overlap.
The maximum amount of water that can be added to textured paint is ten percent of the total volume of the material. The average amount of water that is enough to dilute the paint is about 4%.
If the material is tinted at home, then this process must be given great attention. First of all, take your time and add color a little at a time. Each time after adding the dye, mix the paint well and apply it to the wall in order to really appreciate the resulting color. Wait for the paint to dry, to speed up this process, use a hair dryer.
Buy paint and pigments from one manufacturer, only in this case, it will be possible to achieve the desired shade.
Before applying structural paint, care must be taken to prepare the surface. The final result of the work will directly depend on the quality of the wall. First of all, you need to get rid of horizontal differences. The surface to be painted must be even. Daylight, after applying the composition to the surface, will show all the irregularities on the wall. Therefore, before applying paint, plaster the surface with high quality or finish it with putty.
Next, be sure to cover the walls with a primer. The composition will absorb finely porous putty particles, reduce paint consumption and disinfect the surface. We recommend staying on deep penetration soil. It is possible to use a primer with quartz sand, this composition provides excellent adhesion between the structural paint and the wall.
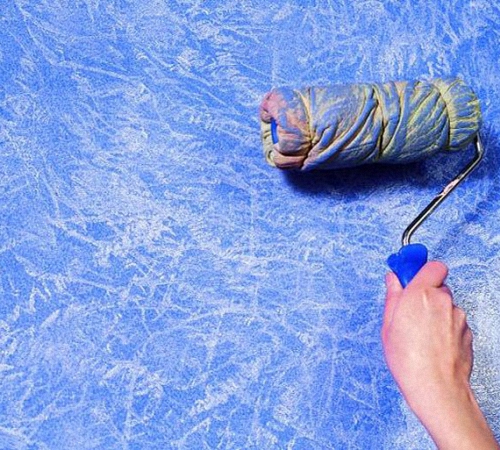
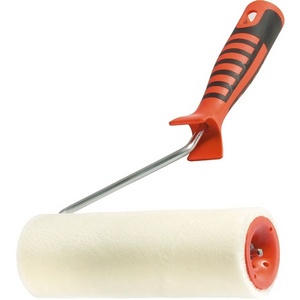
For applying decorative paint, a roller having structural irregularities is used. With it, the paint covers the wall with high quality.
In addition to the structural roller, before applying the structural wall paint, prepare tools in the form of:
How to apply structural paint video:
Initially, create the desired tone of paint by adding dye to it. Apply it to the wall, wait for it to dry and evaluate if this shade is suitable for surface treatment. This whole process is carried out in the daytime and with intense solar radiation.
Mix the paint well before you start painting the wall. To create a rough surface, add sand to the paint, the amount of which is determined by the instructions.
It is possible to replace the roller with a stencil. In this case, the technological process takes longer. In order to get a scratched surface, use graters and combs. However, with the help of a structural roller, it is possible to obtain a uniform texture in a very short time.
Apply paint first longitudinally and then transversely. If a spray gun is used to apply paint, then the first layer is applied from top to bottom, and the second in the transverse direction.
Paint for outdoor use should not be applied in wet or windy conditions. Paint consumption is determined by the way it is applied to the surface. To reduce this indicator, it is necessary to carefully prepare the surface for painting and coat it with a primer.
The setting time of the paint reaches half an hour, so the work must be done very quickly. To prevent paint spills on the walls, cover the surface with a coloring composition from one corner to another. After the paint has dried, usually at least two days, apply decorative wax, varnish or acrylic-based enamel on its surface.
Please note that the paint is applied to the surface only in one layer. Complete drying of the material occurs after one or two weeks from the moment the composition is applied to the wall. Only after that it is allowed to wash the surface or impose various kinds of mechanical loads on it.
It is not allowed to have a draft or direct sunlight in the room where work is performed. They adversely affect the quality of the resulting coating.
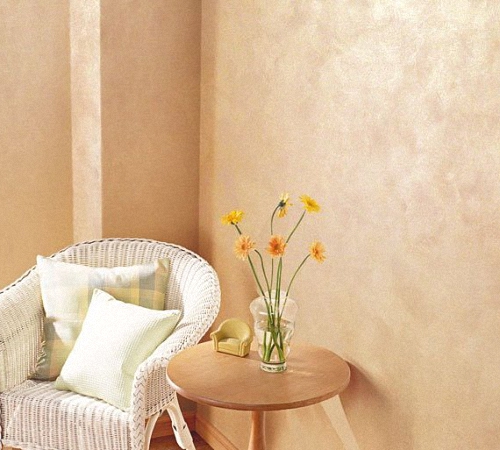
With the help of azure, it is possible to achieve additional aesthetic appeal of the coating. This material allows you to create a shiny, glossy, mother-of-pearl surface of the wall.
The final result of the work depends on the method of applying the azure. Most often, a roller is used to apply the azure. In this case, the wall is pasted over with masking tape to get neat joints. Next, you need to apply the glaze in two layers. Observe the direction from the bottom up or crosswise movements. A roller with a short pile is suitable for work. After painting the surface, remove the tape from the wall.
It is possible to use a paint brush for applying azure. In this case, the azure is applied to the wall with a roller, and the brush decorates the surface according to the given texture. Use only high quality synthetic brushes.
The third way to cover the wall with azure is to use a natural sponge. Initially, the tool is wetted in water and squeezed well. Next, dip the sponge into pearl blue and apply to the wall with gentle washing circular motions. In order to get a more textured pattern, press the sponge onto the surface and scroll it. After completing the painting work, remove the adhesive tape from the wall.
It is possible to use a template or stencil, with which the surface of the wall is processed. Apply the glaze to the stencil using a sponge, brush or roller.
The process of applying paint indoors is not particularly difficult. Structural paint should be applied on a pre-leveled surface, the maximum differences of which are two millimeters.
Next, you should cover the surface with a primer, if this is not done, then the paint consumption will approximately double. In order to create the desired structure, practice on a small piece of plywood. Please note that the curing time of the material is limited and the whole process must be carried out quickly and without interruption.
The paint is applied to the wall in one layer, while the structure is created using a special roller, grater and other decorative tools. Structural paint for indoor use sets very quickly, so try to create the necessary texture immediately after applying it to the wall.
After the paint has dried, be sure to apply a primer to its surface with a roller. In hard-to-reach places, use a brush. Some formulations are diluted not with water, but with a special solvent. In this case, you must purchase it in advance.
If you want to achieve a light pattern, then apply the paint in a thin layer, processing it after that with a roller. Through the application additional materials together with structural paint, it is possible to achieve a variety of decorative effects.
The use of sawdust in the composition of the paint allows you to get a relief surface. The addition of modified starch makes the surface both textured and smooth.
With the help of wax, it is possible to imitate the bark of trees and achieve amazing results in decorating a room. For a stunning reflective effect, add quartz sand and metal pigments to the paint.
How to apply structural paint video:
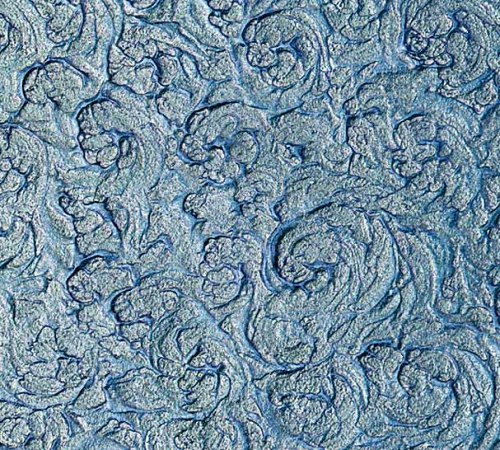
Rollers for decorative plaster will help to add a stylish design to the room and make it unusual. It is amazing that such an affordable and familiar wall leveling tool has become a full-fledged tool for decorative finishing. The secret of the transformation lies in textured rollers, which allow you to create a figured print on the wall that imitates different types surfaces, for example, the texture of stone, wood, leather, "fur coat", etc.
 With the help of figured rollers, you can easily create a picture on the wall
For a long time, craftsmen have been working on walls with improvised means: sponges, a comb, a hard brush. Today, the assortment of construction tools for decoration allows you to find a roller with a ready-made relief that suits your design, which, after processing the plastered wall, turns it into real three-dimensional images. Variations of roller cylinder coatings:
 Before choosing a roller, you need to decide on the desired pattern on the wall
 Tools with a soft surface, such as fur, create a “fur coat” effect on the plaster. Marble finishing is obtained with a fabric roller with a crinkled fabric, and a leather surface gives a finish similar to natural stone. As a rule, they work with such rollers when it is necessary to process a painted surface. Standard foam cylinders can be upgraded with twine, thread, and foam pieces to create natural patterns, such as tree bark texture.
If you are interested in a more pronounced decor, then you can not do without hard-coated rollers. Their cost is an order of magnitude higher than conventional pressure ones, but this is due to their high aesthetic value. Plus, you can use them multiple times. The most productive will be rubber rollers, which can have a convex pattern to get a depressed pattern or slotted to form three-dimensional textures.
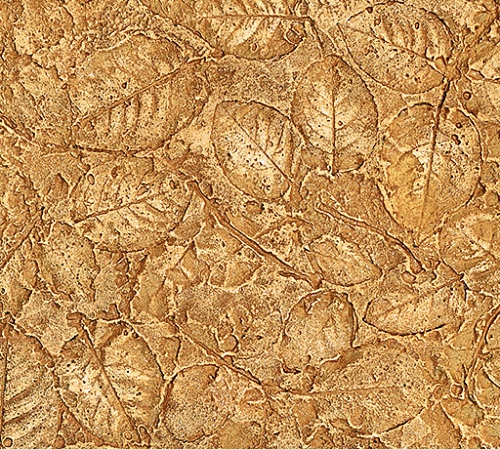
Since such an innovation for decorative plaster came from Western countries, it is in their stores that a variety of textures and patterns reigns: leaves, flowers, animals, birds, geometric shapes.
Work with a structural roller is carried out in two ways - first they apply plaster, wait for some fixing, after which they finish by layer or apply plaster to the wall (already filled with putty in one layer), dipping the roller into the composition. But, basically, the second method is used to carry out patterned coloring by creating prints with this rubber product.
 Before applying decorative plaster, the wall must be carefully prepared
 In order for the plaster to last longer and not crack, it is necessary to pre-treat. To do this, the surface of the wall is cleaned of dirt, old wallpaper, dust and a primer is applied to it. Then, for leveling, they pass with putty. For puttying, spatulas with a size of 300 mm, 450 mm, 600 mm are used. Putty application should be uniform. And don't push too hard.
After the first layer of putty has dried, it is necessary to apply a second one using a 600 mm spatula. Putty must be applied and smoothed in two mutually perpendicular directions. Then you can proceed to the decoration process, which consists of the following steps:
Using rollers for decorative plaster, you must follow a few rules:
A “fur coat” wall means that plaster is sprayed onto the surface with a broom, brush, or a special machine. "Fur coat" is especially popular for the facade surface, but it will also look interesting indoors. The modern version of creating a fur coat includes the use of a textured roller, which allows you to make the layer uniform and presentable.
Facade processing under the "fur coat" is carried out in the same way as in the room. First putty is applied, plastered and carried out over the plastered layer with a pile roller. If an error occurs or you see that the plaster is uneven, you should remove the excess with a spatula. It is impossible to take breaks in the process of creating a “fur coat”, otherwise the composition will have time to dry, and there will be too noticeable a joint at the edges.
The use of structural rollers will allow you to decorate the wall as well as any repair specialist. Decorative plaster has long outgrown its main purpose (wall leveling) and is a great way to create exclusive interiors, and even in ethnic style.
Recipe for success!
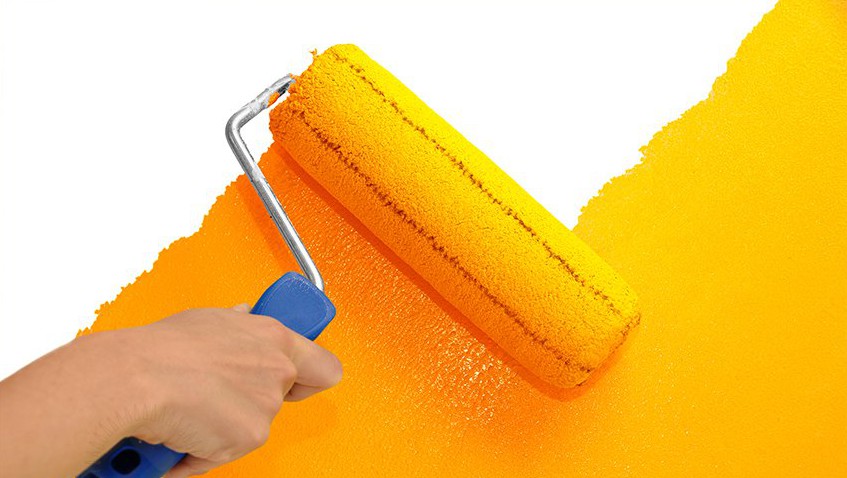
Large flat surfaces such as ceilings or walls can be hand painted with a paint roller. Industrially produce rollers of different designs and sizes. You can find rollers having a width of the rink from 5cm to 30cm. They also differ in the length of the handle. It is necessary to select the right size based on the task. So, for painting walls, as a rule, choose a tool with longer handles. But much more important is to right choice the so-called coat.
Before you start choosing a paint roller for painting walls, you should decide on the type of paint. The type of roller itself largely depends on this. For example, with paints on water based can work foam roller. It is also suitable for applying various water-adhesive compositions (, wallpapering). It is not recommended to apply emulsion paints with such a roller. Foam rollers are the most inexpensive of all. Their main disadvantage can be considered fragility. In addition, they cause a lot of splashes if you work vigorously.
 Which roller is better? Making a choice
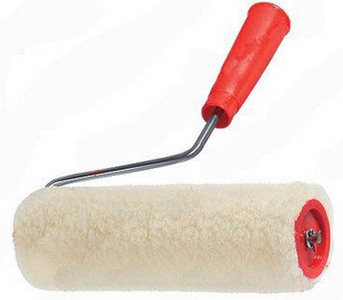
To work with various types paints, including those that have an organic base, rollers with fur, velor, thread surfaces are well suited. These materials absorb a relatively small amount of paint, apply it more evenly to the surface to be painted, do not splatter or create streaks (streaks).
When painting walls, it is important that the paint layer is uniform. Deal with it well fur rollers. In addition, they perfectly paint over various wall surface defects (small irregularities, cracks, depressions, chips). The minus of fur rollers can be considered their ability to climb, leaving "hairs" on the painted surface. This mainly applies to cheap tools.
How to paint the walls and ceiling with a roller? Fur checked by time
Velor rollers have characteristics similar to fur. But they create an even more uniform layer of paint. After applying them, the painted surface looks completely smooth. This type of roller is used for responsible work on painting walls. They say that this is a roller for real professionals. If a beginner uses a velor roller, any marriage is noticeable on the walls. By the way, this tool is optimal for applying varnishes.
Velor roller
In the case when quality is not as important as the speed of work (for example, if the surfaces have a very large area), it is convenient to use thread roller. When working with it, remember that too high a speed of rotation of the cylinder can lead to splashing of paint. Therefore, it is better not to rush too much. The thread roller gives the painted wall a pleasant texture.
 Thread roller for walls
There is a rule: the rougher the surface of the walls, the longer the pile of the “fur coat” should be. A long-haired roller should be a roller with which it is planned to paint a relief surface (for example, or wallpaper with an imitation of it). Long pile paints well various notches, dents, depressions. For smooth walls you need a short pile roller! This is important: if you use a long pile roller on a smooth surface, smudges, streaks and uneven color may occur.
The roller for ceilings must be selected according to the same criteria as for walls. Typically, a ceiling roller, unlike a wall paint tool, has a relatively short or medium-sized handle. The requirements for the quality of painting the ceiling are usually higher, so the roller must be chosen carefully. Most often, for painting ceilings, rollers with a slightly elongated soft pile are used. It is very good if such a pile is made from natural materials, for example, from wool. Too short pile picks up insufficient amount of paint. A foam roller for the ceiling can be used, but it is not the best choice: it forms "bubbles".
The process of painting wall surfaces is not as simple as it might seem at the beginning of the repair. This is very good way update the interior in a short time. But only if the walls are even, absolutely smooth and do not require any additional action. Most often, before starting finishing work, you have to solve many problems and look for answers to questions that arise:
Major renovations require space. First of all, you need to free the room as much as possible from furniture and foreign objects. The floors must be covered with a film or thick paper, the remaining furniture too.
Staining does not hide the imperfections of the base, but rather reveals the slightest defects in the surface to be painted. That's why preparations are, if not the main ones in the overall process, then very responsible. The main leveling, in the presence of large irregularities, cracks, shells, chips, is carried out in traditional ways: by plastering or sheathing with plasterboard sheets. Then it is necessary to perform the starting puttying on the plaster. In the case of drywall, it is first necessary to seal the joints with putty using reinforcing tape, and wipe the caps of the self-tapping screws. Then there is a choice:
By the way, wallpapering will help to hide small irregularities and will serve as a good basis for any coloring composition. Dry and sanded walls must be carefully coated with a primer. It will remove small dust particles and contribute to better paint adhesion. At the same time, it will protect the walls from the appearance of dampness, mold, fungi. At the same time, the primer will save the coloring composition to some extent. To avoid paint rejection or formulation inconsistencies, the primer should be purchased from the same brand name as the paint. As a last resort - universal for internal works. Wallpaper can be primed, but not desirable. Since the primer has a liquid consistency and can penetrate into the inner layers and reach the adhesive layer. The wallpaper will "lead" and you will have to change them.
If the repair concerns not only the walls, but also the ceiling, then the ceiling should be finished first. Otherwise, drops of the coloring mixture may fall on already painted walls and spoil the whole work. Of course, you can cover them with a film, but this is already extra red tape.
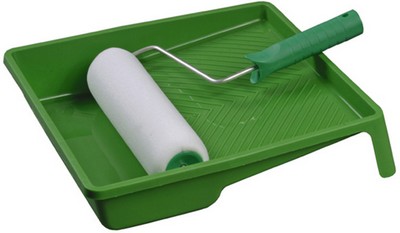
If a we are talking about repairing an apartment or house, and not a production workshop, then it is undesirable to use an airbrush. Working with it requires thorough protection in the interests of occupational safety. Also, the spray gun can spray paint not only on the desired surface, but also around it. The most convenient to use at home will be rollers and paint brushes. In addition, you will need a paint tray, an extension to the roller handle, masking tape, a tape measure, and a stick for mixing the dye. Consider what are the rollers for painting walls:
Among other things, there are some more requirements for rollers. For example, butt joints on the shell must not protrude. The fur coat should be tightly stretched over the base, which, in turn, should rotate freely and smoothly around its axis.
Paint brushes will be needed for touching up hard-to-reach places and edging. Therefore, it is better to stock up on flat and round brushes of small and medium size with soft natural bristles.

For internal surfaces in rooms where people are located, it is best to use water-based formulations. Since it is easy to paint walls with a roller with this type of paint, they dry quickly. In addition, they are absolutely harmless to health, they can be easily diluted with ordinary water when thickened.
Water-based dyes fit perfectly on the surface of any materials: concrete, wood, stones. They have a normal degree of vapor permeability, the ability to "breathe". Many manufacturers produce such dyes, so there is plenty to choose from in terms of cost and color. The main thing is not to make a mistake with the calculation and purchase a sufficient amount of the product of the same color. Since in case of a shortage of paint, it will not be easy to choose the right shade.
Painting the walls with a roller begins with the preparation of the coloring composition and tools. If there is a need to work using an extension cord, then it should be fixed to the tool handle in advance. You need to prepare a tray for paint and composition. If this is a ready-made mixture, then it needs to be simply mixed. If the pigment is added to a white base, then it is necessary to prepare the amount of coloring composition necessary to color the entire room. Finishing should be started only after the complete drying of the primer layer or wallpaper.
Now it is necessary to mark the boundaries of painting, especially for the ceiling, window and door openings. To do this, masking tape is used, they also need to cover electrical fittings and other parts that cannot be finished. First, the corners are painted over with a brush - the lines where the walls join each other and with the ceiling. Then the roller comes into operation, on which there should be a moderate amount of paint. Movements should be directed from the bottom up, smoothly with a little pressure. There is a small nuance here, since it is necessary to paint the walls with a roller correctly not vertically, but a little obliquely, moving it either to the left or to the right. The stroke of the tool is a bit like English letter W.
Another way of applying coloring compositions is staining with squares. First, the paint tool is moved up / down, then from left to right and again up / down. And so square after square. At the same time, it is necessary to ensure that the boundaries between adjacent sections are well rubbed. Masking tape must be removed immediately after painting. If this is done later, the paint will dry and some of it may come off along with the tape.
To get a beautiful and unique design of the apartment, the walls are covered with paint. This work is not difficult, and even very pleasant to perform. To achieve a high-quality result, you need to know how to properly paint the walls with a roller.
The roller applies the paint to the wall more evenly than the brush.
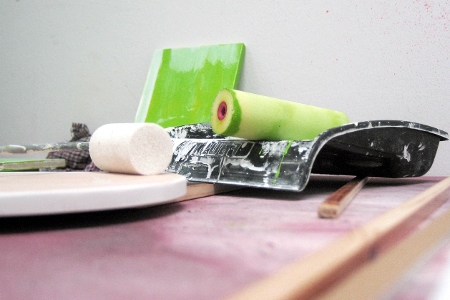
Would need:
Before starting work, you need to prepare all the necessary tools. Depending on the achievement of the painting effect, it is chosen which roller to paint the walls with. To apply an even base layer, a high-quality fur roller is used, to obtain marble stains, a cloth roller is used. Also, for work, you will need a special bath, one of the sides of which has a ribbed surface to remove excess paint. If there is no such device, then squeeze nets can be made, for example, from a piece of plywood, on which holes (12-15 mm) are drilled in a checkerboard pattern in increments of 20 mm.

How to paint the walls to get a uniformly painted surface? First, with the help of a brush, places that are inaccessible to the roller are carefully painted over, i.e. wall corners, around skirting boards, etc. Then the roller is lowered into the paint and rolled for wringing. You need to start painting the walls from the side on which the window or door openings are located. The work must be carried out sequentially step by step, starting from the edges. Apply paint on the wall with a roller, you need to roll it over its entire height from top to bottom, back and a little obliquely. In this case, the next strip must necessarily overlap the edge of the previous strip by 4-5 cm. In order for the painted surface to turn out to be uniform, the paint must be shaded well, cleaning the joints between the strips. It can be applied in two layers as needed. On walls with a small area, you can first apply the paint with a brush, blending it well, and then roll it with a roller.
In order for the roller to serve for a long time, it must be looked after. After each use, the remains of a primer or oil paint are carefully removed from it. After finishing painting, the roller should first be washed in a solvent, and then in water with the addition of soap. After using the primer, it can simply be washed in soapy water.
Back to index
Would need:
How to paint walls to get a marble effect? For this, a roller made of folded fabric is used. Thanks to them, unpainted areas remain, and a mottled surface is obtained. In this case, paint is applied in two shades: the first to obtain the main background, and the second - for the marble effect. Walls painted in light colors look very beautiful, on which brighter paint is structurally applied.
Before painting work, the surface is prepared, from which the dust is first cleaned, and then the primer is applied.
After that, you need to paint the walls with the main background. When the first layer dries, you can apply another if necessary. To apply the structural layer with a fabric roller, the following are mixed: matte water-based paint and acrylic pearl emulsion in a ratio of 1: 1. The prepared composition is applied to the walls, starting from the top. In this case, you need to move the roller in different directions. When painting the surface, special attention is paid to the corners and places above the skirting boards. To paint over them, you need to moisten a lint-free cloth in paint and use it to apply strokes to unpainted areas, while simulating the resulting stains.
When performing with a fabric roller, you need to know that when applying one layer, the main color will be perfectly visible through it. And if you often run the tool over the surface, the result will be a more saturated and dense structure. To achieve the desired effect, work is carried out in small areas. Like any other tool, the fabric roller needs to be looked after. After each painting, it is thoroughly washed. Dirt and cobwebs stuck to it are removed using the sticky side of the masking tape.
The Ministry of Finance of Russia for the first time disclosed data on the salaries of employees of federal...

Of the many questions and topics that are asked to tarot cards, not a small one ...

The benefits and harms of Coca-Cola. Coca Cola is a popular drink all over the world....