Female infidelity is a rather complex phenomenon. First, with the social ...

Do-it-yourself ceiling sheathing in the country
Here are several options for building materials that I heard in response to the question of how to sheathe the ceiling in the country:
For my house, we decided to use wood paneling for the attic ceiling. The kitchen and bathroom are distinguished by high humidity, which wood does not tolerate and, moreover, it is an expensive pleasure. Therefore, these rooms were suitable for cheap finishing options from plastic panels resistant to humidity. It turned out to be easy to make a filing with such a building material. Ideas of what to make the planking drew very quickly. The building material was chosen at an average cost.
Ceiling clapboard
The clapboard paneling will look very nice in wooden house... From experience, I can say that first you will need to accurately calculate the amount of materials with a margin of up to about 10% of the total volume. In addition, you additionally need to take care of protecting the building material from insects and painful fungi, which can severely damage the tree. Boards must dry well before assembly work.
![]()
Lining close up
Pine lining turned out to be the cheapest for the price. To save money on the purchase of boards for a 2.4x3m room, six-meter boards were purchased that could be cut in half without a trace. There are other pallet sizes available for waste-free ceiling sheathing.
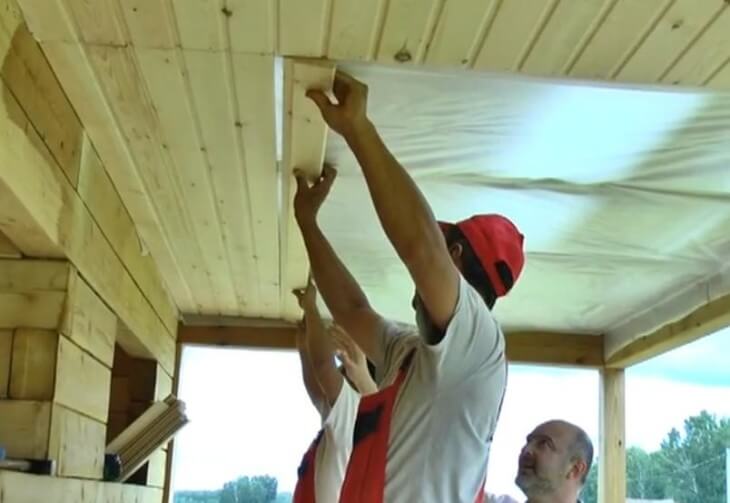
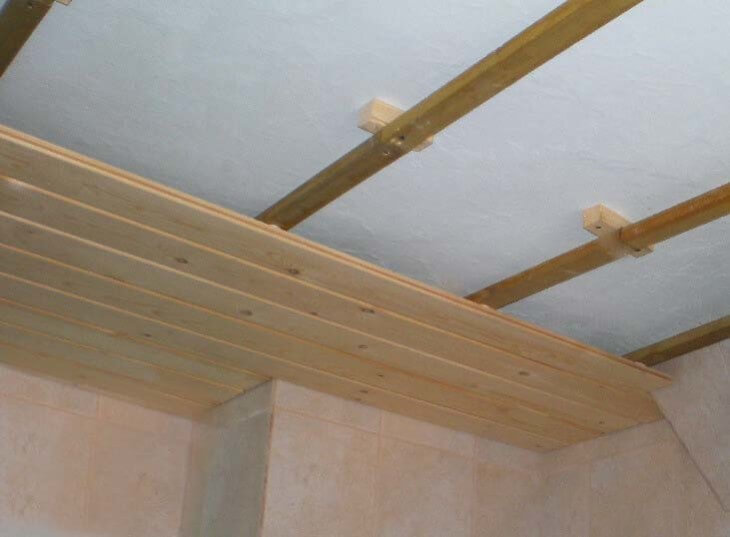
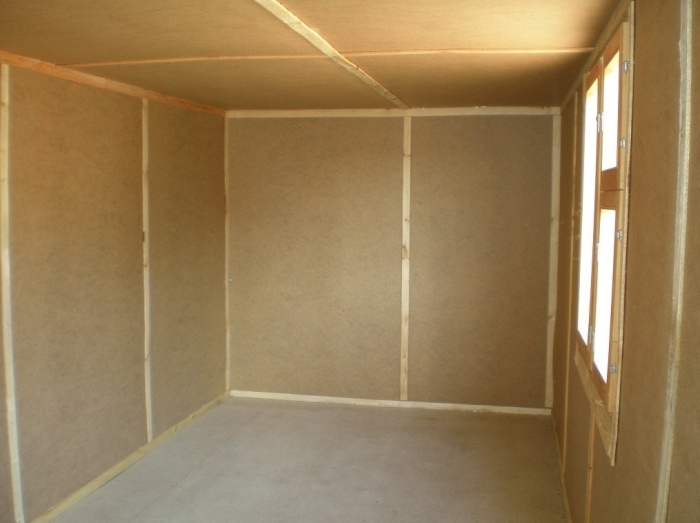
To create the frame, I purchased 30x30 wooden beams, also made of pine. But you can also use a metal profile. I pre-soaked the bars with linseed oil to protect it from decay.
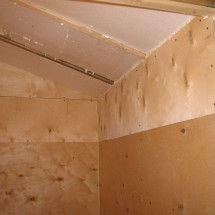
Do-it-yourself lining of the ceiling with clapboard
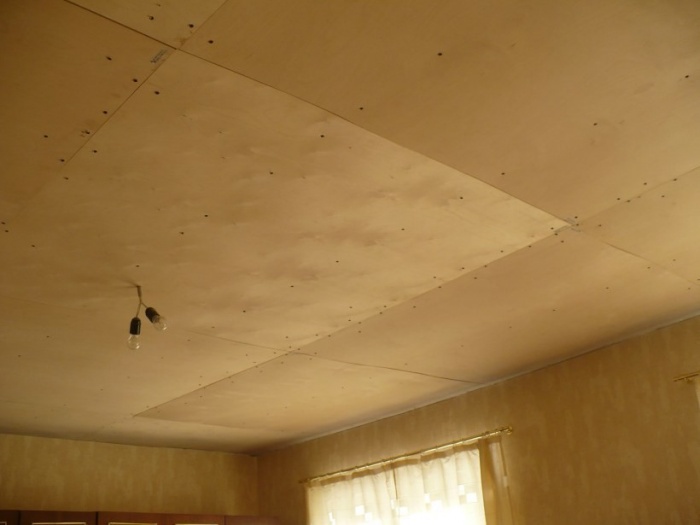
The lathing needs to be done on the ceiling with a distance between the beams of no more than 1 m, but I made 80 cm. The beam should be perpendicular to the facing boards. I fastened the crate with self-tapping screws, but you can also use just nails, which need to be driven in at an angle. In places where the ceiling was not too flat, I used wooden wedges to prevent the cladding board from sagging. I performed the cladding with the boards by attaching self-tapping screws to the beams. So sequentially, inserting the spike of the new board into the groove of the already fixed one, using a screwdriver, I sheathed the entire ceiling. Too tightly I did not fasten one board to another, so that when deforming during changes in temperature and humidity, they would not deform.
Having finished fixing the boards to the beams, I reinforced pine moldings at the junction of the walls with the ceiling. It turned out a very beautiful ceiling in the country, which I proudly showed to my friends later.
For the ceiling filing in the kitchen, I needed to have the following on hand:
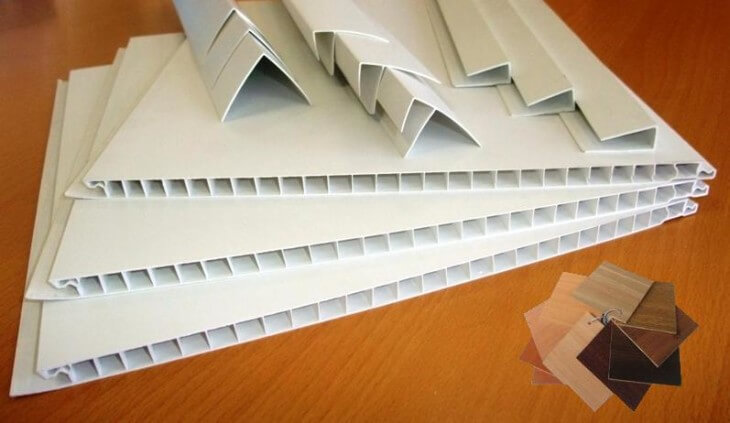
PVC panels and accessories
First, you need to make a crate from a wooden beam of pine 30x30. I fastened them to the ceiling with screws, with a pitch of 50 cm. We fasten a corner to the frames from the initial side, into which we will insert the side edge of the first panel. Two profiles are fixed perpendicular to the panels at the walls. The bars should be perpendicular to the panels, and the corner along. We fasten the side part of one plastic strip to the corner, and the ends are inserted into the profile. To make it easier to insert the strip into the profile, I bent it slightly towards myself. Using the staples, we carefully attach the panel to the rails with a stapler.
![]()
Wooden lathing
We attach the next panel to the first one by adjusting the grooves and attaching with staples. Thus, stripes must be used until the sheathing reaches the opposite wall. The last strip can be cut if it is wider than the remaining uncovered space. On the side of the panel to the wall, you need to put on a corner and hem it to the slats.
It is quick and easy to hem plastic panels and this material is much cheaper than lining. But it must be borne in mind during the installation of PVC panels that this material is quite fragile and flammable. It should be purchased with a margin so that you can replace the damaged strip. To make such a plating with your own hands is available to every owner.
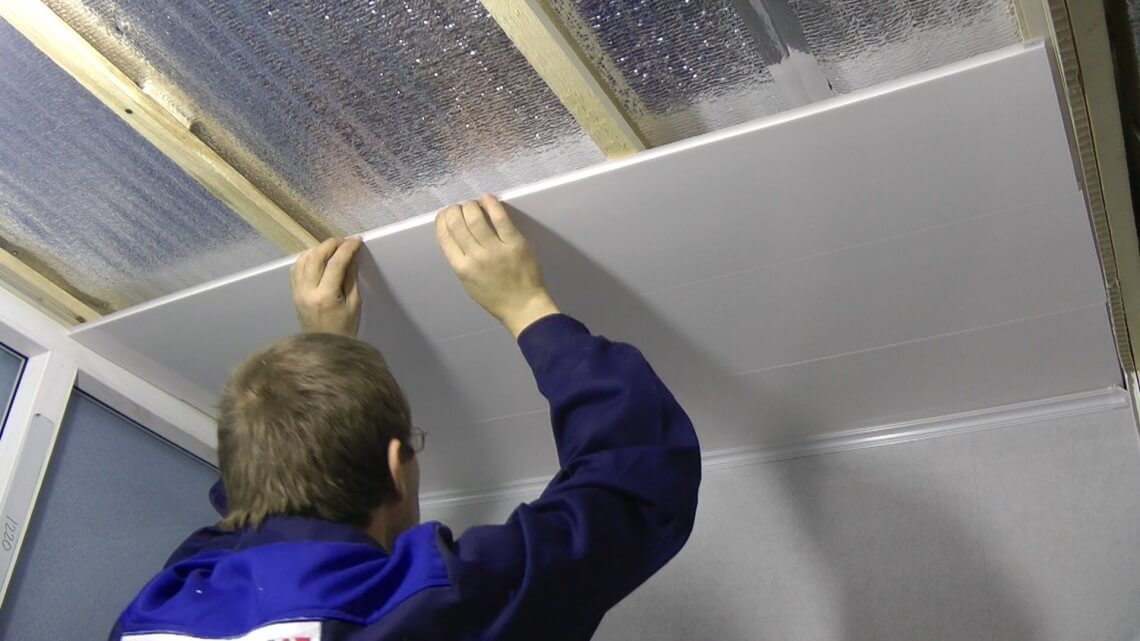
Installation of panels on the ceiling
There is another inexpensive way to hem the ceiling with fiberboard, which will suit many for a country house. Such a ceiling in the country can be treated with oil paint, or plates can be glued to it, which will additionally insulate the house. I hemmed the ceiling in the pantry in this way, as soon as the dacha was built.
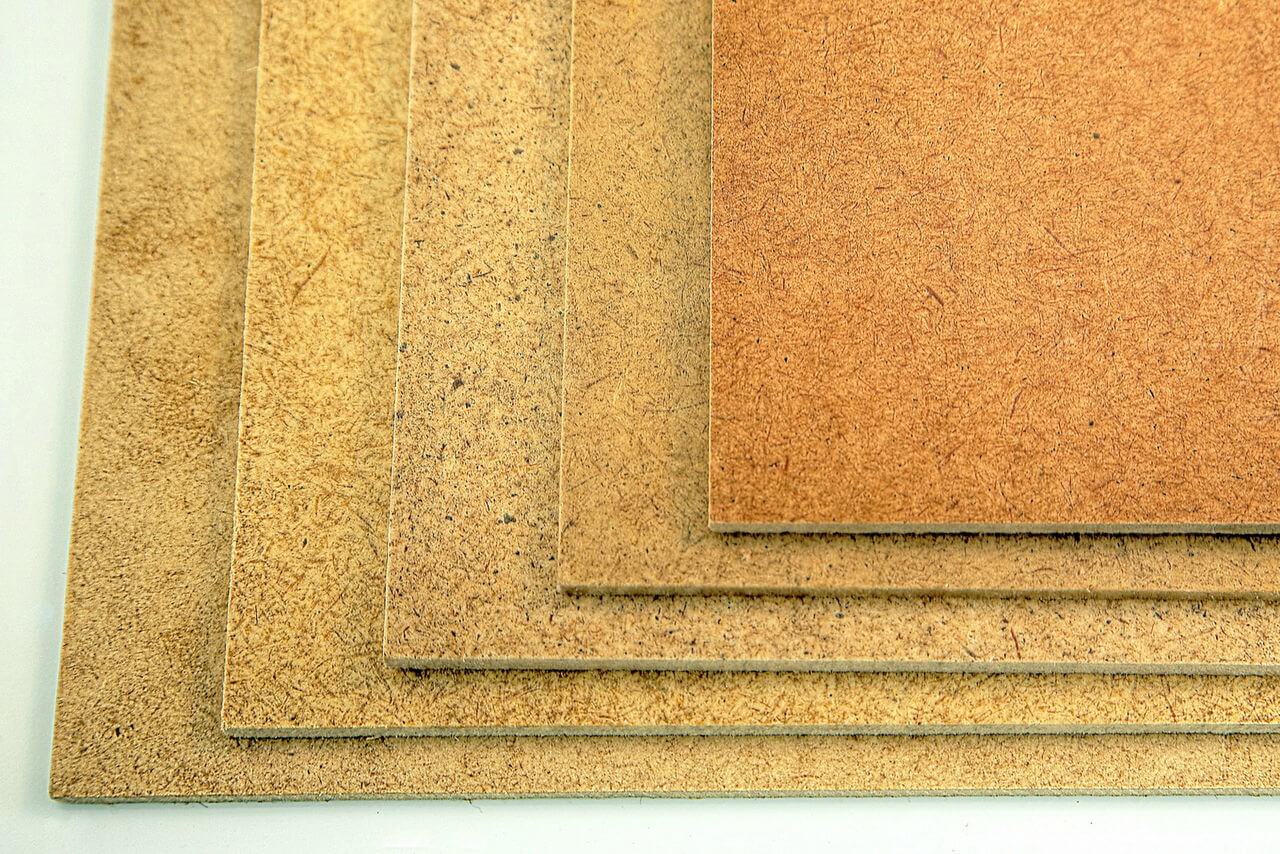
Fiberboard sheets
Fiberboard perfectly withstands moisture, but a strong long-term influence of water can distort them. You will need the same tool and slats for the previous types of ceiling sheathing. First, mark the places where you will fix the slats. It is desirable to do this using a level gauge. We begin to fasten the most extreme ones close to the walls. Then we nail the rest in parallel with a step of 50-70 cm. I chose a distance of 50 cm. It is necessary to attach the plates to each rail. We mask the joints along the perimeter with cornices.
When you buy fiberboard, you need to let it settle in the room for a couple of days so that it picks up moisture. Otherwise, over time, it can be warped. Otherwise, it is an affordable and easy option for finishing the ceiling for any person, even with a small income.
Fiberboard cladding
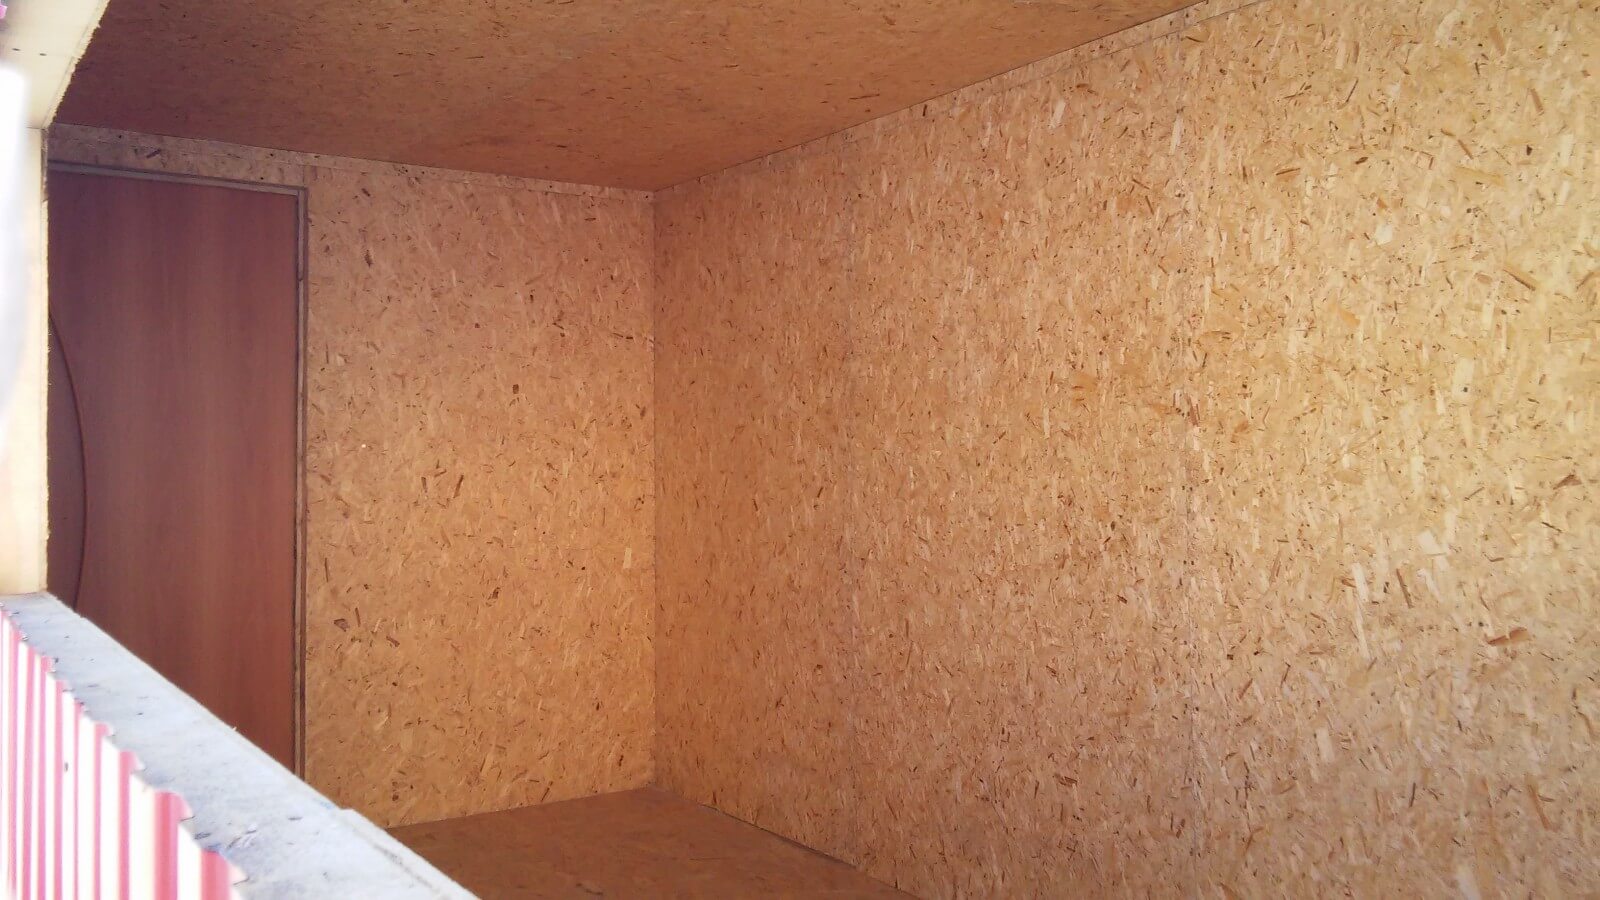
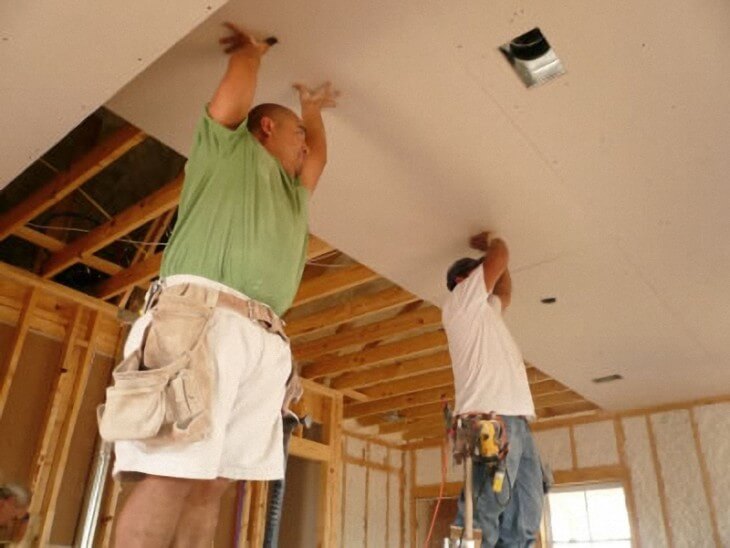
Today, the most common version of wall and ceiling cladding than drywall is probably not to be found. This material makes it possible to embody different fantasies in the form of intricate figures, spotlights and other possibilities. You also need to fasten drywall using a crate. For its implementation, a wooden beam and a metal profile are used. Drywall can simply be attached with a whole sheet. Or you can use a sharp knife to cut out some intricate pattern. Before fixing the drywall, an electrical cable is laid and points for placing the lamps are marked. Drywall is attached to the equipped crate with self-tapping screws.

Ceiling cladding with plasterboard
So, now you know how you can sheathe the ceiling at your dacha with cheap materials. All of these jobs are fairly easy to do. You just need to have the necessary tools, building materials and desire. Hope you find my experience useful. Good luck in building your summer cottage!
 Comparison of methods of filing a ceiling with different materials
Proper preparation for installation work ensures the highest quality result. That is why the work should be started from the preparatory stage.
First of all, it is necessary to calculate the area of the room, if it is unknown, and calculate the number of required slabs. In order to calculate the area, it is enough to multiply the height by the length, subtract the area of windows and doors calculated in the same way. We divide the resulting figure by the area of one panel and we get the required number of panels for wall cladding. To the final figure, you need to add 5-7% of the stock.
Fiberboard panels can be mounted on nails, special mastic or clamps.


Finishing work under renovation is perhaps the most important. Your apartment may have perfectly prepared walls, but a crooked finish can nullify all the efforts of the craftsmen. And vice versa - even the most gnarled walls can be masked by the finish with laminated fiberboard.
Laminated fiberboard has appeared on the construction markets relatively recently. A huge variety of fiberboard wall panels is divided into three types:
In addition, laminated panels are divided into moisture-resistant and non-moisture resistant, this aspect should be taken into account when choosing, say, a kitchen or a bathroom.
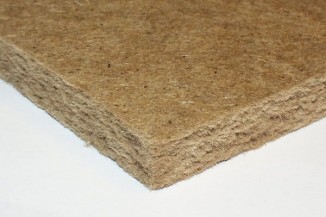
Fiberboard panel structure
Fiberboard manufacturers claim that their products are strikingly different from, despite similar manufacturing principles. In fact, these differences are noticeable to the naked eye, you should pay attention to the edge: the fiberboard panel is uniformly dense and consists of very fine chips, more precisely, compressed wood fibers. The fibers are pre-moistened, mixed with special resins and pressed at high temperature... Then the slabs are cut to the required size, a laminated coating of any color and texture is applied to the surface. The front side of the fiberboard can be decorated both in traditional versions (marble, tiles, granite and even under the metal), and fancy, with bright patterns, mirror inserts, stucco, thematic drawings and reproductions of paintings.
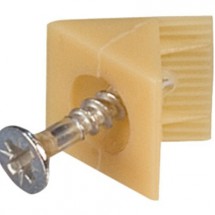
Fiberboard panels for walls are durable, self-tapping screws hold well in them, which makes it possible to attach shelves, frames and lamps to fiberboard walls. Of course, you need to take into account the thickness of the material and use special dowels such as "umbrella" or "butterfly".
For all types of fiberboard wall panels, the so-called molding is produced: fittings and accessories that are used for finishing joints and masking wall defects. These include fillets, moldings, plinths, corners, platbands, finishing elements, plinth strips and other little things that play an important role in the formation of a single interior style.
Method of gluing fiberboard panels
Depending on the condition of the walls, laminated panels can be finished in several ways:
How to fix Wall panels from fiberboard, everyone decides for himself. If you decide to mount the fiberboard directly on the wall, you will have to pre-align and prime the walls. Starting from the corner, aligning with a plumb line, glue the first sheet, then grease the next one with glue, snap it into the lock first and also glue it to the wall. Don't want to mess around with glue? Use nails or screws, but remember that the caps will be visible. You can work around this drawback and attach the panels using nails with decorative caps.
Fiberboard is directly attached to walls made of wood and vulture panels. On brick and concrete walls you will have to first apply the markings, drill holes and drive in plugs, into which screws are then screwed in or nails are driven in to secure the panels.
But most often you have to build a crate and only then fix the panels. Thus, even the most hopeless wall can be leveled, while losing a few centimeters of space and acquiring the ability to lay communications, sound and heat insulation materials.
The lathing is mounted from wood or a special plastic profile. Fastening to the lathing is carried out using glue, self-tapping screws or clamps (special clips that are purchased with the panels). The lathing is installed strictly according to the level and plumb line, in increments of no more than 30 cm. After installing the lathing, attach the sheets in any way and install the molding.
The video shows an example of installing fiberboard sheets on the wall in the bathroom.
Laminated fiberboard opens up truly endless possibilities for imagination and design delights, while allowing you to significantly save on finishing work.
How to make a ceiling with fiberboard: frame, drawing, design
Expert response
Hello Bakyt, installation of fiberboard on the ceiling begins with preparatory work. Remove old finishes. Otherwise, there is a high risk of mold. Moreover, such a ceiling is unlikely to be flat.
Attention ! With the most unfavorable development of circumstances, wood-boring beetles and wood lice will start in the old coating.
To prevent this from happening, it will be necessary to carry out pest control work. To do this, use only high-quality antiseptics.
Before starting the installation of a fiberboard ceiling, you need to attend to the presence of the right tool, you will need:
Mark the ceiling using a building level. Be sure to mark the wall accordingly. Fasten special wooden slats. They should be parallel to each other.
Important ! The distance from the edge to the first rail is at least 25 cm.
The second layer of battens is applied perpendicular to the first. Slabs will be attached to these two layers in the future. Additionally, it is necessary to fill in the scraps so that the whole system is on the same level.
The ideal size of the crate squares is meter by meter. So, it will be much easier for you to fix the fiberboard sheets. It is also possible to save time and buy a ready-made profile for a false ceiling. In this case, you do not have to worry about a flat surface.
At the final stage of work, you need to mount the fiberboard sheets on the previously installed frame. In this case, you can use both screws and nails. The choice of fastening materials is primarily governed by the weight of the sheets.
It is important to avoid gaps during installation. If this is not possible for you, then there are two options: in the first case, cut the fiberboard plates into equilateral squares and secure; in the second option, you can use the leftover materials to close the gaps.
Advice ! The joints are best masked with decorative strips. Then cover the surface with varnish or paint. Also, the cornice will be useful as a decorative element.
Fibreboard is one of the easiest materials to use and is widely used. In addition, its price is at an affordable level. At the end of the work, the heads of bolts or nails are puttyed so that they do not rust. Don't forget to install lighting fixtures. For example, you can make corresponding holes in the ceiling for them in advance.
Repeatedly faced with the problem of wall decoration. There are often several reasons for this. This may be the need to insulate them, create additional noise insulation, improve their appearance, etc., but the main reason is the need to align curved walls. How to do this and what material to use to save not only money, but also time? An excellent option would be to sheathe the walls with hardboard, since this material is inexpensive and easy to use.
Introducing you step by step guide how to make walls with hardboard, what tools and materials we need in our work. Before starting work, read characteristics of hardboard.
The scientific name of hardboard is fiberboard (fiberboard). For the manufacture of this material, various wood waste is used. They are crushed, soaked in moisture and placed under a press for wringing. The resulting raw material is thoroughly dried, mixed with a special binding solution and formed into slabs. The composition of the solution includes special resins of synthetic origin, paraffin or rosin to increase moisture resistance, as well as various kinds of antiseptics.
Since the resulting product has a high humidity (70%), it is placed under a hot press (about 180 degrees C). In the production process, the front side of the sheet is made smooth, covering it with a thin layer of varnish, the back remains rough with uncovered fibers. When installing sheets with glue, the roughness gives additional strength to the joint.
During installation, the following tools will come in handy:
To begin with, it is important to determine the degree of curvature of the wall. The method of mounting sheets depends on this.
If the unevenness is insignificant and the humidity in the room is low, then the sheets can be mounted using adhesive substrates. For this, bituminous mastic is perfect. We apply it to the back embossed side of the sheet using a notched trowel with a notch size of 4 mm, and then press it against the wall. You can also use PVA glue, but this is very inconvenient, since it is necessary to firmly press the sheet along its entire plane for some time. Construction glue (KS) is not bad to use.
Also, sheets of hardboard can be attached directly to the wall using self-tapping screws or nails with decorative caps. The finishing procedure is greatly simplified if the walls in the house are wooden. In this case, the sheets are attached directly to the wall without additional preparations, such as marking and drilling holes for dowels.
For walls with large drops, it is better to use a wooden crate. Even the largest irregularities can be smoothed out with it.
For the lathing, wooden bars or slats are suitable for us, no more than 1 cm thick and length from floor to ceiling. To begin with, we take one rail, apply it vertically to the wall and mark the points along the entire length with a pencil where we will drill holes for the dowels with a distance of 20-25 cm. Next, drill the marked holes and use the dowels to attach the rail to the wall. In a similar way, we attach the slats along the entire wall. The distance between adjacent vertical slats should not exceed 30 cm. During the installation process, be sure to use a building level and a plumb line so that the lathing turns out to be even. On uneven areas, use slats to bring them to the same level.
After fixing the vertical slats between them in a horizontal position, we fasten short sections of the slats. We do this so that we get even cells, no more than 30 by 30 cm in size. The wall lathing is ready. Before attaching a sheet of hardboard, it is better to make a crate on all other walls so that it does not overlap with the already fixed sheets.
Of course, hardboard panels take up some space, but it can be used for noise insulation, or, for example, to hide wiring and other communications in the house.
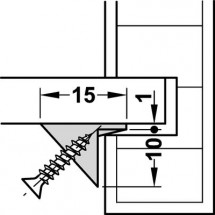
Wall cladding with hardboard starts from the corner of the room. Sheets are placed in a vertical position, tightly fitting to each other using wood screws. The step between them should be 15 cm along the perimeter of the sheet and 30 cm along its inner plane. It is also important to indent 1-2 cm from the floor.
There are some guidelines to follow when cutting sheets. All of them are presented in the following video plot.
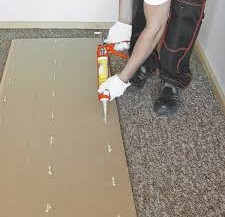
In order for the surface of the wall to be perfectly flat, it is necessary, first of all, self-tapping screws. In this case, an alkyd filler filler is perfect, which does not crack due to its elasticity. After applying it in a thin layer at the joints and tightening the self-tapping screws, immediately lay the construction reinforcing tape on top of it. If you have free time and desire, you can make a screed on the entire plane of the wall.
So you will achieve a perfectly flat surface and at the same time prepare the wall for subsequent wallpapering or painting. After the putty has dried, the places of its application must be treated with fine sandpaper.
For painting, acrylic or water-dispersion paint is suitable.
Also wall sheathed with hardboard is possible. After the putty has dried, apply a primer, glue on paper or old newspapers. After that, we glue the wallpaper according to generally accepted recommendations.
Hardboard prices are low, and this material can be bought at any hardware store.
Female infidelity is a rather complex phenomenon. First, with the social ...

This method of cooking bell pepper was brought by my mother from ...

When updating a game, it's best to get familiar with new content and new ...