From internal pipelines, drains are transported by external ...

Making a small space is a rather difficult task, it is important to think through every little thing to get a functional setting. Sliding systems are an indispensable assistant in this; they can be used not only for furniture, but also for dividing rooms. To do this, there are interior doors of the compartment, which are easily put even by inexperienced masters.
Coupe doors have their own advantages and features, distinguish from the positive characteristics:
In addition, the absence of thresholds provides additional ease of use, which is important for families with disabilities. Thanks to the fixation of the canvas, the sliding doors never slam shut from drafts. If you wish, you can always put a mechanism for automating the device, then the doors will open independently.
But there are such nuances because of which some people refuse to use the sliding mechanism, namely:
Despite the presence of some shortcomings, the interior doors of the compartment have many positive reviews and are quite popular. They are universal and reliable, which is appreciated among ordinary consumers.
Coupe doors differ in various criteria, depending on the design distinguish:
The first and second options do not contribute to saving space, because the canvas runs along the wall at a certain distance. But the cassette mechanism does not affect the arrangement of furniture, while its installation requires a wide opening or removal of part of the wall.
The complete set of a door of a compartment includes cloths, guides, the roller mechanism and the cartridge. When determining the type of mechanism, the weight of the web must be taken into account. If it is light, then two rollers will be enough, with more weight at least four should be used. Accordingly, the price of the interior doors of the compartment will differ, if necessary, you will have to pay extra for additional components.
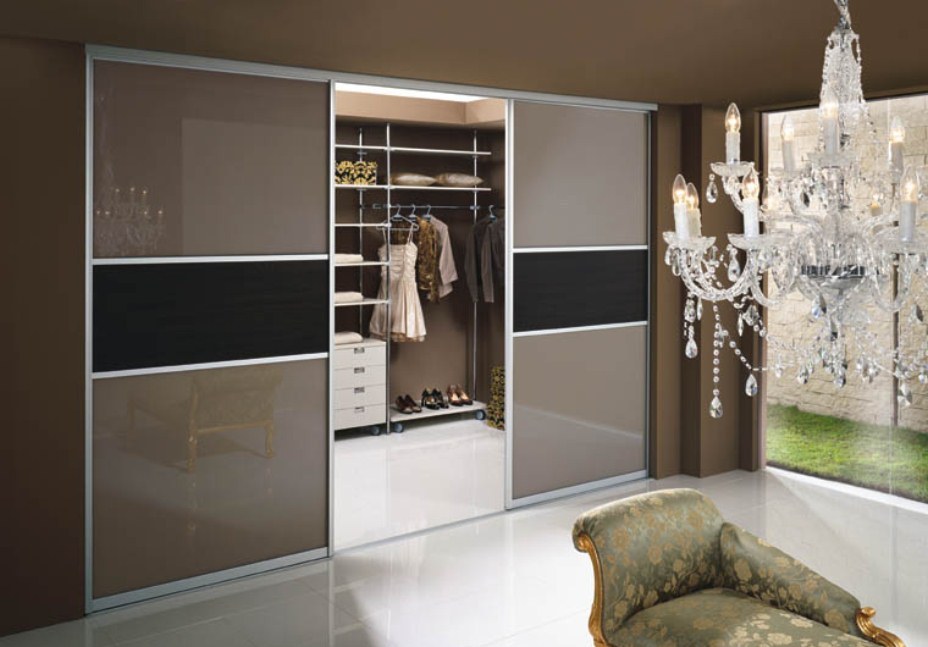
Cloths are made of various materials, it can be solid wood or a combination of glass, plastic or chipboard. Thanks to their accessibility, veneered coupe doors are a popular option - they are practical and attractive. All-glass canvases are also common, which create a feeling of lightness and fit into any environment.
Using a tape measure, measure the parameters of the doorway, then make the purchase of all components. In the process you will need:
During installation interior doors Tool compartments use:
For fastenings used: anchors, screws, small nails.

When choosing the option of entering the door into a niche, preparatory work begins at the stage of rough finishing of the room. Then the sliding system is mounted, in other cases, the process is carried out during the finishing.
Before installing the interior door of the compartment, they correct all the flaws in the opening parameters, the walls should be strictly parallel to each other. When working with a drywall construction, a mortgage of a timber is pre-mounted in it - this is necessary to ensure reliable fastening of the system.
There is a general algorithm for installing interior compartment doors, however, some points in the process may vary. This is due to a single principle of action of mechanisms, but differences in their design. Therefore, it is important to study all the manufacturer's instructions in the instructions before work.
It is preliminary worth noting that the lower fixation in sliding systems can be of three types:
The process consists of the steps:

The process can be completed without the third paragraph in the case of choosing the interior door of the compartment only with the upper guide. But a solution with the presence of additional lower fasteners is preferable due to its reliability.
The installation is completed by setting the door to the correct position. For this, there are adjusting bolts in the system, according to the level of the blade, they are placed strictly in an upright position. Now the doors can functionally function, but the visual design of the opening is required. You will need to mount the racks on both sides of the door frame at the junction of the canvas in the extreme positions. Extras are used to hide fasteners, after which the fittings are installed on the canvas. Platbands are fixed with glue or small nails.
The stores offer a sufficient number of ready-made sets with different types of doors, if you carefully read the instructions for them, you can install the interior doors of the compartment with your own hands. In addition, there is always a specialist who is ready to complete the whole process quickly and efficiently. The cost of installing sliding systems can reach the price of the compartment door itself. For example, a high-quality set of sliding doors with one leaf in Moscow costs about 2000 rubles, for installation its specialist will take the same amount. If the installation is not carried out in a metropolis, then the price of services goes much lower.
To help the home foreman, the whole process of installing the interior doors of the compartment in the following video:
Sliding cabinet doors are considered the most economical and convenient to use. Indeed, they save space, they are easy to open, even a child can cope with doors of a similar design. No need to fear that the shutters will be slammed from a strong wind.
Designers often use the modification of sliding doors as an additional detail of the interior, which allows you to zone the room and make two small ones from one room, which is very appropriate in small-sized apartments.
To understand the important nuances of the process of assembling the door-coupe will help step-by-step instructionpresented below.
Installation of doors begins with the ordering of the place where, in fact, the doors will be inserted. Decide on which edge it is more comfortable to place the fasteners of the sliding mechanism, note how you enter the room. Aesthetic features suggest that the sliding structure is better fixed on the side you enter.
Now pick up the necessary tool:
For the installation of the compartment doors to go correctly, follow the instructions of the specialists:
Installation of the upper profile involves a reference to the control line of the lower guide. The height of the arrangement is equal to the height of the door panel plus 15-20 mm for gaps above and below. Instructions must be attached to the cabinet, you can clarify the size of the gaps by reading the text of the manual.
Negligence regarding the horizontal position of the device threatens with improper installation, which over time will cause the shutters to move to the side. To securely fix both profiles with your own hands, you need to use brackets, but if the compartment doors are too bulky and heavy, it is better to strengthen the model. Take a wooden block 50 × 50 mm, in size, focus on the width of the guide. If the installation involves fastening the doors to the wall, insert an additional profile and fix the guide using an anchor designed to work with drywall. In other cases, use dowels.
Step back from the top edge of 1 cm and fasten the product. At this stage, you also need to mount the locks along with the handles.
If it’s not about the cabinet, but simply about the partition door, the carriages are pre-wound up in profile, equipped with a special opening for this. Installation of sliding doors consists in joining the brackets that hold the doors and the anchors coming out of the carriage.
The limiters may be plugs or special studs. Pay attention to the device of the limiters - ideally, stops should be built in them from elastic and pliable plastic or rubber. Such devices are wear-resistant and will remove excess sound when opening compartment doors.
As a limiting component, you can use a simple wooden block on which there is the desired finish. It is also recommended to use the profile that comes with the rest of the fittings. Installation is carried out in the vertical direction, which will facilitate the procedure. It is in the profile that the reciprocal part of the closing mechanism of the door leaf locking device should be installed.
Among the types of different doors, sliding doors stand out. Recently, they have become much more popular than before and for certain reasons.
The fact is that at first, when this design only appeared on the market, it did not look very presentable. Thin partitions, more like a screen than a door, which were constantly stuck in the skids caused only irritation and were not often used when building the house. This is the main reason that so far the installation of such doors often causes a negative reaction.
In addition, there is a myth about a difficult installation, a complicated installation workflow, and this also plays against, because most try to deal with repair problems on their own without resorting to the help of a master, without calling specialists to their homes for an additional fee. In the article we will refute these myths.
First of all, it must be said that the design of the sliding door is constantly changing. Each new model is more perfect than the old, but a plus to this is a number of additional advantages:
Of course, there are also disadvantages:
Doors are designed in such a way that cracks even with the highest quality installation will still remain. Therefore, there will be no isolation from sounds and the penetration of cold air.
The cost of such a door is higher than the usual
Incorrect installation or poor-quality sash mechanism can lead to uneven movement in the skids, and this leads to jamming of the entire door.
It is important to think in advance that there should be free space on the side into which the door will move. When a sliding door is installed, it will be possible to deliver large-sized furniture only if an additional “pocket” is installed.
If this is not done, it will be possible to install the cabinet at a distance of at least 100 mm, which means it reduces the space. If you avoid this and install a secret "pocket", the wall can not be used for the installation of lamps, decorative elements and sockets. Here you have to choose.
A niche can hide problems from the naked eye - inside the rollers can skew and the door will simply jam.

There are enough pros and cons, so before deciding to install such a design, you should carefully consider everything, weigh all the pros and cons.
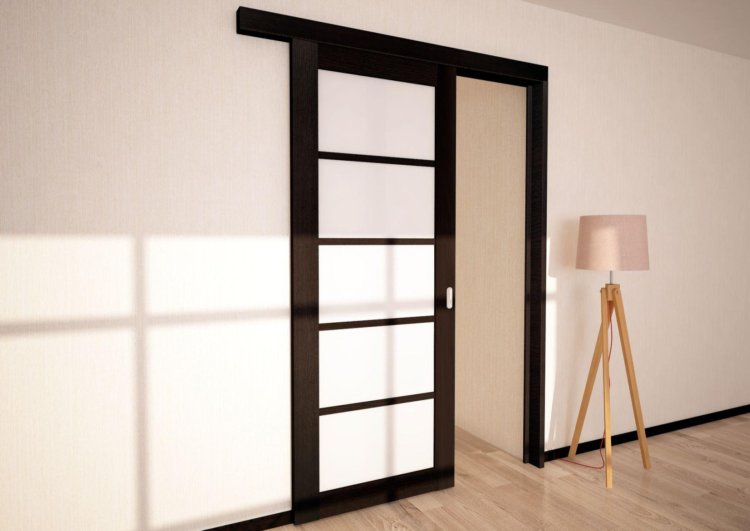
Single leaf
Great for a small room. They are as compact as possible and in a small space they will not take away a single extra centimeter. When opening, the door slides sideways, and does not clutter up a place outside or inside. You can mount them to the ceiling and to the wall
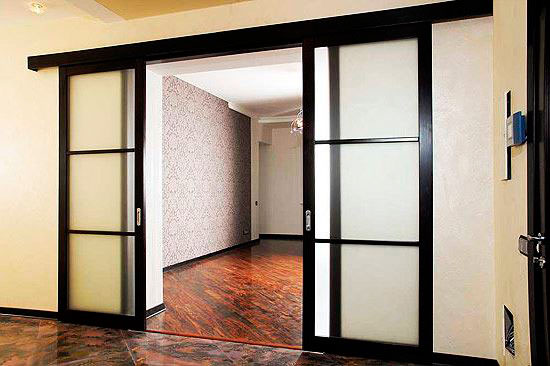
With two wings
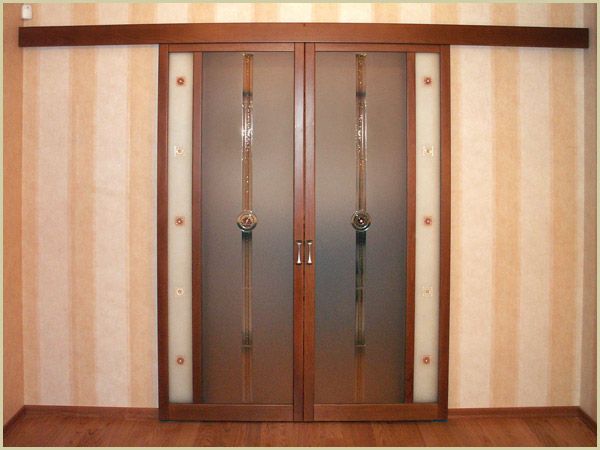
Two-part doors are perfect for a wide opening. Now it is not only economical and functional, but a fashionable element of the interior. This design will look good in a large, dimensional room. The difference here is that instead of a solid structure, you get two halves, one of which can be fixed in a stationary state and use the other.
Before proceeding with the installation, you need to understand how the design works and how the mechanism works.
The process itself is not as complicated as it might seem. Reliability and quality will entirely depend on how carefully you carry out the installation, which means that you need to carefully calculate everything and make measurements.
Decide on the type of door that you will install: double or single. Further, all sliding structures are divided into two categories - which are mounted on the wall and visible, which move along the wall.

Types of mechanisms also differ among themselves and are divided into three groups:
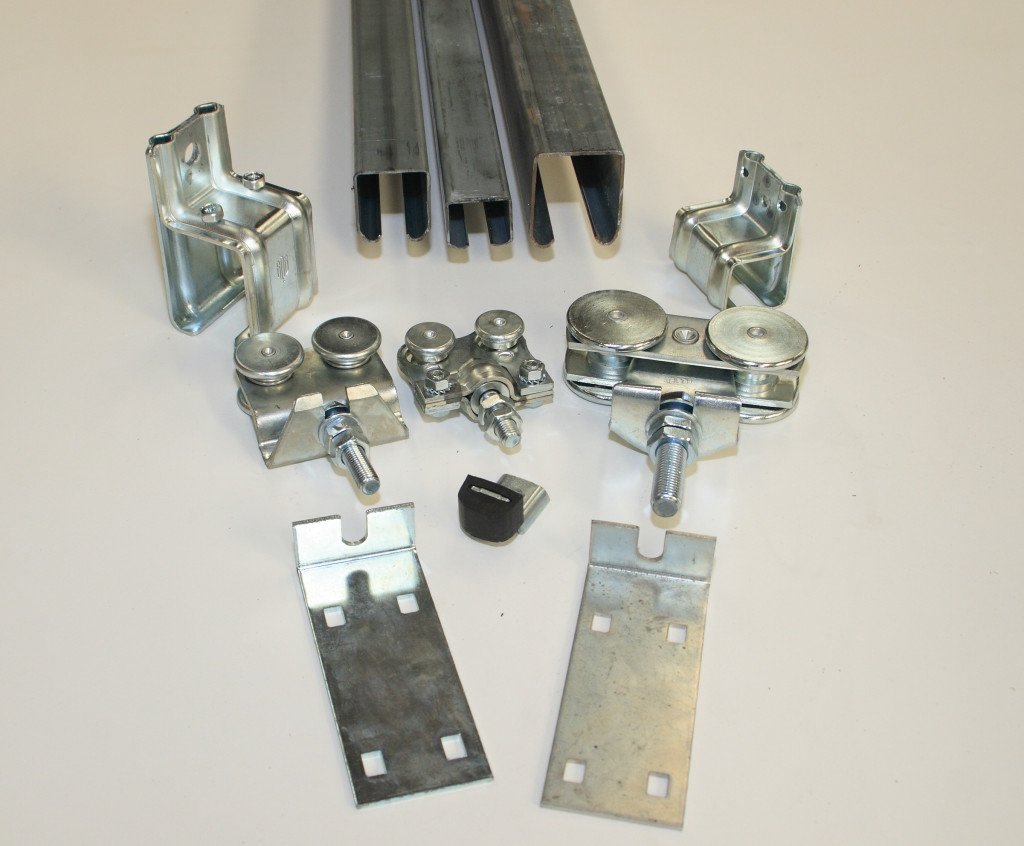
The system of such doors consists of several parts:

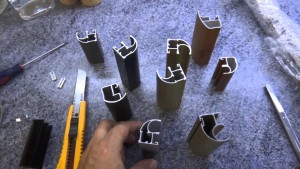
There are only four options for door frames:
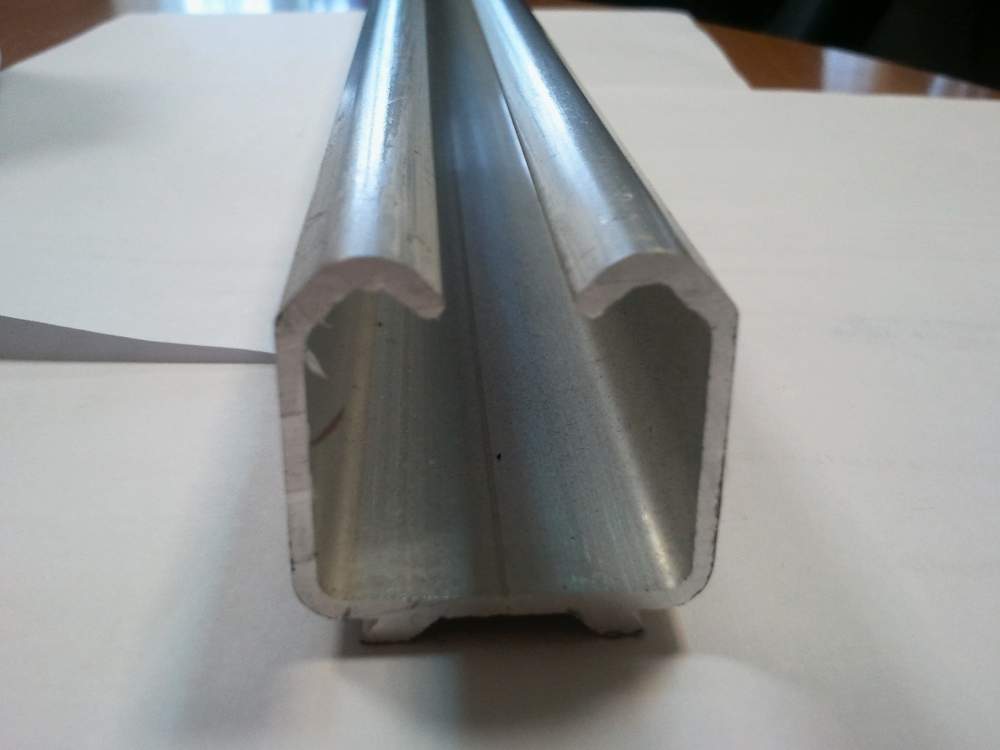
The door is moved apart by roller carriages, one or two, which are just the fastening of the entire canvas. Guide vector made of aluminum. The rollers are made of polymeric materials that are extremely resistant to various kinds of damage and slowly wear out. The rotation of the rollers occurs with the help of bearings, they also provide ease of movement of the carriage.
More details of the mechanism can be seen in the video on the installation of do-it-yourself sliding interior sliding doors:
At this stage, we want to warn you: do not buy a door leaf made of solid wood, if you plan to install a sliding structure - heavy doors can damage the entire mechanism.
Before you begin, read the entire manual from the beginning to the end, then you did not have any unforeseen situations and the need to urgently redo something. And in order to be ready for work you need to stock up on a tool. What will we need in the process, what will we use?

What materials will be needed for decoration?
If you bought a ready-made package, the installation is greatly simplified and it certainly won’t take much time and doesn’t take any power, because the hardware provided by the manufacturer is already in the kit.
But if you want to prove yourself and create a sliding door for your projects, we will pick up the equipment for longer and you will have to learn from our mistakes. But we will try to protect you from mistakes. If you follow the instructions that we created, you will most likely be able to get around many sharp corners and do the job efficiently and quickly.
We begin the installation from the opening. We need to measure the height in three places: the left and right edges, in the center, the width is also measured at three points - top, center and bottom. If you have a desire to decoratively frame the opening, you need to measure the minimum and maximum wall thickness, measurements are made in the corners too, not only on the sides.
Instruction:
The first thing to do is get rid of old door. We remove not only herself, but also everything that will hinder us when working: hinges, platbands and, of course, the door frame. Here is such a moment: if the box does not interfere with the installation of a new entrance, it can be left, but it rarely happens, so it’s better to immediately get rid of the unnecessary part.

Carefully process the edges to which the box was attached, most likely they look untidy after installation. Our task is to put them in order and make them perfectly smooth, for this we strongly recommend using the level. The opening should have absolutely clear dimensions and edges. Nowhere should there be excess brick or sticking out drywall.
The bottom surface of the opening and the floor should be parallel to each other and absolutely horizontal, the error can be a maximum of 5 mm. With a plumb line, you need to check the side parts, and they can also have a deviation of not more than 5 mm. Ideally, the walls should be flat, then the doors will fit snugly.

We proceed directly to the installation of the box. We will align with the help of wedges, and to adjust the floor, these wedges need to be moved or sunk. Thus, relative to the floor and walls, you align the position of the doorway. After making sure that everything is level, we fix the construction with screws - work with a screwdriver very carefully, the slightest shift to the side can damage the surface.
When the door frame is ready, you need to attach the door itself to it and mark where it is located on the upper edge. Then we do the same thing only now we insert the door into the opening. This is a necessary action, because the floor may not be perfectly even - so you check the horizontal and if everything is correct, measure 70 mm up from the line. This is the place where we will install the rail, we fix the wooden beam here with self-tapping screws.

We fix the rail in the lower surface of the beam, at first not too tightly. We check whether it is installed evenly and whether there is enough space between the door and the wall, then we fix it permanently.
This stage is quite simple - you need to install carriages with rollers. The main thing to consider is that the tips should protrude slightly beyond the boundaries of the holes. We insert each into the prepared groove of the rail and check how freely the movement occurs. At the edges, it is necessary to install stops so that the rubber shock absorbers are directed inward.
We retreat 15 mm from the edge of the sash and drill 2 holes with a diameter of 7 mm and a depth of 20 mm. Between these grooves we make a groove, it will be needed for the lower guide.

The groove should be 18 mm deep and 2-3 mm wider than the lower guide. It is difficult to make an even hole yourself, so just at this stage you will need an electric drill.
Attach to the carriages carefully and precisely in the middle, retreating at least two mm from the sides of the sash. It is also important to consider that the round cutouts on the brackets are turned away towards the wall.
We put the door to the rail and connect the right carriage with a hole in the bracket on the same side. Insert the tip of the bolt into the hole of the fastener for the adjustment nut. Brackets fasten with bolts.
Now we install the lower part, it is not difficult to do this - you just need to slightly raise the door itself and insert it into the recess.
We fasten the lower guide with screws to the floor, now it is fixed, double-check that everything is installed exactly and there is no gap between the door and the floor. If there are errors, tighten the screws more tightly.
So, the sliding door is installed, to fix the information, we advise you to watch a video on how to install the sliding doors with your own hands.
When the work is done. you can do decoration, doors of this type themselves decorate the space, and if you add a certain style to it, they will become a bright and stylish spot.
Having decided to realize some unique interior in an apartment or a house with the help of proven and well-known to all elements, be sure to think about creating your own interior door coupe. Using such doors for interior design, you can better use the space, dividing it into zones and visually preserving a holistic view. It’s easy to assemble the compartment doors with your own hands, but for this you need to understand the process and be able to work with the tool.
Before you take on the creation and installation of interior doors, you should find out the advantages and disadvantages of these structures. From what tasks you want to solve by planning your interior, it will depend on whether you need self-made compartment doors or not.
Of the advantages of sliding interior doors that you can see in the photo, there are:

The doors of the compartment also have some disadvantages, which can not be ignored:
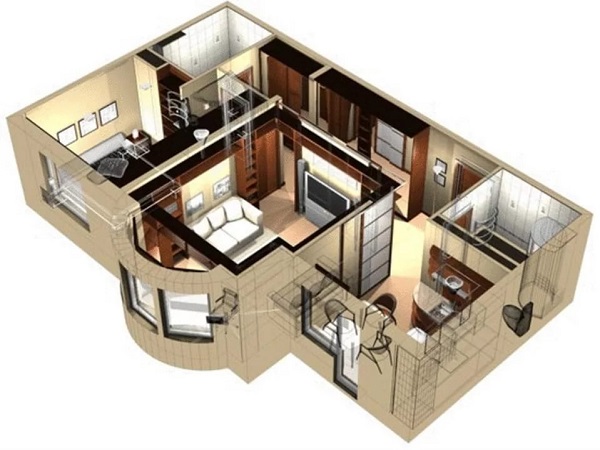
Convenience and functionality of the interior doors of the compartment provides the opportunity to implement various design solutions, both in small rooms and on large objects. Such doors provide the ability to transform the interior space and organically fit into the interior.
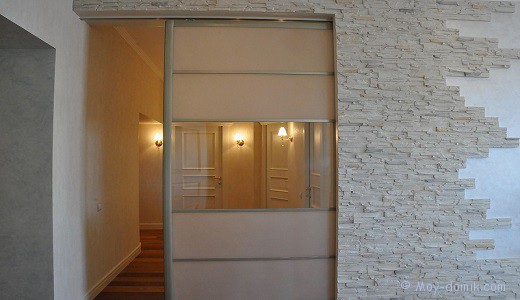
The most popular option is the installation of a sliding compartment door between two residential areas. Using a double-leaf type of door, the room can be successfully zoned, while maintaining its visual integrity. When the doors are closed, the rooms are divided into two, and when you open the door you get one common space with a sufficiently large area. For example, by installing sliding doors, you can separate the office, which, when the door is opened, will become part of the common room for business negotiations.
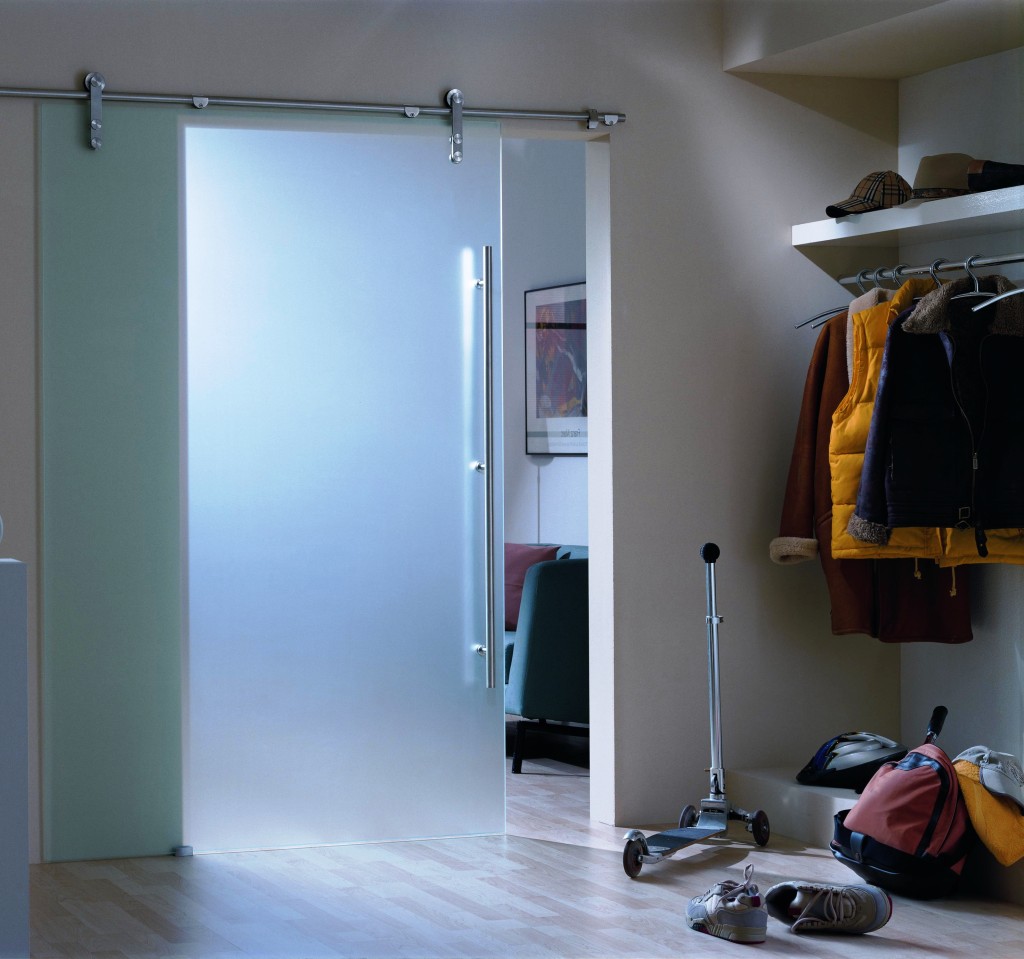
Another option for using coupe doors, as in the photo, is the installation of the structure between the living room and the balcony, loggia or terrace. In this case, experts advise choosing a glass door coupe. Such products let in a stream of light, and in the warm season they can be opened, expanding the room.

Sliding doors are often installed in technical rooms. For example, through the installation of compartment doors, you can separate the pantry or utility room, while maintaining precious space.
Radial doors of the compartment are the most difficult to install and are especially expensive. This is due to the features of their manufacture, since the door leaf and all the guides have a curved shape. All this has a very impressive appearance.
Having chosen the type of sliding door, and having bought everything necessary for its installation, you can get to work. We will consider the process of installing a door with our own hands on the example of a sliding door consisting of one leaf. This is the most simple and popular design that is easy to install. We also look at some other key points inherent in other types of sliding type doors.
Installation of the compartment door begins with marking for the guides. There are two ways to do this. One involves traditional roulette measurements. It is necessary to determine the height of the web from the floor and add 15-20 mm for the gap between the door and the floor. To the height we add the height of the assembled roller mechanism and the guide. After that, you need to install 2-3 marks on the wall and connect them with a line.
The second option is similar to the first with the difference that the door leaf must be attached to the opening, and marks must be put along its upper edge, to which the height of the guide and the roller system will be added subsequently.
On the planned line, you must install the guide so that the bar is below the line. Depending on the type of guide, it can be mounted in different ways. Some products are attached to the wall with dowels, while others are attached to brackets or wooden blocks.
The guide itself should be removed from the wall so that the door does not cling to the platbands or the opening when opening it. You need to carefully select the guides and know how to install them. For sliding doors and other designs of sliding doors that take up space from the ceiling to the floor, the rails are attached directly to these surfaces.
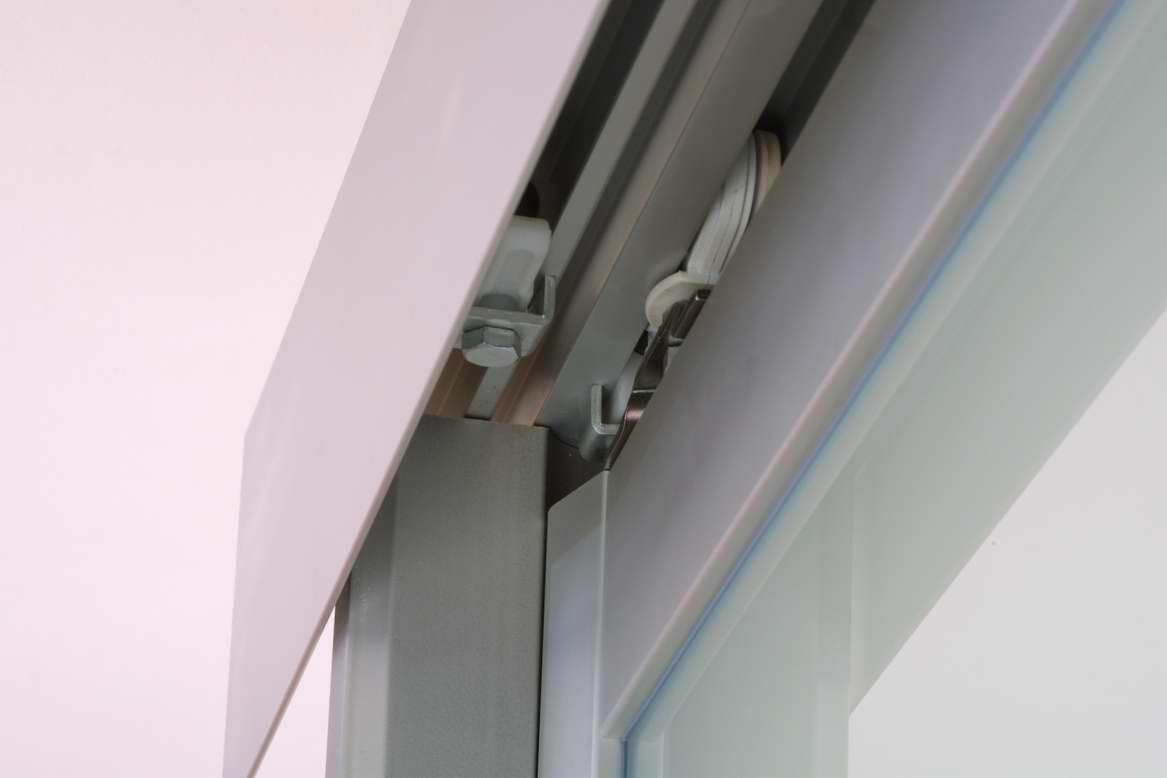
After fixing the guide, insert the mounting bolt into the roller carriage and insert the entire roller mechanism inside. In the case of a conventional single-leaf door, only two rollers are enough, and when installing the so-called "accordion" or cascading faiths, you need to buy rollers for each wing in advance.
Above the door leaf, it is necessary to install brackets for roller carriages, which are mounted 3-5 mm from the edge of the door.
After installing the rollers and the fastening system for them, you need to insert the door leaf of the compartment door with your own hands in its place. To do this, you need to lift the door and screw the bolts into the brackets in the upper part. How this is done, look at the video at the end of the article or pay attention to the attached photos. To carry out this work, it is better to get a partner who will lift the door and hold it while you screw in the bolts. After that, you should check the horizontal position of the installed door and trim it, if necessary.
To hide the slopes and doorway, you can buy special platbands and extensions, as in the photo. The roller mechanism itself is usually hidden behind a decorative strip, which you can see on the attached video.
The last step is to install all the door hardware.
Do-it-yourself installation of a compartment door with a special niche in the wall requires more diligence. To do this, you need to create a special partition from plasterboard sheets, into which the door leaf will be retracted. As for doors with a guide on the floor, as in the photo and in the video, for the guide, you can hollow out the groove using a punch. In all other respects, installing a compartment door is quite simple.
From internal pipelines, drains are transported by external ...
Each apartment, like every family, has its own characteristics, so it is difficult ...