


What winter holidays would be complete without a mountain of tangerines and a couple of juicy...

A feeder is not only a great way to feed our bird friends. If you approach the issue of making it creatively, you can create a real one. We offer a selection of ideas that will tell you how to make a bird feeder with your own hands. And master classes from the editors of HomeMyHome.ru will help you learn the intricacies of manufacturing and reveal the secrets of constructing drawings.
Depending on what goals you pursue when making a feeder, the following types of its design differ.

Making such a “bowl” is not difficult, especially if you have a regular clothesline and clothesline on hand. One of the disadvantages is that in strong winds, such structures tip over, and all the food ends up on the ground.

1 of 6


Inspired by ideas for creating simple feeders? If yes, then our small master classes are for you.
Related article:
How to make a birdhouse yourself, how to decorate it and install it correctly, photo examples of creative houses - read in our publication.
As we have already seen, feeders can be made from completely different materials - literally, everything that is at hand. It's a little more difficult to work with wood. But nothing is impossible, the main thing is that there is a desire. Let's look at different options for bird feeders.
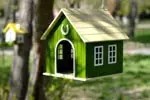
We offer step-by-step instructions on how to make a beautiful bird feeder house yourself, as in the photo below.

The main material is small logs, which can be cut from ordinary cuttings for or rakes. Fast, cheap and original. All other parts are also made of wood. To bring such a masterpiece to life, in addition to raw materials, you will need a special wood drilling machine and. It will be possible to do it without them, but it’s not a fact that it will turn out just as neatly and beautifully.
| Illustration | Description |
 | We cut logs 30 cm long from the cuttings. You should get 36 pieces in total. 24 pieces - for the walls, and parts from the logs for the pediment. Remains are spare parts in case of damage to the main elements. |
 | We are preparing a machine with a wood crown of a suitable diameter to make recesses in the logs that will serve as fastenings for the future feeder. |
 | To ensure that the parts are similar and that the fastening recesses fit each other perfectly, it is best to make paired holes. To do this, we fasten the two blanks together with tape on both sides for better fixation and measure 3 cm from both ends. |
 | We make holes on the machine in the logs secured to each other at both ends. |
 | To assemble the house you will also need round wooden sticks. Sushi chopsticks are ideal, but not flat, but round. In accordance with their diameter, we make a hole in each recess of the log. And we begin to assemble the walls of the house. |
 | When you are finished with the construction, make sure that all the walls are even and glue the logs together. |
 | We cut out a template for the future roof from plywood. The size and slope depend on the design of the resulting house frame. |
 | Using the template, we cut the logs obliquely on both sides. We make a hole in the middle for the stick and glue the resulting structure. On the front side, if desired, we make a hole in the “attic”. Also, to give the structure rigidity, we put in a transverse beam and glue it. |
 | The roof can be made from any available sheet material. In our case, we used moisture-resistant plywood. Small parts were cut out to fit the resulting house. |
 | Let's start decorating the house - doors, canopy, attic. All this is done by hand from leftover plywood. In handicraft stores you can purchase various decorative items, such as a door lock. In our case, the door is simply glued to the wall. |
 | We make a pallet for the house from ordinary ones. |
 | It is best not to twist them together, but to glue them together, as shown in the photo. |
 | We paint the house, make sides on the pallet so that the food does not spill out, and you can hang the resulting food in the garden. |
If you have any questions, you can find answers to them in the video provided.
To make a feeder out of plywood, you will need special tools to work with it, such as a jigsaw, wood glue, tape measure, pencil, construction angle and glue. Let's make a small hopper-type feeder, approximately as in the drawing below. They simplified it a little by placing only two walls, which will be held together to form a triangle shape.

All work takes place in several stages. Use a jigsaw to cut out the necessary parts. Their sizes and shapes are shown in the photo below.

We attach small blocks along the edges of the bottom so that their total height is approximately 5-7 cm.
Attention! We mount the blocks along the 27 cm long side so that there are small indentations along the edges - no more than 7 mm.

To the side where the indents are made, we mount the side walls. To make the entire structure stable, we reinforce it along the connection of the side parts with a block.


Treat the resulting feeder with impregnation so that the plywood does not deteriorate as long as possible under the influence of precipitation and temperature changes.
A bird feeder made from a cardboard box is an option for those who want to do everything as quickly and simply as possible.


All that remains is to choose a stronger box, cut a hole in it for the birds, work out the mounting method - and the design is ready. It's a pity that it will lose its shape very quickly. But this is a fixable matter and costs practically nothing.
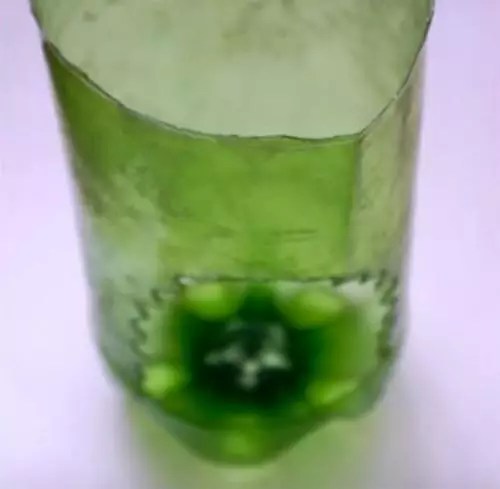
Plastic bottles are one of the most common recycled materials, suitable for making all sorts of useful things with your own hands. Feeders are also no exception. We offer step-by-step instructions for making a cute and durable feeder. For this you will need:

| Illustration | Description |
 | We cut out the bottoms of three two-liter bottles. To make it look more interesting, you can cut out the edges with petals and burn them with a lighter, getting a wavy edge. |
 | We make a hole in the middle of the bottoms and string them on a wire. |
 | We cut off the top of a one and a half liter bottle and, like the bottoms, we process the edges with a lighter. |
 | We string the neck onto a wire and paint the resulting structure with paint. |
 | Use a swab to paint the edges with a contrasting color. |
 | We cut out the bottom part of a one and a half liter bottle, cut a hole and also singe it with a lighter. |
 | We connect the lower and upper parts with a glue gun. |
 | We cut out the weed from the remains of the bottles. And use a glue gun to attach them to the bottom. |
The bird feeder is ready. We pour more food there and watch the growth of the bird population in your garden.
Birds are our smaller friends who delight us with their chirping and singing. And any garden in the presence of birds seems to come to life, filled with new life. Besides Birds help protect summer cottages from attacks by various insects in summer.. And in winter, when they have almost no food, man’s task is to help the birds survive the frosts by feeding them. A good attitude towards birds will pay off handsomely. for birds you can do it yourself quickly, without unnecessary manipulations, it will not only become a source of food for birds, but will also be able to decorate any area.
Many people made feeders for winged birds while studying at school, and some, together with their parents, managed to make more than one feeder while still attending kindergarten. At that time, tasks for making feeders were given at school with the goal of instilling in the child a desire to work and take care of our little brothers.

Now, in most cases, feeders are located in house areas with the aim of luring birds to live permanently in the garden or to take care of them in the winter. There are a great many variations of feeders, but we should not forget that if a person is pursuing a good goal, he must ensure that the feeder is not just beautiful, but comfortable and attractive to birds.

So what should it be like so that birds from all over the area will flock to peck at delicious delicacies?


Advice! In order to make the structure heavier and protect it from swaying in the wind, you can place pebbles in it, but so that they do not end up in the food.

You can make a bird eating area yourself, but stores now sell ready-made designs and products that you can simply purchase and hang in your garden or outside your window. Of course, this saves a lot of time, but it’s better to make the feeder yourself or order it from craftsmen. Only in this case can you be sure that the feeder is made of materials that are safe for flying inhabitants of nature and will perform its function correctly.

On a note! Undoubtedly, you need to pay attention to the design of the feeder, but if it is not just a decorative decoration for the garden, then, first of all, you should pay attention to its functionality.

It is also important to understand that a good feeder, but made in production or by craftsmen, will cost a lot of money. So it’s worth thinking about what to do - save money and do everything yourself, or spend money and buy a ready-made option.

Provided that in fact the feeding station can be made quite quickly and simply, the DIY option remains the best. The main thing is to decide and decide what and how to make the feeder from, how and where it will hang, and also take into account the availability of skills in making various products. You shouldn’t take on a complex project without proper experience; it’s easier to choose the simplest option. Fortunately, there are many types of feeders.
Table. Types of feeders.
| View | Description |
|---|---|
| This category includes all types of feeders that are fixed in the right place by hanging. Such a design will most likely require weighting with something to prevent it from swaying in the wind and when birds land. This category also includes simple feeders with lard or grains molded into one lump. They are hung from trees with string. |
| The most familiar, familiar from childhood and widespread option. The roof of this product is made in the shape of a house; it protects the food from getting wet. It is best if the roof is installed on thin blocks so that there is as much free space for birds as possible. |
| Such a feeder is a board with sides, attached to something or suspended. It does not have a roof, and therefore the food will constantly get wet or be covered with snow. But this is the simplest option. |
| This feeder is a small container-hopper containing food inside. Birds, pecking the food that has spilled onto the tray, make room for new food, which gradually pours out of the bunker. Also, in some cases, birds can peck grain directly from the bin. The main advantage is good protection of feed from water and wind. |
| Feeder designed for shellers. Often sold in stores. It needs to be periodically cleaned of debris, as birds will leave behind large quantities of it and food. |

On a note! The structure can be made simply from food, combining grains into a single lump using various nutrients and hanging such a “gingerbread” in a visible place. Suitable for small birds that will peck grain from the feeder by clinging to it with their claws.

You can make your own feeder from a variety of objects and materials, from an ordinary board to a plastic bottle or even a Tetra Pak box. Each material has its own advantages and disadvantages, and you need to choose what the food supply will be made from based on the presence of certain skills in working with various tools, the availability of free time, funds, as well as the goals of creating a place for eating.

The best option for creating a platform for feeding birds was and remains natural, untreated wood. This design will be closest to nature, and its neutral color and smell will not scare away birds from feeding. It is ideal if the natural bark is preserved on the boards. So when choosing a material, you can choose cuts from birch, pine, etc. You can even make a feeder from branches!

Wooden feeder is the best option
But in order to make a wooden feeder, even the simplest one, you will need certain skills and tools for working with wood.
Advice! You should not decorate a wooden feeder with various bright objects, but it can be decorated with natural materials, for example, by camouflaging the roof with twigs, pine cones, and leaves.

Let's look at how you can make the simplest feeder from wooden materials. To do this, you need to buy wooden blocks, a small piece of fiberboard, a furniture stapler, a saw, drawing supplies and a tape measure.
Step 1. You need to cut a square or rectangle from a sheet of fiberboard. You should apply a pattern of a square or rectangle of the appropriate size onto a sheet of fiberboard, and then use a saw to cut off the excess.


Step 2. Now you need to make the sides for the pallet. You need to cut two pieces of the same length from the block, equal to the side of the square or the long side of the rectangle, as well as two shorter pieces, which will be equal to the width of the square or the narrow side of the rectangle minus the thickness of the block.

Step 3. The sides need to be attached to the bottom of the feeder, which was previously made of fiberboard. The easiest way to do this is with a stapler.

Step 4. Now you need to make 4 supports for the roof of the feeder, all from the same block. They must be the same height.


Step 6. The upper parts of the supports standing on one side must be connected by crossbars cut from the same block. You should also make cuts on them at an angle of 45 degrees.

Step 7 Next it is manufactured. It is required to connect two sheets of fiberboard at an angle of 90 degrees. The connection is made using a small “ridge” bar with a length equal to the length of the slope. It is worth remembering that the roof should hang slightly over the tray of the feeder, which means that the slopes should be made taking this factor into account.

Step 8 Next, the roof needs to be fixed to its racks using the same stapler or nails. The junction of two slopes can be glued using some material that does not allow water to pass through. The feeder is ready. If desired, you can steal it with pine cones and branches.
Advice! When fixing the sides at the bottom of the feeder, they can be additionally coated with PVA glue to ensure connection not only due to the stapler staples, but also due to the glue.

Feeders with sides are the favorite of shelling birds, but for the rest, you can make a feeder without sides. The main thing is that the side is not too high.
Similar structures can be made from plywood, refusing to use fiberboard. In this case, the feeder will be more reliable and durable.
These are very simple feeders, they can be easily and simply made in just a few minutes. They are a delicacy placed on a ribbon or in a case and hung on a tree. Often, using this principle, pieces of lard for tits are fixed on trees. You can also make balls from seeds. You can use peanut butter or suet to bind the grains together. And such feeders just need to be fixed on the tape somewhere in a place visible to the birds. To attract attention, you can try tying a sprig of rowan to such a feeder. You need to form the balls outside so that they immediately harden in the cold.

Advice! It is best to make pendants in the shape of a ball, and not in some beautiful and exotic shape. The ball is the most convenient option for birds.
Let's see how you can make a simple structure for placing lard, the manufacture of which will require twine, wire and an ordinary hoop - an accessory for embroiderers.
Step 1. You need to buy regular plastic hoops in the store. They need to be separated into two halves, but in the lock area the hoops should remain connected.


Step 2. In the lock area, you need to wrap the hoop with wire on both sides.


Step 3. On the other hand, where the hoop is separated, you need to make a wire jumper and wrap it with a “tail” from the wire to approximately the middle.

Step 4. The remaining wire needs to be twisted and formed into a hook at an angle of 90 degrees, which is directed inside the hoop. Lard will be placed on it.


Step 6. After this, the hoop and wire need to be wrapped with regular twine. The feeder is ready. All you have to do is place it in the right place in the garden and put a treat for the birds on the pin.


Of course, you can simply cut a hole in the side of a plastic bottle and hang it on a tree, filling it with grain. But you can get creative and make the feeder a little more complicated. To do this, you will need flower trays of different diameters and a plastic bottle of approximately 1.5 liters. A strong rope will also come in handy.
Step 1. In one of the pallets (which is smaller) you need to make a hole of the same diameter as the neck of the bottle. You can cut it either with a knife or with a special crown placed on a drill.


Step 2. Next, you need to remove the cap from the plastic bottle and screw the bottle itself into the tray with its neck, and screw the cap onto the neck from below. But for now, the structure can be temporarily dismantled. A small hole should be cut in the side of the bottle so that the food can pour out of it and be accessible to the birds.


Step 3. You need to cut off the bottom of the bottle using a sharp knife.

Step 4. Now on the pallet - both on the first and on the second - you need to mark and drill holes for the rope. First you need to make holes on the smaller one, and then, placing it on the larger one, mark it and also drill holes.


Step 5. The final assembly of the structure is underway. The bottle must be screwed to the bottom tray.

Step 6. You need to cut six pieces of rope of the same length. It is better to take a rope that is tight and thick enough. You can also use a synthetic version.

Step 7 Now you need to tie a knot on each rope at the same distance from the edge.

Step 8 You need to thread the ropes through the holes on the small pallet so that the short tails of the ropes are at the bottom.

Step 9 The second pallet will become an improvised roof for the feeder. Now you need to thread the ropes through the holes of the second pallet.

Step 10 The ropes need to be well tensioned. The result should be the same design as in the figure.

Step 11 Now you need to form “tails” from the bottom and top of the remnants of the rope. Don't forget to make a hanging loop on the top side.

Step 12 All that remains is to fill the feeder with seeds and fix it on tree branches using a hanging loop.

You can make bird feeders from any materials. You can whip up a feeding place even from cardboard, but such a feeder will not last long. If you want to decorate your garden with beautiful and durable feeding places for birds, then it is better to spend your time and make a wooden feeder.
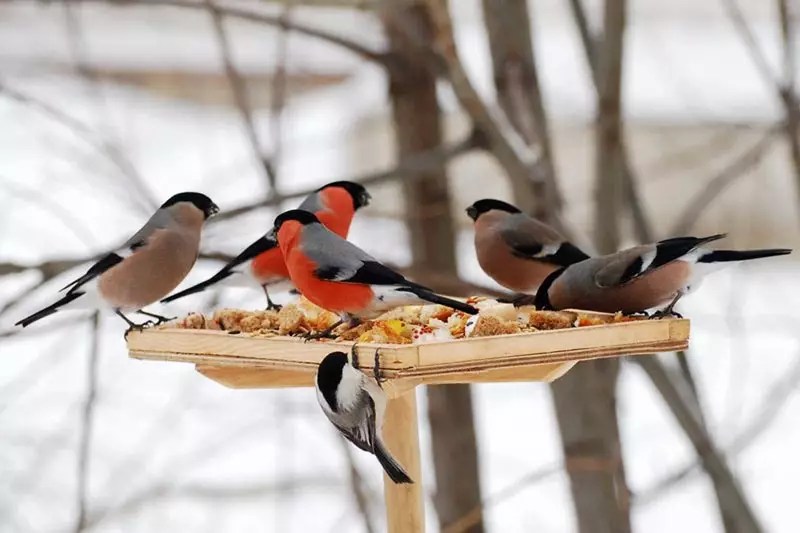
Scientists now clearly agree that there are no harmful birds at all. Even from such arrogant rogues as hooded crows and cormorants, as it turned out, there is still much more benefit than harm. Documented attacks on climbers by bearded eagle and lamb's eagle have been caused by climbers approaching their nests; a brood is a brood, it needs to be protected. The second thing that experts are unanimous about is that in winter a bird feeder is needed in residential areas. Many of the small and most useful of them do not make regular flights, but undertake feeding migrations in winter. Near human habitation, food areas remain plentiful longer than in the wild, and when real cold comes with lack of food, there is no longer enough strength to fly: there will be nothing to eat along the way.
If you describe the bird in one word, it would be movement. There are no and cannot be birds that hibernate or otherwise save their own energy resources when unfavorable conditions occur: the body’s adaptation to flight requires a high metabolic rate. If the bird is hungry and/or cold, it becomes more and more anxious, looking for something nutritious to peck. She does not weaken at the same time until she falls, numb, at the feet of a passerby. Take it to the veterinarians - maybe they will come out. But it’s still better, after spending a little labor, to build a feeder for the winter with your own hands; Almost any household scraps or scraps will work for this.

Gardeners, gardeners and summer residents who visit their plots in winter will benefit greatly from this: even granivorous birds, sparrows, for example, feed their brood with insects. In the spring, just in time for the chicks to hatch, pests wake up and become active. If you make a bird feeder in the fall and feed their beneficial community on the site, see Fig., you will need to spend much less on plant protection products. Bird feeders, let the reader know, can be made attractive for some species of birds and not very convenient for others, from which there is less benefit. How exactly – this is the focus of this article. Not to the detriment, hopefully, of other aspects of the issue, such as materials that are cheaper or completely free, design, etc.
Let us first imagine the design of a feeding trough. Let’s just imagine it, because there is no need to draw it up on paper and run around with it in offices with serious uncles and caustic aunts. But, firstly, you need to know where and for what purpose there will be a winter bird canteen: in the city, outside the city, for temporary feeding in the very cold or for permanently attracting useful helpers. Secondly, who will we feed? Who should we let go ahead, and who should we unobtrusively ask to wait? For example, if others have a bad time, sparrows, crows and pigeons will certainly kill each other. They have long become accustomed to humans and will find something to profit from in the most severe food shortage, but in a dacha or on an estate other birds will be of more use.
Having decided on the “range of desired clientele,” we will choose the design of the feeder. Birds not only do not eat all the same things, they also take food in different ways: from the ground or an extensive solid level support, from thick branches, twigs and tree trunks, clinging to them with their claws, from swaying thin branches and blades of grass; The design of the feeder should provide advantageous access to feed to desired guests. We do not mean birds that take food in the summer; they are all migratory. After this, we will select the material for the feeder, preferably free, and from it we will see how to make it. This is approximately the WPR (work execution plan).
As already said, sparrows, pigeons and, especially, crows need to be discouraged from the feeder. What kind of birds are desirable on it? Of course, wintering in this area. They can be divided into 2 categories: the first are nomadic. They do not have specific wintering places; Where there is enough food, it is good there even in winter. They will be the most frequent guests at the feeder. The second ones are obligate, i.e. necessarily wintering in their permanent feeding stations (areas). Only extreme circumstances can drive them to the feeder: a particularly harsh winter, etc. In the central zone of the Russian Federation and in the south of Siberia, in addition to the ubiquitous persistent sparrows, the birds shown in the figure fly to the feeder; a list with names is below it.

The first trinity are obligately wintering insectivorous birds. Nuthatch and pika extract insects from bark cracks and wood passages with beaks specially adapted for this purpose. Woodpeckers, as you know, gouge their way to prey. At the feeder, you can almost certainly expect only the Lesser Spotted Woodpecker: it has already, one might say, completely gotten along with people, and with a lack of animal food, it is able to feed on hard seeds. Other woodpeckers (black or yellow, great spotted, green, golden or Syrian) will never fly to the feeder, and if a nuthatch and/or pika appear there, it means that the birds are generally unwell this winter, and high-calorie food with animal fats should be given and proteins; which one exactly – more on that later. All these birds take food by clinging to a support.
Crossbills also overwinter obligately, but feed by husking the seeds of conifers from cones, these are the most specialized of shelling birds, their beak has turned into something like tongs. Crossbills even hatch chicks in the middle of winter, when there are plenty of puffed up cones. In general, they don’t care about taking food from a branch or clinging to a support, as long as it’s not from the ground. Jays and nutcrackers are also shellers, but not as skilled. By the way, Kedrovka can be seen not only in the north; sometimes it undertakes long-distance feeding migrations, during which it reaches Spain.
All shelling birds are very useful for the forest, because... contribute to the spread of trees: the crossbill loses a lot of them, restoring the existing forest, and the jay and nutcracker create storehouses of seeds, which are not fully used, or are even completely forgotten. This is how the forest spreads. Forestry specialists are confident that without nutcrackers, maintaining the supply of Siberian pine (Siberian cedar) would be impossible. In addition, jays and nutcrackers destroy a lot of wintering harmful insects.
It is possible to attract shelling birds to your site, but they need a special type of homemade feeders, see below. Shelling feeders are also sold ready-made, but there is nothing in them that you cannot make yourself. They will also be suitable for crossbills in case of cone harvest failure, however, after feeding, they will fly back into the forest.
Note: Just in case, let us also remind you: insectivorous forest birds and shellers fly to people for food in the most extreme cases, and then they must be offered nutritious, high-calorie food. Along the way, they will thoroughly clean up the garden and vegetable garden from overwintering harmful little things.
The bullfinch, waxwing, grosbeak and goldfinch are considered primarily frugivorous birds. There is no mistake here, we are not talking about flesh, but about juicy fruits and berries. Their seeds in the digestive tract of these birds, as a rule, are not digested, but the germination of seeds after such treatment increases. That is, frugivorous birds contribute to the spread of berry bushes and trees. However, frugivorous birds feed their chicks with insects, and while/when there is no harvest, they themselves do not disdain them. Actually, frugivorous birds of middle latitudes can be considered avian omnivores, because. animal feed makes up a significant portion of their diet. The goldfinch can generally consume more insects than plant foods. In the extermination of wintering pests, they complement insectivores and shellers, because those, as a rule, do not take prey that is completely open and motionless, for example. pupae.
It is advisable to introduce frugivorous birds to the site, but with caution. A good bait would be pieces of soft, juicy plant food placed on the roof of the feeder: apple cores with seeds, pumpkin, cucumber. However, before you put bait, you need to take a closer look at those eating: if a grosbeak is seen among them, it is better to refuse baiting. In the spring, it pecks out swelling buds and in some places has become a real scourge of gardens and vegetable gardens. Later, the grosbeak more than compensates for the damage, destroying huge numbers of May beetles and cabbage caterpillars, but still there is no need to promote its excessive reproduction.
Note: Sometimes it is advised, as a winter vitamin supplement, to put twigs in the feeder that have been left in water at home until the buds swell. No need, just like any other seedlings, or even absolutely useful tits, can learn to “bear wood.” The best vitamin food for birds in winter is cores of apples and pears with seeds, fibrous core of pumpkin with seeds, bunches of viburnum, rowan, elderberry, dried rose hips, cherry (can be made from compote) and grape seeds. For more information about feed, see below.

Fruit-eating birds take food from the ground and clinging to a support, so the feeder for them can be anything other than a swinging suspension, see below. They are stronger and stronger than sparrows, but not so impudent, so they are not competitors for tits if there is enough food. Goldfinches are the most common species at the feeder; they are close to becoming obligately hibernating human symbionts. Here it is useful to remember Saint-Exupery: “We are responsible for those we have tamed.”
Siskins, buntings and greenfinches are granivorous birds. Their seedlings have nothing to fear from weeds: they prefer wild grass seeds. The chicks are fed insects. Food is taken from the ground and from a swaying twig/blade of grass. They are friendly with tits, but sparrows need to be kept away from their feeder: granivorous birds are small, not very strong and non-aggressive.
Note: The author is deeply convinced that the old song about the little siskin who drank vodka on the Fontanka was composed not only as a mockery of the cadets of one of the elite cadet corps who wore yellow and black uniforms. In nature, the siskin really has a somewhat drowsy and arrogant look, like that of a beginning heavy drinker who has just grabbed (snatched, grunted, missed, rolled, knocked over, knocked over, etc., etc.) a stopper or two, see fig. on right. That doesn’t stop him from being as careful and prudent as a bird.
Finally, a horde of tit birds who steal wheat only from the house that Jack built. In fact, insects are an indispensable and significant part of their diet, and of varying sizes. If the great and tufted tits are able to cope with locusts, then the long-tailed tit and chickadee are not averse to pecking at aphids and spider mites. The tits have gotten along quite well with people; there is no need to attract them, they will come on their own. In normal winters, feeding should be given with dry plant matter, and in severe frosts - highly nutritious, like other insectivores. Then, having become bored with the dry grass over the winter, the titmice will attack the pests in the spring, not allowing them to properly stretch their mandibles, and they will immediately have no time for seedlings with crops. And whoever survives this beak slaughter will no longer be able to cause significant damage to the crop. Tits can take food from the thinnest branches blown by the wind; they only have one evolutionary step left to learn how to take food from the summer. This makes it easier to create specialized tit canteens.
Sparrows are no less useful than other granivores, but they are daring, sneaky, and live in flocks. And an ordinary bird feeder, unlike crows and pigeons, is quite suitable in size for them. Sparrows take food mainly from the ground, but they are not afraid of branches. Therefore, they are able to eat other birds, when for them feeding is a matter of life and death, and the chirping scoundrels themselves, in the meantime, could hold out somehow. So it is advisable to arrange a winter bird feeder in such a way that sparrows fly to it only if the wind is really blowing in the crop.

Here you can use their caution and manner of avoiding danger. If you noticed, the sparrows run away, starting from a place steeply upward. Therefore, a feeder with low entrances (windows for birds to access the food) and a steep roof with large overhangs is unattractive for sparrows: in order to escape from there, you must first flutter to the side, and this is not sparrow-like. An “anti-sparrow” feeder can be made similar to a chicken feeder, diagram in Fig. Next we will consider other options.
When choosing the type of feeder, in addition to the species composition of the guests, you need to keep in mind the following:
Based on everything stated above, let’s see which winter bird feeders are better in which case. Their main types are shown in the figure:

1 – hanging feeder. Just food on a string or in a mesh case. A typical tit feeder in case of extreme cold. Among other birds, it can be visited by forest insectivores, except woodpeckers. “Antifreeze” food for tits – just a piece of unsalted lard, pos. 1 on next rice. A more nutritious option, also designed for shellers, is a ball of a mixture of seeds (see below), held together with congealed lard or peanut butter in a vegetable net, pos. 2. However, there is no need to cast the feed mass into plastic cups or beautiful shapes and freeze it (pos. 6,7), it is difficult for birds to cling and the calories from feeding may not compensate for the energy consumption to support themselves by fluttering their wings. The ball from the finished mass must be sculpted by hand in the cold; the fat hardens quickly, and the ball can be hung immediately.

A hanging feeder can be made for certain species of birds. For example, great tits readily peck at garlands of dried berries (especially rose hips) or peanut pods, pos. 3, 4. But blue tits love to ride on swings, and balls for them need to be hung on the thinnest and most elastic branches or even designed in an original way in the form of mobile sculptures, or mobiles, poses. 5. Great tits will also fly there, but they do not fight with blue tits.
For shelling birds, bullfinches and waxwings, hanging feeding from a cone will be good; For visibility, it’s a good idea to supplement it with a bunch of viburnum or rowan, pos. 1 to the following figure:

If there is no fertile cone, any disheveled one will do: it is doused with peanut butter (pos. 2), solid food is stuffed between the scales (pos. 3), and hanged. Bird lovers and animal photographers, hanging cone baits since the summer, manage to make even crossbills their regular guests.

A hanging feeder for any birds that take food from a swinging support can be quickly made from paper. In fact, paper is not a material for winter feeders: it becomes limp and pecks. But a spool from a toilet paper roll, smeared with the same peanut butter and sprinkled with seeds (see the picture on the right), can save more than one poor creature right before your eyes, and you can make such a feeder in literally 5 minutes. The colored tails below are not a whim; they are visible to birds from afar and attract their attention. It is better to make the tails red and/or green: for birds, red means berries, and where there is greenery in winter, there will be food.
2 – platform. The advantage is that the feed is clearly visible. Disadvantages: the food falls asleep in the snow, the wind blows it up, a lot of it wakes up, the sparrows feel at home on it.

3 – house. The food is protected from snow; By selecting the roof structure, the feeder-house can be made windproof and anti-sparrow. But a lot of food still wakes up, and only birds that are accustomed to feeding will come to dine. Forest dwellers, reaching for housing in an extreme situation, may simply not see what is there and drop dead two steps away. A feeding house with a sloping roof can also be quickly built from a box, as shown in Fig. on right. If circumstances allow, then it is advisable to soak the box three to five times diluted with PVA (it is also useful for cardboard feeders), and glue supports from sticks/twigs. Then the structure will be enough for more than one winter. This feeder is nailed to the tree.
Note: the feeding platform can be converted into a house and back as needed (weather, etc.) by attaching a removable roof made of thin hard plastic, see fig. left. PET from cut bottles, sewn with fishing line or stapled with a stapler, works well, but thin polycarbonate will also work. In the latter case, you need to nail slats with grooves to the sides of the platform and slide the roof in and out of them.

A feeder-house with a pitched roof is also convenient for fairly large and strong birds: pigeons, waxwings, jays, nutcrackers. They all don’t mind feeding in a row, so a dining house for them needs to be made with a perch. Material – any suitable, incl. and treated cardboard as a wood substitute, see below. The feeder for these birds should be larger than for small birds; For approximate dimensions see fig. on right. It’s tempting to quickly build a similar one from a shoebox, in the same place, but it won’t last long: strong, active birds will tear and peck at the weak material in a feeding or two.
4 – bunker. Optimal in all respects, including anti-sparrow resistance. The fact is that sparrows are flocking birds. If the flock does not fit in the feeding area, 1-2 sparrows will not “run over” the buntings with chickadees: they will eat in someone else’s company, but take turns and observe decency.

Homemade bunker feeders come in different designs, see fig. In the center there is a special area for tits and small spotted woodpeckers (a hard narrow area, see below). She and the one on the right are anti-sparrows. Modern materials make it possible to manufacture such an effective feeder as a bunker in 5 minutes. How is clear from Fig. on right.

Materials – PET bottle, plastic plate, nylon thread, superglue. Tools – scissors, knife, gypsy needle. And this feeder will last for more than one winter.
5.6 – tray. The food is poorly visible, so these are feeders for familiar and important birds. What is better to do in front of the entrance, a landing platform or a perch-pole, depends on the type of feeding; What is more convenient for someone, we will see further in the course of the presentation. They are divided into designs with free access to feed (5 in the figure at the beginning of the section) and its automatic feeding into the feeding tray (6 in the same place). The latter are even better than bunker ones: the feed practically does not spill. We will look at them in more detail later. A tray feeder can be designed to accommodate only 1 or several species of birds (6), but to do this you need to have serious knowledge of ornithology, appropriate tools and skills; Specialized tray feeders are commercially available in a fairly wide range.
Note: if the tray canteen is planned to be publicly accessible, the food in it can be made clearly visible by making the bin completely or partially transparent from plastic.
7 – specialized feeder-husker for birds of the appropriate type of food. The feed is held in place by a metal mesh. It can be combined with a tray and thus become combined.
The most popular feeders today are plastic. There are several reasons: empty, unusable plastic containers have nowhere to go, transparent plastic makes the food visible from afar, working with plastic is easy, not wasteful, and can be done at home without special tools. Plastics are durable, resistant, bird feeders made from them will last for many years and can be made of any type.

If you make a feeding house out of plastic, pos. 1 in Fig., please note that the roof should be matte and generally opaque. Wild birds, of course, are smarter than tame canaries and parrots, but when they see a sneaking cat (or, say, the shine of a lens), they can hit the transparent lens out of fright.
Good small plastic feeders are made from used toys: cubes, etc. They are made from polyethylene, so the only reliable way to glue, for example, a roof is instant cyanoacrylate glue (superglue). The feeders are clearly visible, all birds are curious to one degree or another, so there are no problems with the visibility of food. Round holes in polyethylene are easily cut with a ballerina compass with two needles. Homemade products for pos. 2 For complete bird happiness, the only thing missing is perches: polyethylene is slippery.
At pos. 3 and 4 are already purchased plastic feeders. Just a note: the house on pos. 3 costs 180 rubles, and the transparent “firm” at pos. 4 – three times more. But the same feeder can be glued together from scraps of polycarbonate and equipped, if you really want it for a window, with suction cups for bathroom shelves.
Feeders made from unusable plastic containers deserve special consideration, see fig. below. The design for pos. is very well thought out. 1. A wide tray provides good visibility of food, and in combination with a perch allows any birds to feed. The large capacity of the tray and the corresponding supply of food in it do not require frequent approaches from feeders, which frightens the birds less. The trough-shaped tray ensures minimal spillage of feed. Wing hatches bent upward provide an anti-sparrow effect; The platform they form on top allows you to place juicy vitamin supplements.

Feeders for pos. 2 and 3 are focused on tits, goldfinches and granivores. The main thing in them is a properly designed dispenser tray, see below. Simpler feeders for the same tribe, pos. 4 and 5, you can hang it if the sparrows are not very annoying. At pos. 4 there was a container for computer disks, this is more for small things like siskins, and the feeding station from a sour cream bucket (item 5) will feed bullfinches and waxwings.
Feeders made from used containers for liquid products can also be classified as plastic. The milk-kefir bags are, however, cardboard, but they are laminated with film on both sides, so they will last through the winter. Well, as for bottles and containers, they are made of PET. Small milk and juice packets make excellent feeders for tits, goldfinches, and granivores; you just need to insert a perch stick, pos. 1 on next rice. For the same birds, if the egg is used, you need to cut openings in the vessel about 6x8 cm, each on 3 sides, not reaching 3-4 cm to the bottom, and bend the valves outward, pos. 2.

If you screw a hard wooden circle to the bottom of the dishes instead of wobbly valves, you can count on visits from the Lesser Spotted Woodpecker. He won’t sit on a tit flap: what kind of woodpecker will he be if he doesn’t cling to a tree with his claws?
Large bags make public canteens, then the openings need to be cut larger so that the food can be seen from afar. In the case when the feeder is suspended in free space, you must also pierce it with a perch, pos. 4. When placed in a bush as a perch for tits, its branches, pos. 5, and the sparrows will be uncomfortable here.

How to make a feeder from a plastic container and a 0.25-0.5 liter bottle is shown in Fig. on right. The hook at the bottom is optional; hanging food can be hung on it, see above. However, for other types of feeders, the bottle dispenser tray may be too big. In this case, it can be glued together from cardboard or several layers of paper soaked in diluted PVA, see next. rice.:

Yellow arrows show the paths of feed movement. To make him wake up less, the inner end of the perch stick should reach the rear edge of the tray; Of course, you can pierce the vessel right through with it. The arrows in the center of the circle give the horizontal and vertical scale, i.e. the entrance will be 6 cm in diameter, this is enough for birds no larger than a great tit.

From 2 juice packets you get a good tit feeder-house, see fig. on right. The entire structure is held together with straws from the same juice, their protruding ends will be perches. To prevent the perches from bending (the corrugation of the straw remains outside), it is advisable to insert thin twigs into the tubes; can be broken off right there on the spot.
Wooden feeders are good for their durability: impregnated with drying oil, water-polymer emulsion or its substitute in the form of diluted PVA and painted, they last for years. Therefore, wooden feeders are most often made stationary. Of course, to make them you will also need carpentry tools with a separate workplace.

The traditional design of a wooden feeder is a house. A view of the simplest homemade wooden feeder with dimensions is shown in Fig. left. However, firstly, such a feeder does not protect food from weathering, because the space under the flat roof is blown through. Secondly, by seemingly slightly changing the configuration and proportions of the parts, it is possible to specialize the feeder quite strongly. E.g. pos. 1 in Fig. Below is public. Pos. 2 will attract shelling birds: landing on the slats protruding to the side and pulling out seeds through the lathing will give the complete illusion of the usual feeding process. Pos. 3 and 4 – with weakened blowing of food and a noticeable anti-passerine effect, for small and larger birds, respectively. Pos. 5 – almost windproof and fundamentally anti-sparrow: a sparrow that has retained its common sense will fly into this only as a last resort.
It is more convenient and easier to make winter hanging wooden feeders from plywood and blocks of approximately 30x30 or 30x40 mm. Here you can do without lumber at all by gluing PVA bars from strips of the same plywood. However, stationary feeders on poles will be more durable from solid wood, because... plywood outdoors, except for expensive waterproof birch, after a season or two begins to delaminate with any impregnation.

For example in Fig. Above is a drawing of a country, garden or forest feeder for all types of birds. A tin tray on a pole not only keeps predators out, but also serves as a dining area for sparrows. The lifting liner (it slides freely on the post) makes cleaning easier and allows birds of one species to feed from their recess, leaving others to feed. You can hang nets or cones with food for shellers on a pole under the roof, and hanging food for tits at the corners of the platform. The roof is removable and on hooks for easy maintenance.

A hanging analogue of such a feeder, as they say now, with simplified functionality, is shown in Fig. on right. The diameter of the floor platforms is about 500 mm. The ledges on the middle platform are convenient for birds looking at the food before starting to eat. In this case, the sparrows are given the upper platform: these troublemakers will scatter the food anyway, so you can do without a side, although it won’t hurt.
In Fig. Below are wooden feeders, bunker and tray, which can be converted into combined ones, suitable for hullers. The fact is that in these designs, to improve the visibility of the feed, the bunkers are made with glazed windows. Replacing glass with a steel mesh with a mesh size of about 5x5 mm will allow shellers to pull out seeds while others are pecking from trays or from the platform.

Wooden feeders look better than home-made plastic ones; they are easier to adapt to the needs of both the birds and the owner. But what to do if you don’t have woodworking tools or don’t want to start carpentry with its sawdust and shavings in the house?
A feeder that is not inferior to a wooden one in terms of convenience and appearance and can last at least 3-4 seasons can be made from corrugated cardboard from packaging boxes that have become unnecessary. Of course, it will take more time, but the only tools you will need are a pencil, a ruler, a square, a sharp knife, scissors, an awl, PVA glue and a brush for it. The technology is similar to making cardboard shelves:

Anyone who takes up tinkering wants to make something of their own, unusual and unique. Unusual feeders can be divided into original ones based on the technique of execution or some functional features and simply beautiful, designer ones. One, of course, is no hindrance to the other, if only one’s hands were in place.
The first few, let's say, technical and functional ones, are shown in the figure:

Pos. 1 – special for shellers, frugivores and large granivores. The cob is placed on a nail driven through the bottom. Here it is necessary to note that the corn should be hard, fodder or oilseed varieties, with smaller grains. Canteen sugar will be harmful to birds: its grains contain too much starch and sugars.
Pos. Doesn’t require 2 comments: over the summer I accumulated ice cream sticks, then PVA, strings, and that’s it. If you make a pole on each side, then 4 siskins or chickadees will be able to feed at once. Pos. 3 is woven from paper tubes. The work is complex and time-consuming, especially considering that they need to be properly protected from limpness. However, judging by the fact that in such a small area there are as many as 3 great tits feeding and another one is waiting in line, the birds really like this creation.

Finally, pos. 4, from a tin can. Here it would not hurt to put a perch made of a stick in the braid instead of a slippery cold piece of iron. The manufacturing technology allows this quite well: the can is tied with a rope in the same way that sailors, riggers, or, say, high-rise assemblers, apply a mark to the end of the cable, see fig. on right.
If you take decorative feeders, then there are no restrictions on the design: the bright colors of the birds do not scare away, they can easily distinguish a drawn cat from a living one, and they will even peck the image in revenge; Let's just give a few examples in the figure:

According to the execution technique, it is better to avoid varnished and shiny surfaces, as in pos. 1. On a smooth surface, it is more difficult for the claws to catch on, the grains dodge the beak, and the glare hurts the bird’s sensitive eyes.
Pumpkin feeders for wild birds do not fit into any classification, but for birds this is a real paradise: proteins, fats, carbohydrates, vitamins and microelements - all in one and in sufficient quantity for everyone. Plus, the support is strong and at the same time pliable under the claws. It is not necessary to make something like a house out of a pumpkin or carve a scarecrow’s face on it, as in the figure: it is enough to remove a piece of skin from one side to the pulp, and before spring only the peel will remain from the pumpkin. Perhaps suitable for fun crafts.

All that remains is to decide what kind of bird food to put in the feeder. The best food for all wintering birds is wild grass seeds, especially burdocks. Songbird lovers and ornithologists collect turnip seeds in the summer or buy them at pet stores. Next, in order of preference by birds and benefits for them:

Note: if it is possible to buy the so-called at a pet store. Canary seed or grain mixture for budgies is just what any bird at the feeder needs.
Wheat, rye and bread made from them should be avoided: the bird's body is not designed to process excess starch. Black bread is especially dangerous: it causes inflammation of the goiter, which often leads to the death of the bird. Completely dry white bread crumbs can be given to pigeons and fruit-eating birds. The same applies to all cereals that swell greatly during cooking: barley (barley), rice, buckwheat. As mentioned above, you need to be careful with corn. In general, one must keep in mind that wild birds are smaller than chickens and ducks, and their digestion is unaccustomed to domestic feed.
Note: the peel of citrus and tropical fruits - bananas, mangoes, avocados, mangosteens, sapodillas, etc. is a deadly poison for our birds. It's a matter of sugar composition.
The best vitamin supplements, as already mentioned, are brushes and bunches of wild berries. In addition to the mentioned rowan, viburnum, and elderberry, barberries, currants, chokeberries, and junipers are also readily eaten. In the southern regions - cotoneaster, berries of “wild grapes” (cissus), boxwood. Seeds of table grapes, cherries and cherries from compote, melon and watermelon seeds (not pulp!), cores of apples and pears with seeds, grated raw carrots are also an excellent vitamin supplement. You should not give whole fruits: having fed on them, even the most principled tit will not resist the temptation to peck them in the garden in the summer.
An important component of the bird's diet is mineral nutrition and solid inclusions that grind food in the stomach. The most important mineral is calcium. Its source at the feeder is finely crushed eggshells. It must be given without fail if you want the winter eaters to nest right away in the spring. Birds, like domestic chickens, also need sand. It needs to be sprinkled a little at a time, always river rounded and the smallest.
So, a certain young man with an actively destructive way of thinking in the winter heard that black bread and banana peels are killer for birds. He immediately set to work: he was not lazy and put together a feeding trough, dried and finely crushed banana peels. Then he forked out for a loaf of Borodinsky for 40 rubles. at the price at that time, I crushed it too. I mixed everything, hung up the feeder, and poured bird poison into it.
The next morning I went, anticipating the “task,” to see how many of them were lying there dead with swollen crops. It turned out - not a single one, the food was not touched. Before the unlucky terrorist had time to decide what he should think about this, flocks of trees fell from the surrounding trees and showered Grisha with “business cards.” The individual “cards” merged into a continuous blanket, and a pile formed on the head. Since then, the poor fellow carefully and cautiously avoids even flocks of sparrows on the asphalt.
How to make a bird feeder
Bird feeders are a great theme for both bird lovers and inventors of small architectural forms. How to do simple or sophisticated feeder from cardboard boxes, from plastic bottles, from tin cans, from a wooden block or mayonnaise bucket, as well as from cake packaging and everything else, what to feed tits and what sparrows eat, look and read, - ideas fly in the air and land on this page.
 What a beauty!
 Master Class
1. Using a hot knife, cut the bottle in two places according to the mark. See for yourself what width of strip to cut, there are no exact dimensions.
 Cut according to the basting
 2.See the picture below. If you cut a wider strip, you will get a more squat figure; if you cut less, the product will be taller.
 The height of the feeder depends on the height of the cut piece
 3. At the bottom of the bottle, cut a hole for birds to land in, as shown in the photo. Don't forget to run a hot knife along the edge of the window so as to melt the cut and make it not sharp. The bird will sit on the edge of the window with its paws and should not cut itself.
 To prevent birds from cutting their paws
 Paint the bottom of the bottle with acrylic paint.
4.When the paint is dry, make two holes with a hole punch (or a hot nail) in the bottom of the bottle, on either side of the entrance to the feeder at the same distance.
 A hole punch makes holes neater than a nail.
 5. Symmetrical holes must be made in the upper part of the bottle; twine will be threaded through these holes, with the help of which the upper and lower parts of the bottle will be connected and this beauty will be suspended.
 Connect the bottom and top of the structure with twine
 6.Color the top of the bottle and don’t forget the cork. Let dry.
7. The twine will be threaded according to the scheme:
 The twine connects the top and bottom of the feeder, and the knots are pulled up through the hole in the plug
 8Make a hole in the cork, take the knots and pull the two ends of the twine by the knots through the hole in the cork.
 Thread the twine through the hole in the cork
 9Decorative detail. Make additional holes, as shown in the photo, on the bottom and top of the bottle and fasten the parts with decorative rivets. This will additionally hold the parts together and give the appearance of a “branded item”.
 Holes for rivets
Align the rivet holes at the bottom of the product with the same holes at the top
 Rivets are especially decorative
  Raffia palm twine bow
 And these bottles would also make funny feeders.
 Minion Feeder
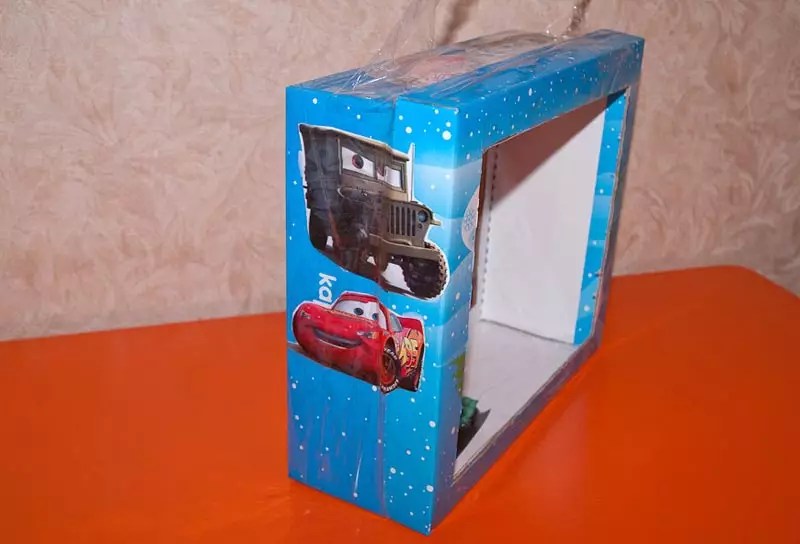
 Any cardboard box with a hole cut out, hung, and filled with food is a feeder. For example, a box from Rafaelo or boxes from New Year's children's gifts, of which every home accumulates in abundance after the New Year.
We use milk cartons, paint and decorate with buttons and twigs. Glue with a glue gun using silicone glue. (I bought myself a glue gun at a hardware store, it was 3 times cheaper than at a craft store).
 Milk carton feeder with buttons
  Cardboard box feeder
  Box from Raffaello
  New Year gift boxes
 By the way, if there is no balcony, but only a window, then the cardboard device will be very useful; it will not break the window when you lower it outside the window onto the windowsill. I'm just afraid that in this house the neighbors are not happy about feeding pigeons so close to cars. The hole in the box should have been made small, then the pigeons would not have been able to feed on the windowsill, but the tits would scurry back and forth and delight the child and kitten with their bustle. And so it is It’s kind of boring to look at a pigeon’s butt sticking out of a box.
 A girl hangs a feeder outside the window (So much effort, but you can only see the pigeon’s butt).
  Feeders made from tin cans
  To prevent birds from cutting themselves, smooth the landing edge of the feeder.
 Baby formula jars are very convenient for birds.
Lauren Martin, a French gardener, has created an entire feeding garden.
The simplest homemade bird canteen, which allows you to pour a full bottle of seeds, since the small hole does not allow the seeds to spill out.
 The simplest bird feeder
 We do this according to the scheme:
 How to make the simplest feeder from a plastic bottle
  Easy to do
 From cake packaging.
 Cake for tits
 Wooden bar idea
 Bird bar idea
 From plastic buckets for mayonnaise.
 Bird bucket1
  Bird bucket2
 Wooden blocks
 It’s quite difficult to do, but it looks very eco-friendly
 Made from whole coconut.

When the holiday is over and the coconut pulp is eaten, the capacity of the coconut feeder will be filled with simple food in the form of seeds and the exotic restaurant will turn into a budget canteen.
Two options for one technology:

This is actually an important question. After all, we live among people and our interests or the interests of our feathered friends should not conflict with the interests of the people around us.
If the droppings of birds that we attract to our window or balcony regularly fall on the lower balconies or on our neighbors’ cars, expect trouble. Do we need it?
The solution to this problem is simple. There are a few things you need to know.
1 Feed pigeons only on the ground, away from parking lots, balconies and window sills, so that pigeon droppings do not cause damage to us and our neighbors.
2 Sparrows, unlike tits, do not fly away immediately as soon as they take food, they sit in the same place where there is food and poop there and throw the husks from the seeds there. Such a fellow will sit on the edge of a bottle or perch, take the seeds, peck them and throw the husk back into the seeds or nearby. The brat will spit all around. The tits are afraid of him and wait, sitting on the branches nearby, for him to eat. Therefore, the container with seeds should be hung away from the wall of the house,
1.at least look at how my neighbors did it in the video.
This is a brambling that has settled down; they spend the winter with us. These birds are like sparrows, they sit until they are full and try not to let the tits in, but the tits fly up, take a seed and put it on a branch to peck the seed from the seed.
2.Or place it inside the balcony so you can clean up after your guests.
 Krmushka on the balcony
  Tits love lard
  Serious feeder
  Titmouse on the window slope
  Attach the feeder using a dowel
  Feeder with a lid - very convenient for filling with seeds
  "Hleboprovod"
 A child living in this house called this structure a “bread pipeline”
For feeding tits, unroasted sunflower seeds, unsalted lard, fat, nuts (chopped, with soft flesh, such as walnuts) and an exotic option - sawn coconut suspended on a string - are suitable.
What not to give to birds
You should not give salted lard, fried seeds, smoked meats, or rye bread.
Tits will not eat buckwheat, millet, or rice.
But sparrows will eat millet and crushed grains and raisins.
By the way, wild grape berries () on your balcony will also attract birds. An Alpine jackdaw is flying to us, watch the video at the end of the article.
Lard treat
 Treats for birds
 Lard can simply be hung on a thread or cut into pieces and placed in a vegetable net; I made such a design on my feeder, which is also an observation deck for my cats in the summer.
Making your own bird feeder is not difficult. In winter, birds are in great danger; they need to be fed.
This is why people create feeders and help birds survive this cold season.

Feeders can be created using any materials that are found in any home. They do not require financial investments or special knowledge, but only a good attitude towards the environment.

General rules for creating feeders:
You can make the drawings yourself, or you can find them on the Internet. When selecting or creating a drawing, take into account the features of the tiles.

If you plan to feed small birds, then plan a small opening so that large birds do not compete with them.

Prepare: plywood, hammer and nails, glue, jigsaw (electric), timber (about 20 by 20 cm) and sandpaper.


A reliable and high-quality material for any crafts is wood.

Prepare:

Step 1 Frame base – assemble the bottom with the sides. Cut pieces of timber to fit the bottom and connect. Glue the ends with glue and tighten with self-tapping screws. It is recommended to make the sides (two parallel) 5 cm longer than the bottom.

Step 2 Nail the bottom to the base frame.

Step 3 Screw the racks (from 18 to 20 cm) to the inside of the box.

Step 4 Attach two bars at right angles. Secure the joints with another block. You need to make two parts in the form of a right angle.


Step 5 Attach the rafters to the posts using rafters and nail pieces of wood to them for the roof.

Step 6 Glue sticks-perches to the sides (extended).

This type of bird house is often made in kindergartens and primary schools. Prepare: milk/juice carton, scissors, wire, marker and adhesive tape.


This type of feeder holds a lot of food, which is very convenient for feeding birds in winter. It is convenient for them to eat inside such a spacious product. You can involve the whole family to create. Prepare: bottles, knife (or stationery knife).


You can create a feeder from almost any cardboard box. It is better to choose thick and laminated cardboard so that it will last longer in winter moisture conditions.

Making this feeder is easy because it already has the desired shape, walls, bottom and roof. You just need to cut the holes. Prepare: tape, knife and nylon cord.


There is an alternative version of this design. The lid can be glued perpendicularly so that it serves as a stand for food.

Then the side and roof will be from the second part of the box.


This product must also be carefully taped. Next you need to make two small wire hooks and lay them on the “ceiling” (twist and bend). The hooks need to be connected to each other, and now it can be hung on a branch.


What winter holidays would be complete without a mountain of tangerines and a couple of juicy...

Amethyst is a quartz mineral with a deep purple-pink color. He...

You can make an imitation of stained glass without using glass, i.e. from colored paper...