Denis Valentinovich Manturov Minister of Industry and Trade of the Russian ...

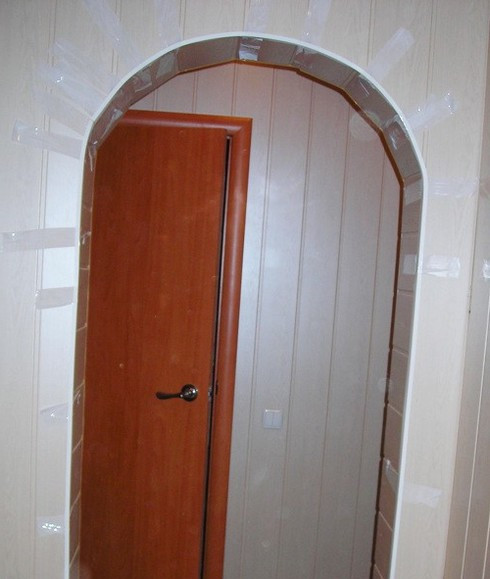
When it comes to furnishing, there may be several options. Plaster, wallpaper, various kinds of panels - everything can serve as the main finishing material... But if you want to solve the issue of the safety of this very material in the places of transition from one plane to another, use an arched corner. By design, these are the most elementary products, but with broad capabilities.
In essence, arched corners, on the one hand, are an element of protection wall decoration, and on the other hand, it is a decorative element in the interior of the whole room. They are mainly used for aligning the corner rounded sections of door or window openings. But, due to their design, they can also be installed on straight (horizontal or vertical) sections of the wall. In addition, during the main work, some of them are used as building materials.
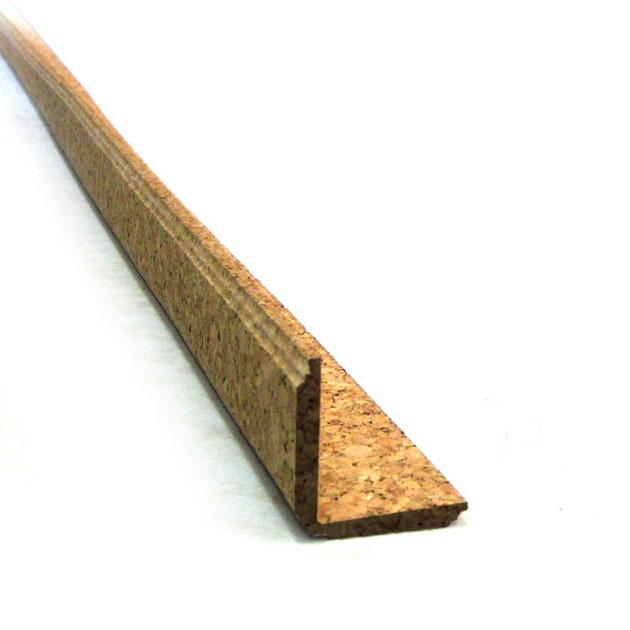
When plastering right angles, metal or plastic perforated strips perform a double role: they serve as a reinforcing element of the corner, plus they are the standard of 90 °. A right angle is the main indicator of the quality finish of the treated surface. There is also a cork corner. But this is a simple decoration element without any additional fastening properties.
When working with drywall, corners, often metal, are used, to some extent, both as a fastener for adjacent sheets, and as a material that provides perfect adhesion of the putty to the drywall.
Depending on the place of use, the corners are divided into two types:
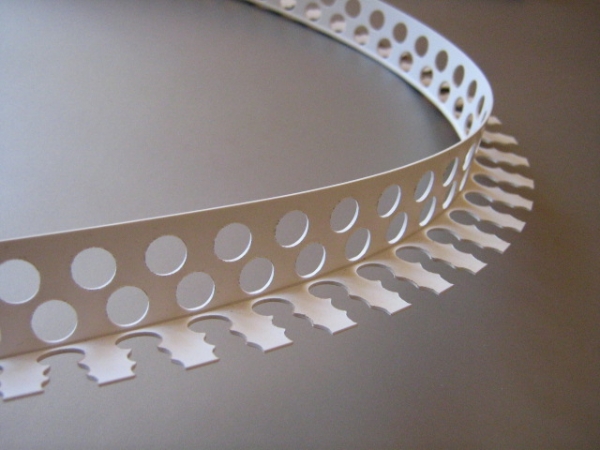
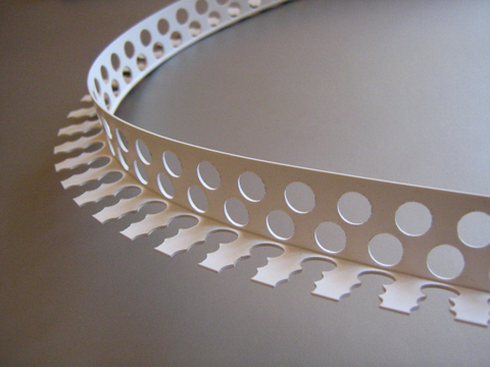
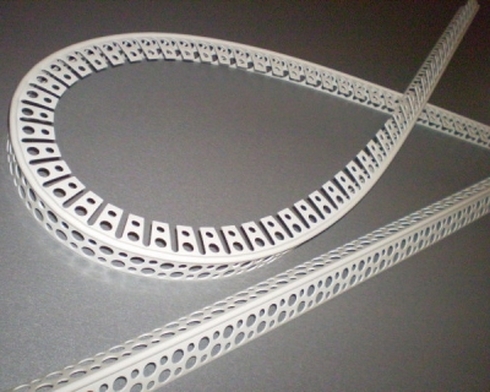
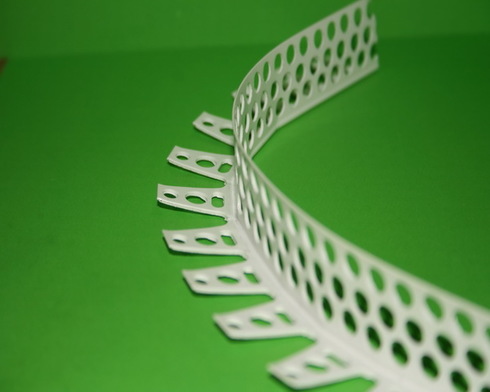
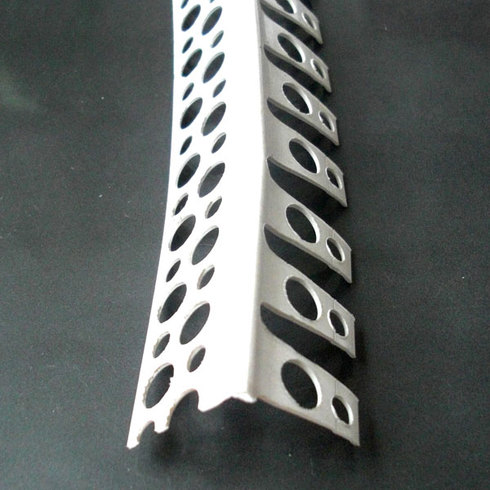
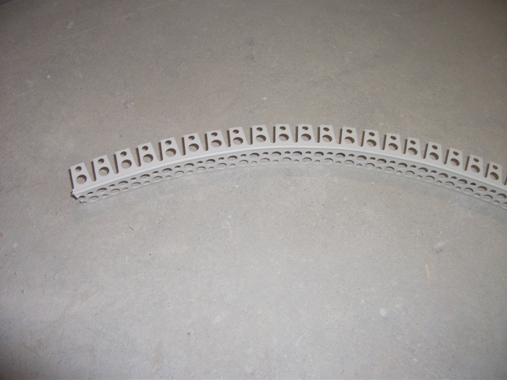
The first are perforated. They have holes on each plank for better adhesion to the putty. Plus, one side of the corner is made in the form of separate petals, which allows you to impose a long strip (up to 3 meters) on the bend of an arch of any diameter. We can say that it is a flexible building material for universal use in a single area. It can be either metal or plastic.
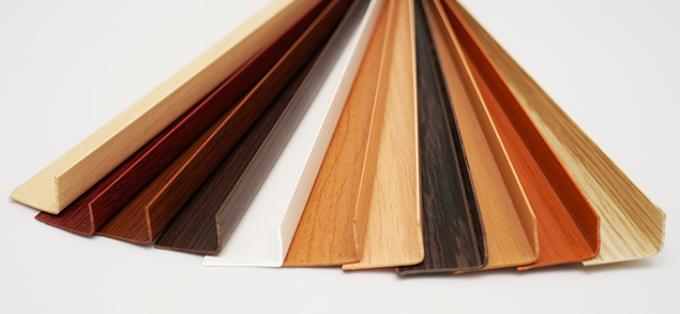
The latter have a wider assortment. They can be made of metal, PVC, cork and be white, colored, solid or wood-like. The surface on such products is even, there is no perforation. Separate modifications of the corner elements for the arch have one side even and solid, and the other in the form of petals. Design decisions define the look.
If we take into account all the advantages in the complex, both technical and "human", arched corners are the most profitable option in arranging door and window openings.

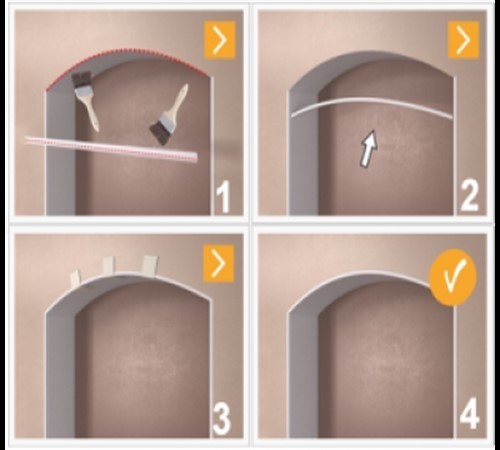
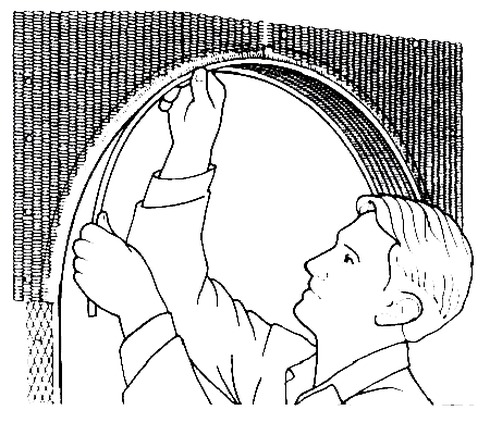
Reliable fixing of the strip in place is a fundamental factor in a practical and aesthetically pleasing archway opening. There are 4 ways to attach a decorative element:
The most optimal option for fixing the corner in place. The mounting procedure is as follows:
If the "decoration" is glued in this way, everything will turn out cleanly and relatively quickly.
The option is similar to the previous one: apply glue, bend, attach, glue, fix. But there can be problems here. Liquid nails dissolve certain types of plastics.
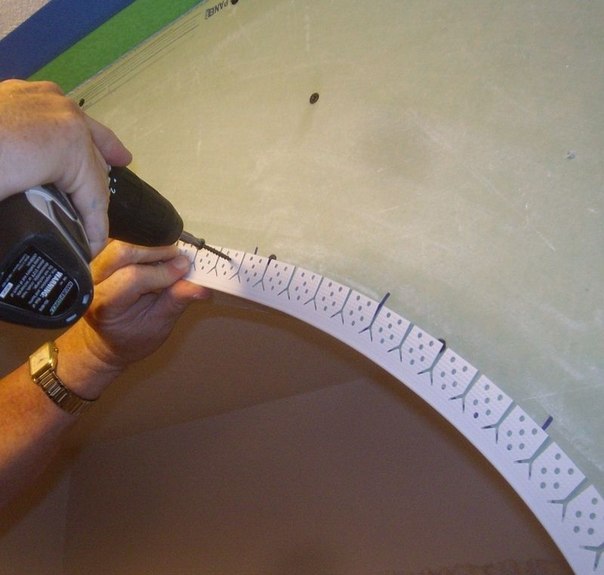
Self-tapping screws are rarely used for decorating. But the installation process is easier, in three steps: bend, attach, secure. More option for flexible perforated plaster strips.
The cork is somewhat more difficult to glue, but it looks much richer than its PVC counterparts. Everything is done in a certain sequence. First, a layer of glue should be applied to the surface, hold for 20 minutes, bend the corner, apply in place, glue evenly and tightly, remove excess glue.
Before gluing, materials and surface must be prepared for the procedure. The sequence is as follows:
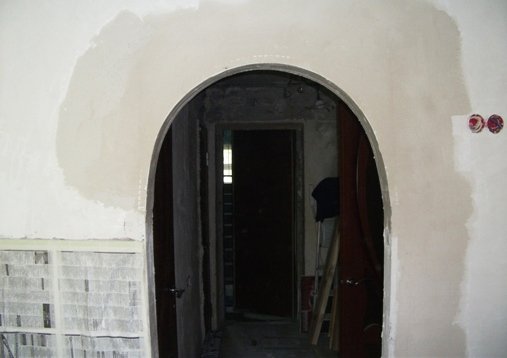
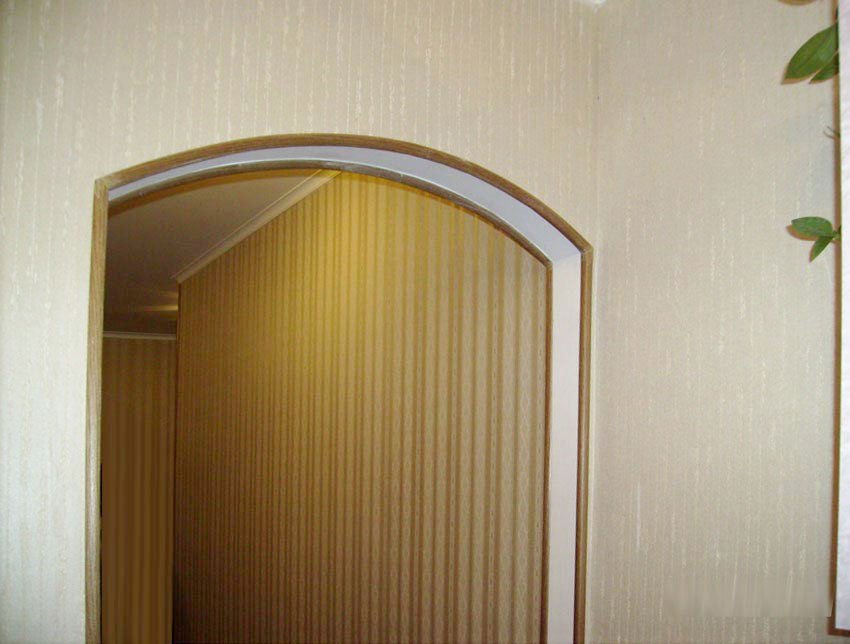
Feng Shui recommends creating an environment in the house in which there will be a minimum of corners. The arch fully corresponds to this technique, and most importantly, it visually expands the space of the apartment and the doorway itself. But in order to be durable, it must be strengthened. By learning how to fix an arched corner, you can increase the life of the arch and guarantee the integrity of its edges.
The corner profile for arches is used simultaneously for several purposes:
You can give a small classification of angular arched profiles.
In order to strengthen the edges of the opening, decorative and perforated L-shaped profiles are most often used. The first type is used for exterior decoration. Usually they are produced with a length of 270 cm. The second is masked under the finishing material. The length of such elements is 300 cm.
Decorative items are made of PVC, and perforated items are made of metal, cork or the same PVC. Cork is the least popular because of its fragility.

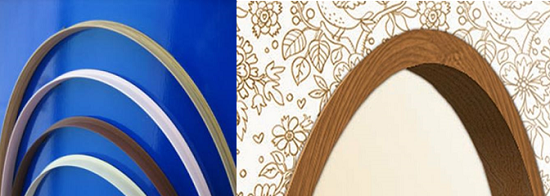
By color and texture, corner profiles for arched openings are divided into:
Most often, such finishing elements are sold in two sizes:
Before gluing the arched corner, prepare everything you need.
Fixing the arched corner is quite simple, no matter what material it is made of.
If you are in doubt about how to glue an arched corner, then consult a specialist. He will tell you which glue is better to choose specifically in your case. It is best to use a special "decor" class tool, which is perfect for working with plastic elements.
As you can see, the rest of the questions remain. Everything is extremely simple and straightforward. Now you can decorate the arch using the corner yourself.
13 March, 2017
Specialization: Master in the construction of plasterboard structures, finishing works and installation floor coverings... Installation of door and window blocks, decoration of facades, installation of electrical, plumbing and heating - I can give detailed advice on all types of work.

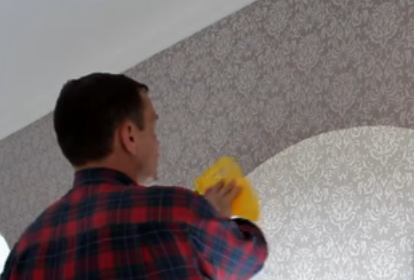
When I glued wallpaper for the first time in a room with an arch, the result of the work turned out to be far from ideal. Sloppy joints, folds, flaking areas - all this worsened the appearance. But experience has come with practice, now I can say that adherence to technology will allow you to achieve an excellent result, even if you have never glued wallpaper to the arch.

If you want to achieve a good result, then you need to have all the necessary materials and tools at hand. We will analyze only the stage of wallpapering; you must prepare the surface in advance. The substrate must be dry and level.
To work, you need the following materials:
| Illustration | Material description |
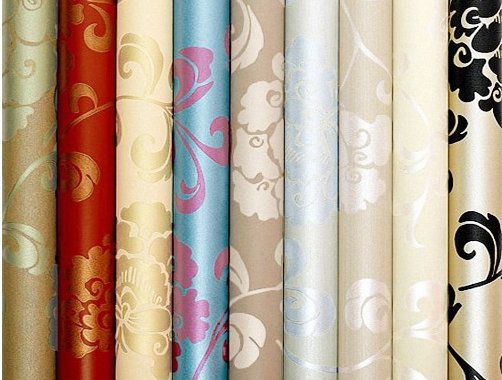 |
Wallpaper... It all depends on your tastes and preferences. From the presence of an arch, the choice of finishing material does not change much. Although I do not recommend using 3D wallpaper for walls with an arch, they are intended for a solid surface and the opening spoils the whole impression of the composition. Sometimes the arch is highlighted with wallpaper of a different color. Another option is to paint the surface of the arch, in this case, instead of wallpaper, you will need paint of a certain color. |
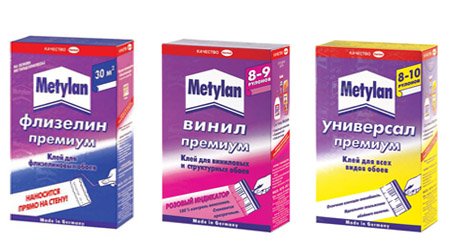 |
Wallpaper glue... Choose a composition according to the type of wallpaper used.
|
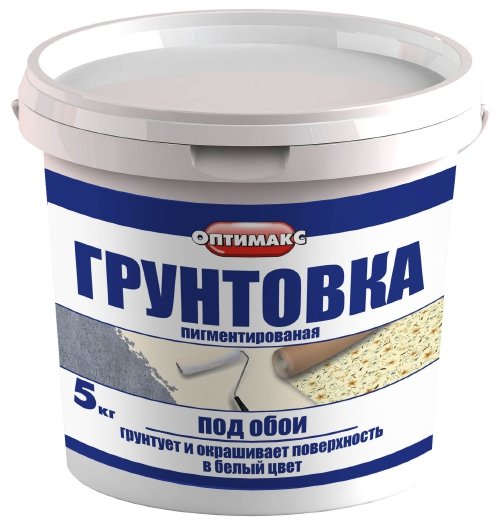 |
Primer... To improve the adhesion of the adhesive and to strengthen the base, all surfaces are imperative. If the bases are porous and loose, then the treatment is best done twice. |
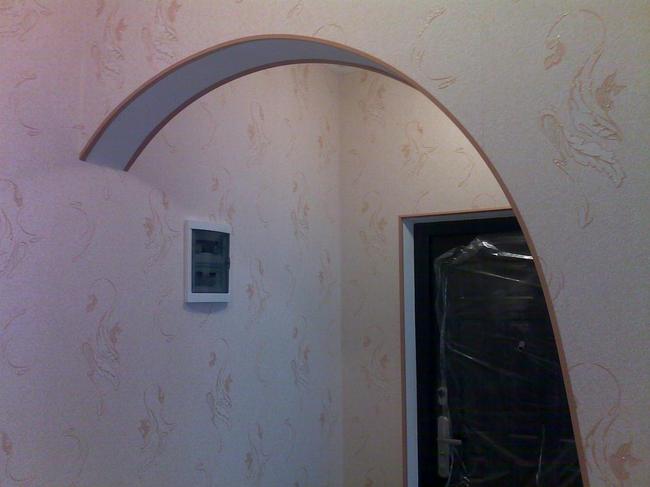
| Corner on the arch... If you decide to close the joint of the wall and the opening with a corner from the outside, then special flexible products of different colors are used. If the corner is attached under the wallpaper, then a special small version is used, which has a small ledge to form the outline of the arch. |
|
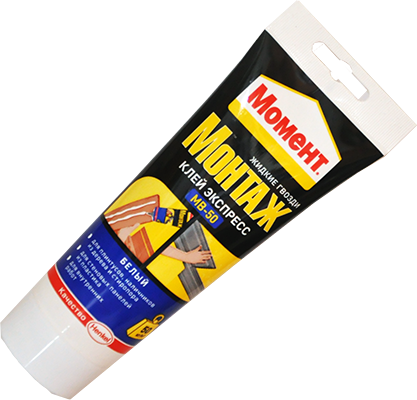 |
Liquid Nails... It is on them that it is best to glue a plastic corner. You do not need to buy a large bottle, a tube from which the composition is easy to apply is enough. The packaging price is only 100 rubles and it is enough for a whole arch. |
Tool for work:

Let's figure out how to paste over a door arch:
| Illustration | Stage description |
 |
All glued surfaces are primed... Before wallpapering the arch, be sure to treat the base with soil. It is applied in an even layer. You can continue working after the surface is completely dry. This usually takes 1 to 3 hours. |
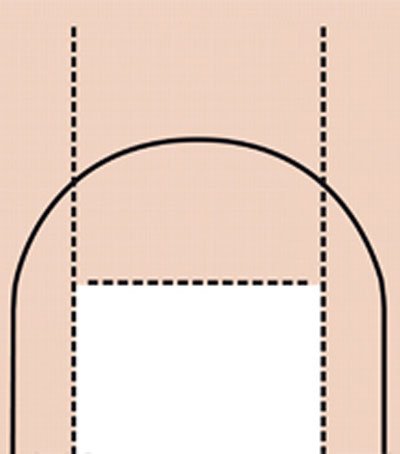 |
The location of the wallpaper sheets is planned... If your arch width is large, then you need to glue the canvases as shown in the diagram on the left. The edges must necessarily protrude inward, and a whole sheet is located in the middle. If the arch is small, then it is glued with two sheets with a joint in the middle. |
| Glue is applied to the prepared wallpaper sheet... It is important to evenly distribute the composition over the entire surface. Pay special attention to the edges, as most often they are impregnated worse and then you have to grease individual areas so that they stick. The canvas should be soaked for 5 minutes. Some types of wallpaper also require the application of glue to the wall. In this case, the composition is distributed according to the base. The instructions on the package with the composition will tell you if you need to do this. |
|
 |
Wallpaper is glued to the wall... Everything is done in the same way as usual. Next, you need to cut off the excess part. The work is easiest to carry out with scissors. A strip about 20 mm wide is left along the edge. Particular accuracy is not needed, it is important that the protrusion is more or less even along the entire length of the edge. |
 |
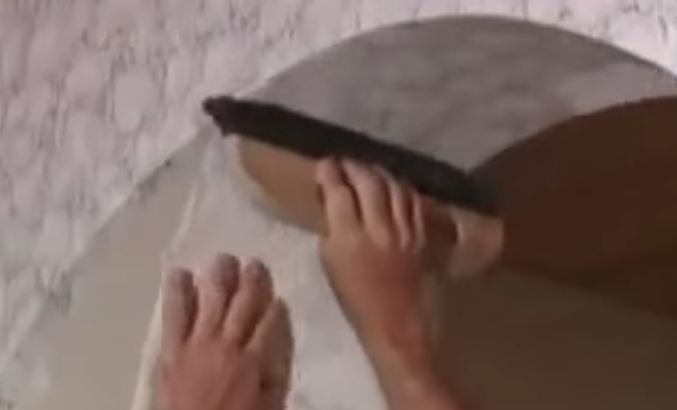
Perpendicular cuts are made on the protruding part of the wallpaper... They should be every 2-3 cm. This will allow you to tightly press the wallpaper to the inside of the arch and eliminate the appearance of folds. |
 |
The protruding part is lubricated with glue and glued... Here it is important to gently and evenly press the material along the entire edge. Do this gradually, starting from the middle of the arch and going to each side in order. For pressing, you can use a special narrow roller, but you can also do the work manually. |
 |
A strip is cut along the width of the arch and glued... To make everything look neat, cut the wallpaper 3-4 mm narrower than necessary. Due to the bends, no gap will be visible, and you can press the piece evenly and accurately. Work starts from the bottom and goes in order, the surface is neatly smoothed with a brush. |
 |
The finished result looks very neat... The surface dries for a couple of days, at this time do not open the vents. |
 |
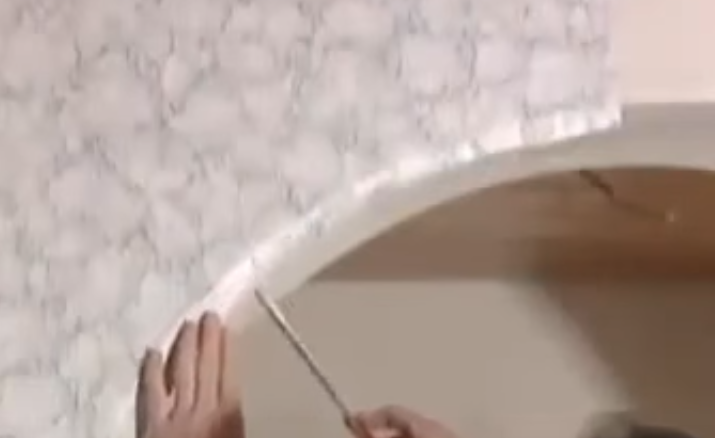
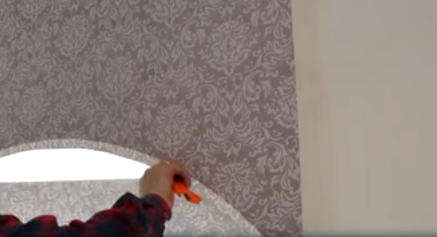
If a corner is used, then cuts are made along its edge... The corners for the arch on the wallpaper are glued to liquid nails as shown in the photo. It is important to align the element and press it firmly against the surface. All excess liquid nails are removed with a spatula. The composition dries within a few hours, but it is better to leave it for a day to fully harden. |
 |
After pasting the wallpaper, the edges are trimmed... This is done with a knife, which is placed along the ledge of the corner and gently guided along the entire edge. The result is an even connection, as in the photo. The main thing is to do this work carefully and slowly. |
 |
You can glue the corners to the wallpaper. In this case, the process is simple:
The corner on the arch over the wallpaper can be either in a contrasting color or match the tone of the coating so as not to be conspicuous. |
Now I will tell you how to glue the arch with wallpaper, if you do not need to paste over the interior. Most often, this option is found on windows, but it can also be done in door structures. I'll tell you how to do this type of work with your own hands:
| Illustration | Stage description |
 |
First, the wallpaper is pasted... It is necessary to very carefully level the surface, paying special attention to the quality of adhesion along the perimeter of the arch. |
 |
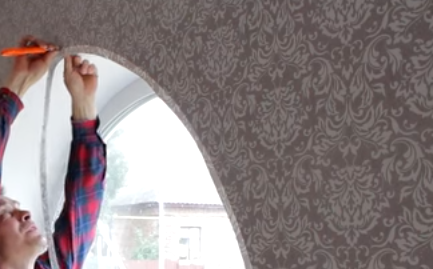
Excess canvases are cut around the perimeter... Here you need to leave a margin of 10 to 20 mm. This is necessary so that the canvas does not deform much during drying. Large pieces are warped, and the wallpaper is fixed very poorly along the edge. |
 |
After pasting and cutting, the wallpaper is left to dry completely.... I advise you to wait at least a day before continuing with the workflow. |
 |
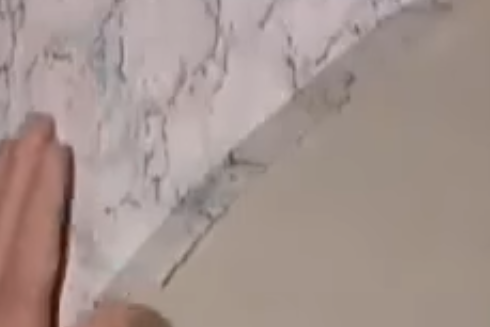
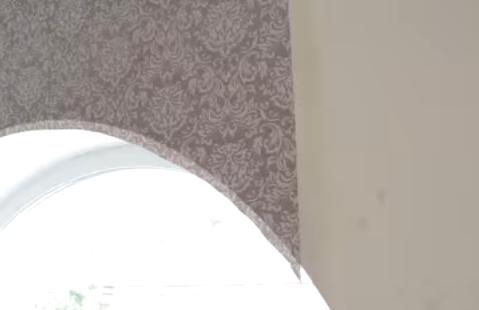
Surplus wallpaper is neatly cut off... The knife is placed along the inside of the arch and is guided along the edge. It is best to cut without lifting your hand to keep the cut straight and clear.
|
 |
The finished result looks like this... The arch can be painted, covered with decorative plaster. |
Using this article as a guide, you can easily wallpaper the arch. Just observe simple tips and do everything carefully. The video in this article will help you understand the topic even better, if you don't understand something, ask in the comments.
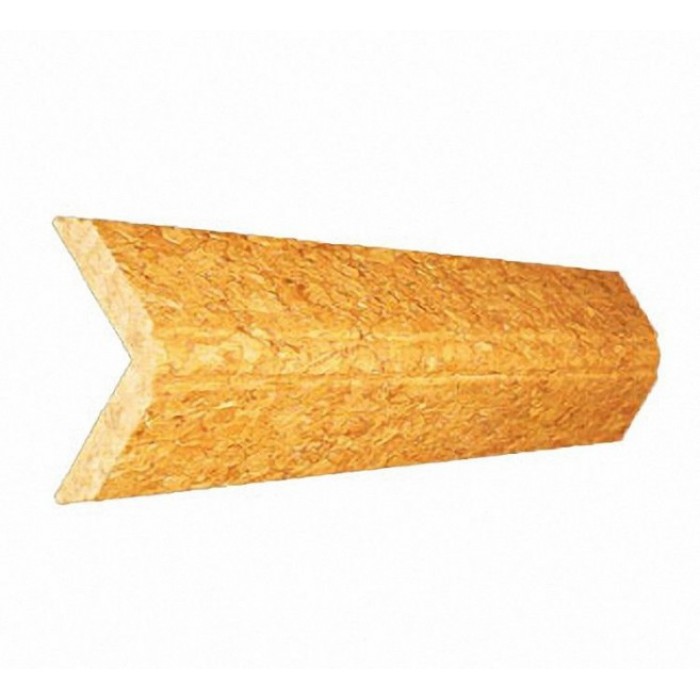
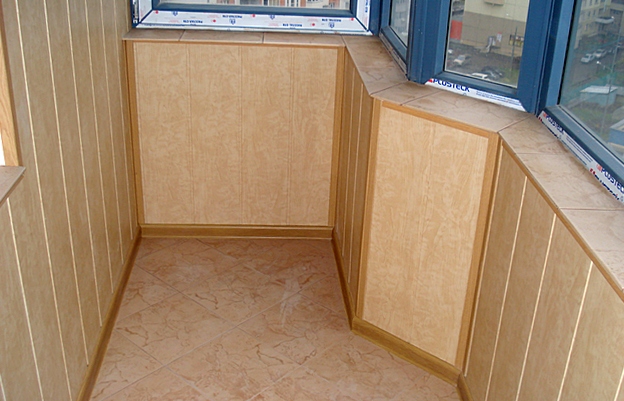
Arched corners are used mainly to align door and window openings, as well as to give them a more complete look. A variety of corners in hardware stores allows you to complete any interior design, and gluing them with your own hands is as easy as shelling pears. The corners for the arch can be wooden, metal, plastic, etc. The easiest way to work with plastic structures, therefore, it is about them and there will be a speech Further.
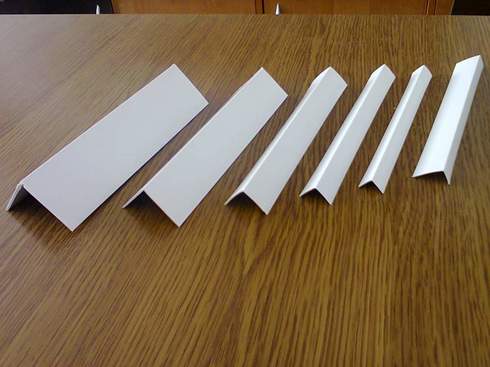
Arched corners usually have a length of more than 2 meters and a wide variety of colors: white, beige, wood-like, etc. They are made of polyvinyl chloride and can be used for finishing both internal and external corners of premises (see photo). Plastic arches help prevent defects from forming on them, and colored structures help prevent premature erasure of wallpaper and paint. In addition, the corners allow you to hide small irregularities that remained after the repair. This is especially true for arches made by hand from drywall.
So, the main "pluses" of arched corners made of plastic include:
the ability to give openings the correct shape;
hiding defects that remained after repair;
the ability to add completeness to the interior;
ease of installation;
ease of care;
protection of corners from mechanical damage;
durability;
a wide range of colors that makes it easy to fit them into any interior design;
resistance to ultraviolet rays;
unnecessary additional painting;
cheapness and many others.
In order to glue the arched corners you will need:
construction stapler;
primer solution;
"liquid Nails".
Before gluing the structure to the corners, you need to cleanse the surface from dust, dirt, old wallpaper or paint, etc. If there are large protrusions on the walls, they must be gently knocked down with a hammer. After that, you need to clean the room and proceed to carefully leveling the surface. For this, you can use plaster or putty. Subsequent work can only be performed after the filler is completely dry. This time can be spent familiarizing yourself with the instructions below, which will describe how to glue the plastic corners for the arch, or watching the video presented.
You need to know that arched corners can have different purposes, as well as differ in color and size. Depending on this, you can stick them in different ways. The filler usually takes several hours to dry. This time will depend on the quality of the material used. Immediately before gluing the corners to the arches, it is necessary to prime the surface to improve adhesion. If necessary, the primer can be applied in several layers.
You can glue the plastic arched corners as follows. A small amount of adhesive is applied to the corner, after which the plastic structure is pressed against it. It must be securely fixed and held with your hands for about 5 minutes. Any glue that may come out on the sides must be removed immediately with a damp cloth and white spirit. After that, the plastic corners must be fixed with tape and left so for a while until the adhesive is completely dry.
To glue the plastic structure, you can use both ordinary glue and "liquid nails", which will be more reliable. It is necessary to apply "liquid nails" using a special gun. As for the shade, it is best to use a colorless substance for the job.
In addition to the above solutions for gluing corners made of plastic, you can also use a putty. But in this case, there is a risk that the material may peel off from the surface as a result of temperature changes. To prevent this from happening, you can use a construction stapler with small staples. They almost firmly nailed the corner to the wall, as, for example, in the photo. In this case, you should try to place the staples at the same distance from each other.
How to decorate an arch with a corner? Which corner can be used to decorate the interior of an apartment or a private house? How does it attach to the walls? Let's figure it out.
First, let's list types of corners that apply to.
Curious: a plastic corner for finishing corners is not only external, but also internal. The difference is in the shape of the section: for the inner corners there is a profile, which has a little more than 90 degrees between the planes, and a little less for the outer ones.
How to properly reinforce the corners during the do-it-yourself wall putty?
Actually, there is nothing prohibitively complicated in this work.
A typical example of such work- when we use a plastic corner for.
So, how and with what to fix the profile?
Tip: For cutting, it is most convenient to use a grinder with any abrasive cutting wheel. The cut is perfectly flat, without burrs. Don't forget a respirator or a gauze mask: the fine plastic powder clogs your lungs quickly and effectively.
Here we need to make a small lyrical digression. A quality sealant can be considered, the price of which for a tube is at least 130-150 rubles, and the manufacturer found it possible to subscribe to the package. Cheap sealants differ from expensive ones, first of all, by far worse adhesion to smooth surfaces.
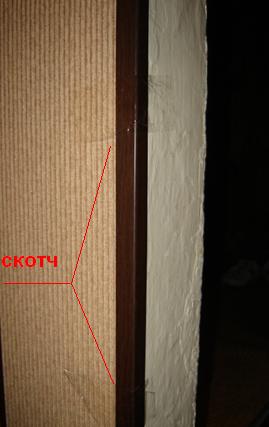
On durable surfaces for temporary fixation, you can use scotch tape - regular or masking tape.
What does the instruction for an arch look like? Obviously, when fastening, the right angle will lag behind the curved surface.
Useful: in the same way, you can fix lagging plastic profiles on the inner and outer corners.
Universal corners for finishing MDF panels are easy to attach:
How are plastic corners mounted for finishing corners at the junction of PVC panels?
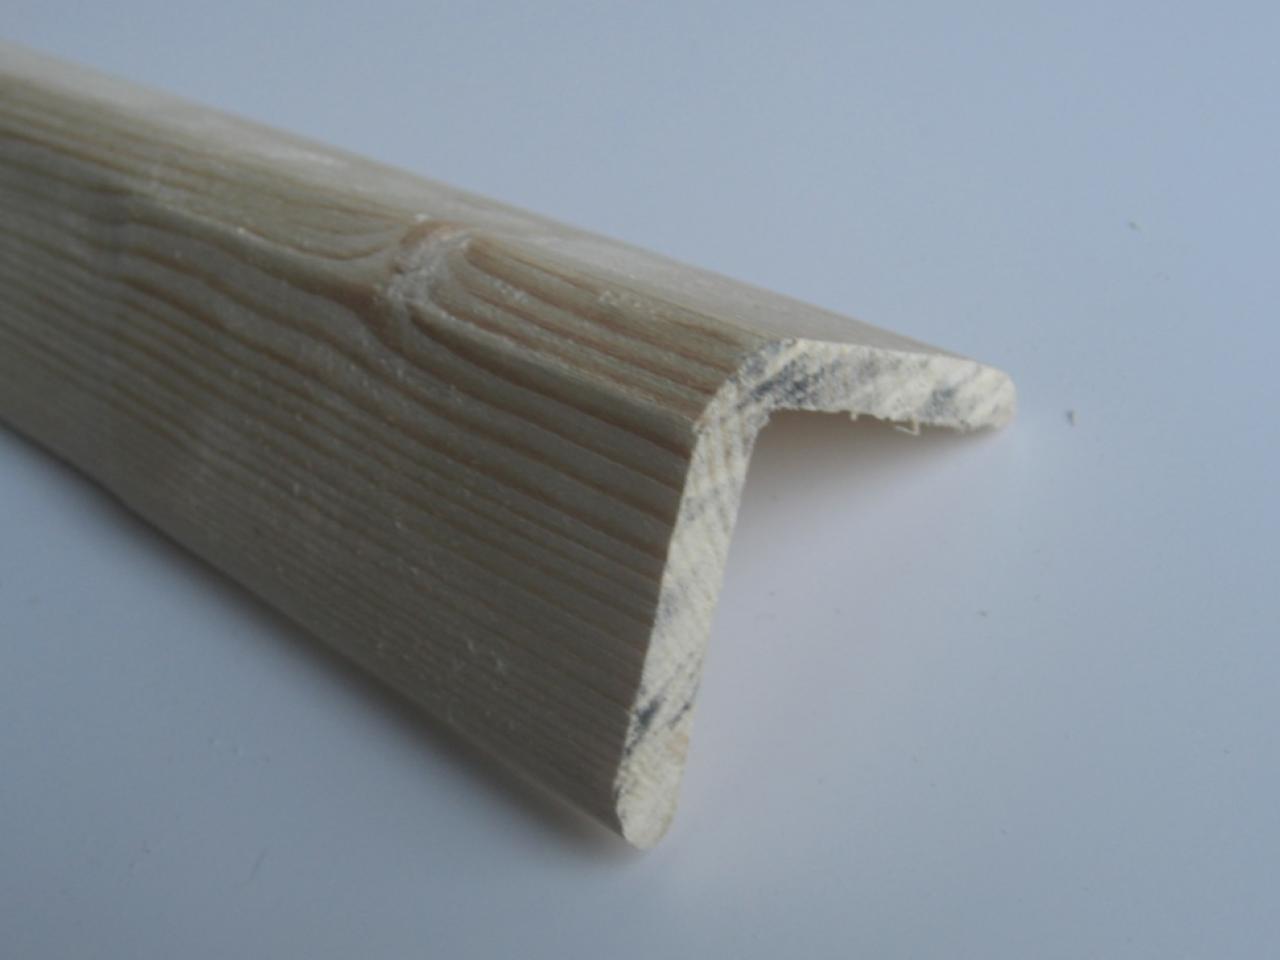
How is the decoration of the corners of the walls in the apartment with wooden corners?
There are two possible ways.
And here, too, two solutions are possible.
It is easy to find ready-made profiles on sale - with holes and fasteners.
Denis Valentinovich Manturov Minister of Industry and Trade of the Russian ...

Denis Manturov (born February 23, 1969, Murmansk, RSFSR, ...

, The Arbitration Court, the General Prosecutor's Office and the Federal Penitentiary Service, as well as a brief description ...