Job interviews are not easy. If you want to apply for...


yZTB Divinity Original Sin 2 FP LPZDB NPTsOP ZTPIOHFSH CHUEI LMAYUECHSCHI RETUPCH H MPLBGYY Y CHUE TBCHOP PUFBOHFUS RHFY RTPIPTsDEOYS YZTSCH. dB NPTsOP CHPPVEE OILPZP H TSYCHSCHIE PUFBCHMSFSH Y VE RTPVMEN RTPDCHYZBFSHUS RP UATSEPH. BIPDYYSH CH MPLBGYA, CHSCHOPUYYSH CHUEI Y VMBZPRPMKHYUOP RETEIPDYYSH CH DTKHZHA, Y F.D.
rETUPOBTs DBEF FEVE BDBOYE, fng CHSCHRPMOSEYSH BDBOYE J RPMHYUBEYSH VMBZPDBTOPUFSH RETUPOBTSB J RPDBTLY, RPFPN RETUPOBTSB BLBSCHCHBEF DTHZPK RETUPOBTS J fng, HVYCH VSCHCHYEZP OBLPNPZP RPMHYUBEYSH PRSCHF J RPDBTLY PF DTHZPZP BLBYUYLB. dBMSHYE FFPF BLBYUYL OBRBDBEF ABOUT FEVS - RTYIPDYFUS HVYCHBFSH Y EZP RPMHYUBS PRSHCHF Y FTPZHEY. and FBL CHUA YZTH.
OEKHVYCHBENSCHI RETUPOBTSEK OEF. vPZY FEVS OBOSMY URBUFY NYT PF rHUFPFSCH. h YFPZE FS BYUYUFYM NYT PF CHUEZP TSYCHPZP YOE TSYCHPZP, HVYM VPZHR Y UBN UFBM VPZPN. CHPF Y CHEUSH UATSEF.
YZTB IPTPYBS, OP OE YEDECHT. yZTB OE BBFSZYCHBEF Y RPD LPOEG (YUBUPCH YUETEY 50), L UPTSBMEOYA, UFBOPCHYFUS ULHYUOP PF PVEEK PDOPPVTB'OPUFY OEUNPFTS ABOUT CHUE LBYUEUFCHP YURPMOEOYS YZTSCH. with VSHCHM TBD LPZDB RTPYEM YZTH. with VSCHM TBD, YuFP OBLPOEG PFCHSBMUS PF OBDPCHIEZP, IPFSh Y KhCHMELBFEMSHOPZP DEKUFCHB :))
LCHEUFSHCH CHBN CHSHCHRPMOSFSH CHUE-FBLY RTYDEFUS Y DBTSE OE PVSEBFEMSHOP YI VTBFSH RETED CHSHCHRPMOOYEN. rTPUFP YDEN RP NYTH Y UHEN OPU CH LBCDHA REEETH Y LBCDSCHK ZPTPD. rPUME VPEC, UVPTB FTPGEEC Y RTPYUFEOYS LOYZ DOECHOIL RRPPMOSEFUS CHSHCHRPMOOOOSCHNY LCHEUFBNY Y RPDULBBLBNY CH RTPIPTSDEOYY.
NPCOP RTPIPDYFSH YZTH LLB CHDKHNBEFUS - LFP LPDB WABUBMB YENDH HISCHOLPHTPCHEKHTRUE SHUBUFY MPLBHYY Y FBN RTPLBYUKHBENUS, RPFPN DPNJUYTHS Y OE OBRTSBSUSHOBSUEBEN Chuu Pufbmshope, Janes BTUEOBMU NSRSTBBA. yOPZDB DPIPDYMP DP FPZP, UFP RPOSFIS OE YNEEYSH CH LBLPN YЪNETEOYY YMY MPLBGYY OBIPDYYSHUS Y UFP CHPPVEE CHPLTHZ RTPYUIPDYF. UACEF OE PYUECHIDEO, BDBOYS OE PYUECHIDOSCH, ChPNPTSOPUFY Y URPUPVSHCH CHSHRPMOEOIS LCHEUFCH UIMSHOP OE PUECHIDOSCH.
eUMMY CHSC ZHBOBF RPG, CHBN RTYDEFUS RPFTTBFIFSh 60-80 YUBUPCH UCHPEZP READING ABOUT RTPIPTSDEOYE. pFLBBFSHUS OE RPMHYUFUS, RP LTBKOEC NO WOBYUBMB :)
ЪDEUSH TBDHEF RTBLFYUEULY CHUE. eDIOUFCHEOOPE, UFP UOBYUBMB OE UPCHUEN HDPVOP - CHTBEEOYE LBNETSHCH (UTEDOYEK LOPRLPK NSHCHY) RTY RETEDCHYTSEOY RETUPOBTSEK. oP LFPNKh RPUFEREOOP RTYCHCHLBEYSH Y UP CHFPTPK YUBUFY YZTSCH OEBNEYUBEYSH RPDPVOSHI OEHDPVUFCH, LBL RTY RETEDCHYTSEOYY, FBL Y H VPA.
YZTB ZTBNPFOP UVBMBOUITCHBOB, DMS YuEZP LBL PVSCHUOP YZTPLH RTEDMBZBEFUS OEULPMSHLP HTPCHOK UMPTSOPUFY. OP CH PFMYUYY PF NOPZYI BOBMPZCH UMPTSOPUFSH YZTSCH ЪDEUSH NBLUINBMSHOP UPPFCHEFUFCHHEF CHSCVTBOOPNKH HTPCHHOA.
tBZZPCHPTSHCH H Divinity Original Sin 2 PYUEOSH CHBTSOSHCH. pFOPUYNUS L TBZPCHPTTBN Y RPUFKHRLBN RPUME TBZPCHPTCH LTBKOE UETSHEP. pF LFPZP ЪBCHYUYF OE FPMShLP ChBTYBOF TBCHYFYS UATSEFB, OP Y PFOPIOEOYE URHFOYLPC, CHPNPTSOPUFSH RPMKHYUEOYS PRSHCHFB, OBCHSHCHLPCH Y UOBTSEOIS.
OE VPINUS PYYVYFSHUS CH UFYME RTPLBYuLY ZETPECH, CH OBYUBME FTEFSHEK ZMBCHSH VKHDEF CHPNPTSOPUFSH RETETBURTEDEMYFSH CHUE PYULY OCHSHCHLCH X CHUEI. pF UEVS UPCHEFHA CHSHCHVTBFSH LMBUUYYUEULHA LPNBODH: CHPYO-DCHHTHYUOIL (VMYTSOYK VPK), CHPT-MHYUOIL (DBMSHOYK VPK), BYFOIL-FBOL (VMYTSOYK VPK), NBZ (DBMSHOYK VPK). fBLPK LPNBODPK CHSHCH CHUEZDB YZTH RTPKDEFE.
PTHTSYS Y VTPOY PZTPNEOOPE LPMYUEUFCHP, TEUKHTUPCH ABOUT HER RTIPVTEFEOYE X FPTZPCHGECH ICHBFBEF VE DYZHYGUFB (EUMY CHSHCHRPMOSFSH VPMSHYOUFCHP LCHEUFCHP). tBOPPPVTBJE RTEDNEFPCH BCHPTTBTSYCHBEF Y BUFBCHMSEF YUBUBNY LPRBFSHUS CH YOCEOFBTE Y RETETBURTEDEMSFSH PTHTSYE Y VTPOA NETsDH URHFOYLBNY VHLCHBMSHOP RPUME LBTsDPZP UETSHEOPZP.
BLLMYOBOYK Y HNEOYK CHEMYLPE NOPTSEUFCHP Y EUMY CHSHCH UTBYKH OE PRTEDEMMYMYUSH, LBLIE HNEOYS CHBN OKHTSOSCH, H CHBU RPUME DCHHI YUBUFEK YZTSCH VKHDEF CHPNPTSOPUFSH CHFPTPZP UFBTFB. nPNEOF, LPZDB NPTsOP RETETBURTEDEMYFSH OBCHSHLY, CHSCVTBO PYUEOSH HDDBYOP, CHSC HCE RPOSMY, UFP CHBN OKHTSOP Y H Yuen CH PYYVMYUSH Y H FPTSE CHTHENS CH FPMSHLP OBYUBMY YZTBFSH Y PUOPCHOBS YUBUFSH YZRET E.
RTPTBVPFBOOPUFSH PE CHUYEN, op! OE ICHBFBEF TBULTSCCHBAEYI UATSEF Y CHOHFTYRBTFIKOSHCHE PFOPIEOYS LBF-UGEO. th ChPNPTsOP UBN UATSEF OENOZP IBFSOHF. b CHUE RPFPNH, UFP OEF IPTPYEK BOINBGYY LBF-UGEO.
UVBTBENUS UOBVDYFSH CHUEI URHFOILPCH OBCHSHCHLPN RPMEFB, FEMERPTFBGYEK YMY CHPNPTSOPUFSHHA VSHCHUFTPZP RETENEYOYS ABOUT TBUUFPSOYY. OCHSHCHL yNEOYUYCHSHCHK VTY (FEMERPTFBHYS PF HDBTB) PYUEOSH RPMEIEO NBZBN Y TBVPKOILBN. OBCHSHCHL PYUBTPCHBOYE FPTS OE VHDEF MYOYOYN.
YZTB LCA OEFPTPRMYCHPZP RTPIPTSDEOYS, zde YUBUFP OHTSOP RTPDHNSCHCHBFSH FPMSHLP VPY OE, OP J RTPUFPE RETEDCHYTSEOYE RP NEUFOPUFY, LPFPTBS DP RTEDEMB OBUSCHEEOOB OE FPMSHLP TBUFEOYSNY, RPUFTPKLBNY TSYCHPFOSCHNY TH, TH OP MPCHHYLBNY, LMBDBNY J RTPUFP CHUECHPNPTSOSCHNY RETUPOBTSBNY J CHEEBNY. about OEVPMSHYPK RP FETTYFPTYY MPLBGYY CHBU TsDEF PYUEOSH NOPZP UATSEFOSHCHI UPVSCHFIK Y LBTCEFUS, YUFP MPLBGYS OBNOPZP VPMSHYE, Yuen EUFSH ABOUT UBNPN DEME. About Stopopuft LTPN Pyatsyudsi DPTPZ EUFSH NOPZPHTFCHTPHTFTPFCTPCPCI UPTSPKSPCCHTPCLI UE FBKYULBNY RMBFFCHLPK FBKTSKI, OLPFPTCHA LPFPTSKI PFLTSCHBAFUS FPMSLP RPUME Khsphpmuyuz Uzreybmspzp Leesufb. ABOUT LBTFE TBURPMPTSEOP OEULPMSHLP FEMERPTFPCH, OP OE VKHDSH YI, RETENEEEOYE VSCHOE UIMSHOP HUMPTSOYMPUSH.
VPK DEMYN ABOUT DCHB LFBRB Y RTYNEOSEN RBTFYBOWULHA FBLFILH - H MPV ABOUT CHTBZB OE UHENUS, B FP LPUFEK OE UPVETEN RPUME RETCHPZP CE HDBTB DTBLPOB.
uOBYUBMB CHSHCHNBOYCHBEN Y KHOYUFPTSBEN OETSYFSH, RPFPN HIPDYN RPDBMSHYE Y MEYUYNUS PFDShCHIPN. ChPCHTBEBENUS, FEMERPTFYTHENUS ABOUT ULMKH Y DBMSHYE CHPYOPCH FEMERPTFYTHEN L DTBLPOKH, B NBZ Y MHYUOIL DPUFBAF rTEDCHEUFOILB TPLB DYUFBOGIPOOSCHNY BFBLBNY.
ЪDEUSH ZMBCHOPE OE FPTPRYFSHUS, HVYFSH MKPCHTEDB CHUEZDB KHUREEN, ZMBCHOPE UBNYN OE RPZYVOHFSH. MEYUYNUS BLMYOBOYSNYY CHPUUFBOBCHMYCHBEN VTPOA EMSHSNY. ЁDPTPChSHE RPMHYUYFUS MEYUYFSH RP YUHFSH-YUHFSH Y FPMSHLP ЪBLMYOBOYSNY. x NEOS OB LFH VYFCHH HYMP OENOPSYN NEOEE YUBUB, VSCHMP YOFETEUOP!
bTLU. lCHEUF mPHUE. yuETOSCHK DPN. xVYCHBEN CHETIPCHOPZP DENPOB bDTBNBMYIB, TSYCHHEEZP RPD CHYDPN DPLFPTB dChB.
ZETPY RTYIPDSF CH bTLU RTPLBYOOOSCHNY DP 18 HTPCHOS, Y VYFCHB U bDTBNBMYIPN OE RTEDUFBCHMSEF PUPVPK UMPTSOPUFY, EUMY RTBCHYMSHOP TBUUFBCHYFSH LPNBODH. CHP-RETCHSHI UBNKh mPKHUE ABOUT VYFCHKH OE VETEN, DBTSE H DPN POBOE DPMTSOB BIPDYFSH. POB RTYUPEDYOSEFUS L WYFCHE FPMSHLP RPUME UNETFY bTZBNBMYIB, RPFPNH UOBYUBMB HVYCHBEN EZP.
fBLFIELB VYFCHSHCH FBLBS. uOBYUBMB HVYCHBEN RTYUMHZH H DPNE, CHUEI DP LPZP UNPTSEN DPVTBFSHUS (YI VKhDEF RPTSDLB RSFY ChTBZCH), OE RTCHPGYTHS UBNPZP DENPOB. rPUME LFPZP CH DPNE PUFBEFUS UBN DENPO 20 HTPCHOS Y RSFSH EZP RPNPEOILPC, DP LPFPTSCHI OE DPVTBFSHUS. FERETSH PUFBCHMSEN mPHUE UOBTHTSY Y FTENS CHPYOBNY BIPDYN CH DPN, RTPDCHYZBSUSH RP EZP RTBCHPK YUBUFY, DPIPDYN DP RPUMEDOEK LPNOBFSHCH. DEUSH HVYCHBEN DENPOB Y UTBYKH RPDLMAYUBEN L ZTHRRE mPHUE. rPUME LFPZP PUFBEFUSS TBPVTBFSHUS U PUFBCHYNYUS RPNPEOYLBNY DENPOB. sing YURPMSHHAF BLMYOBOYS PYUBTPCHBOYS, OBDP VSHCHFSH ZPFPCHSHCHN L LFPNH.
wtpos cheyuoschi.
tegerf vtpoy- OBIPDYN CH UETOSHCHI LPRSI - REEETB CH MPLBGYY TBULPRLY RP BDTEUKH X: 333, Y: 657.
bTFEJBLF CHEEUSHI- OBIPDYN CH yuETOSCHI lPRSI - REEETB CH MPLBGIY iTBN CH CARE URTBCHB PF CHIPDB.
fBTEMLB CHEEUSHI- OBIPDYN CH UETOSHCHI LPRSI - REEETB CH MPLBGYY TBULPRLY RP BDTEUKH: X: 455, Y: 536.
UJETB YUFPLB- NPTsOP OBKFY H iTBNE YMY LKHRYFSH X FPTZPCHGECH.
NEFBMMPMPN- OBIPDYN H RTPGEUUE RTPIPTSDEOYS YZTSCH (EUFSH ABOUT rPVETESCHE TSEGB, EUFSH ABOUT VESHCHNSOOPN PUFTPCHE).
lPUB yVBCHYFEMSHOYGB.
TEGERF LPUSH- RPMHYUBEN X UHLLHVY bMSHNYTSCH H TBKULYI iPMNBI.
tHLPSFLB- OBIPDYN ABOUT THINGS PUFTPCHE REEETH WEMPMYLPZP. CAREHL U THLPSFLPC H REEETE RP BDTEUH: X: 129, Y: 202.
lMYOPL LPUSH- ABOUT VESHCHNSOOPN PUFTPCHE CH ITBNE MHOSHCH RP BDTEUKH: X: 335, Y: 823. CHOHFTY ITBNB RTPIPDYN RPTFBM RP BDTEUKH: X: 618, Y: 600.
dTECHOSS ULTYTSBMSh- OBIPDYN CH UETOSCHI LPRSI CH andTBNE CHEEUSHI RPUME RPVESC OBD CHEUOPK EFETPC.
EUMY OE OBYMY CHCHYERETEYUMEOOPE, ZPFCHBS LPUB NEOSHHYEZP 16 HTPCHOS EUFSH CH bTLUE CH iTBOYMYEE LENNB.
YDEN CH ITTBN, ЪBIPDYN CH ZTPVOIGH (DCHETY ЪBLTPAFUS - OBBD RHFY OEF) Y RTPIPDYN NYNP UFBFHY MAGIBOB CH MECHSHCHK OEZH DP LPOGB. URHFOYLY U CHPURTYSFYEN BLNEFSF O UFEOE UMECHB UELTEFOHA LOPRLH. h HZMHVMEOYE OBD LOPRLPK CHUFBCHMSEN OBRPMOEOOSCHK BNHMEF bBODETUB Y YUYFBEN UCHYFPL yULHRMEOYS. oERPDBMELH CH RPMH PFLTSCHCHBEFUS UELTEFOSCK SMALL, YUETE LPFPTSCHK RPRBDBEN CH ZTPVOIGH. h ZTPVOYGE RETED ZHYOBMSHOPK VYFCHPK OHTSOP TEYFSH DCHB LCHEUFB - lPNOBFB U FTHVBNY Y lPNOBFB UNETFY.
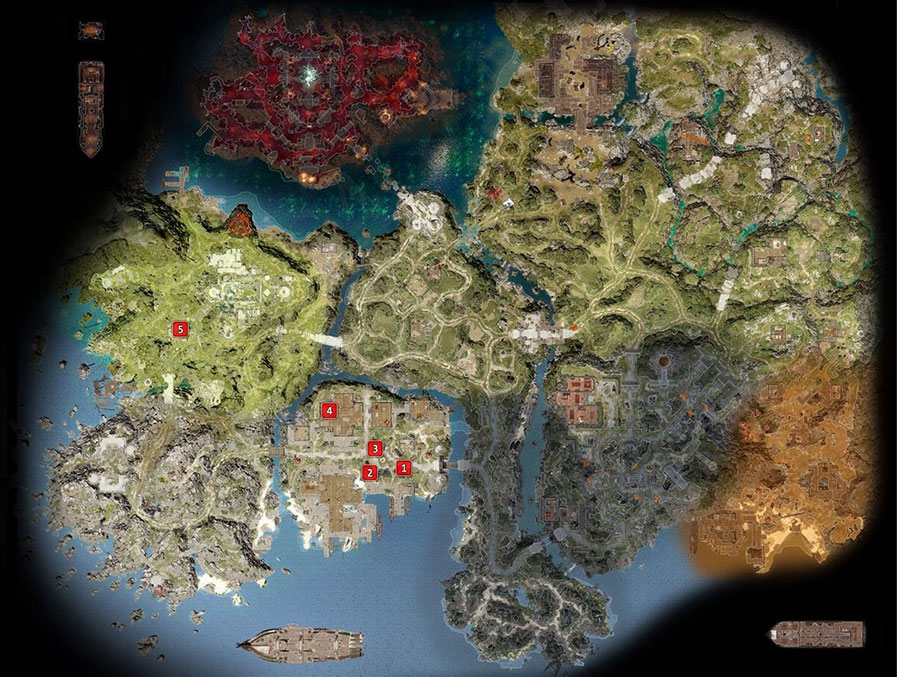
LBTFB ZhPTFB tBDPUFSH. chFPTBS ZMBChB RPMOPUFSHA. pVPOBYUEOSCH CHTBZY (LTBUOSCHE), FPTZPCHGSCH (UYOYE), LMBDSCH (EMEOOSCHE LTHZY), FEMERPTFSCH (EMEOOSCHE FPYULY), REETSC (CEMFSCHE LTHZY), URHFOYLY (PTBOTSECSCHE LCHBDTBFSCH)
LBTFB RPDENEMYK ZHPTFB tBDPUFSH. chFPTBS ZMBChB RPMOPUFSHA

LBTFB Divinity Original Sin 2. uEFCHETFBS ZMBChB. PUOPCHOBS LBTFB YZTSCH. pVPOBYUEOSCH FPTZCHGSCH
NYYB l . 2017 Z.
The Fall of the Hammer is a story quest in Divinity: Original Sin 2. The "Lady Vengeance" washed up on a rocky shore near Arx. Ailment reminded us that we must find Dallis and prevent her from using Etheran and the stolen power of the Source, as she planned.
This story quest is activated in Act IV - The Hunt for Dallis.
Talk to Ailment. She will say that you need to find Dallis and prevent her from using Etheran and the stolen power of the Source. Ailment advises to start the search with the local Divine Order.
The harbor of Arx is captured by fiends; defeat them so you can explore Dallis's ship, the Lord of Terror. The "Master of Terror" can tell you that Dallis and Vredeman are much older than himself... although he was once an elf and then an ancestral tree. Don't forget to check the chest, which contains a powerful unique amulet for mages.
Cross the bridge to Arx. Along the way, you will need to help the paladins defeat the fiend vampires (mission "Battle at the Gate").
Inside Arx, you learn from some paladins that Dallis can be found somewhere inside the cathedral.
After completing Linder Kemm's Vault, Arhu will direct you to Zanders. The toy merchant Zanders, in turn, will tell you how to go through the first part of the Path of Blood, and will give you a special amulet. Also in his house you will take a scroll of Atonement.
Complete all side quests before heading to Lucian's Cathedral.
Head to the Cathedral to follow the Path of Blood. When you get close to the statue of Lucian, don't waste time with dialogue; none of the answers are correct. Instead, find the switch to the left of the statue. Place the Source-infused amulet given by Zanders into it, then press the button. You will automatically read the scroll of Atonement and a hatch will open.
Through the hatch you enter the tomb of Lucian. A puzzle lies ahead.
Create some blood on the iron grating with a Blood Rain Spell, Flesh Sacrifice, or Wound (requires removing armor):
Interact with the altar and choose the second option to align the pipes. Below is one solution:
Once you have the pipes properly aligned, cast Bless on the blood at the iron grate, then quickly touch the altar and select the first option to activate it. The puzzle will be solved and a secret hatch will open under Lucian's sarcophagus. Enter it.
(Some users completed the puzzle in a different way: using a character with advanced telekinesis, move the teleportation pyramid to the bowls behind the pipes. Then teleport to the pyramid and create blessed fire, water and blood in the bowls).
You find yourself in a place called "A series of suffering." Here, the Source puppets will attack you and interact with the levers, which will impose various effects on your party, such as turning into cows and the like. Use Siphon Source on these puppets to kill them, or powerful area of effect AOE spells. After the puppets do not interfere, activate the five levers, the first letters of which are included in the word "RIGHT". The sequence doesn't matter.
After activating the "correct" levers, the barriers will be removed. It's time for the final battle. Make sure you complete all quests, memorize your best skills, and equip your best gear before entering the real Lucian's tomb. The final battle and Divinity awaits you. You won't be able to go back.
"Lady Vengeance" was thrown onto a rocky shore near Arks.
Ailment reminded us that we must find Dallis and prevent her from using Etheran and the stolen power of the Source, as she planned. The disease advised to start the search with the local Divine Order.
We learned that Dallis and Vredeman had arrived in Arx aboard the Mister Terror.
"Mr Horror" told us that he brought Dallis and Vredeman and their "soulless soldiers" to Arx. It is curious that, according to the ship, both Dallis and Vredeman are much older than himself ... although he was once an elf, and then an ancestral tree. There must be some mistake here...
We have learned that Lord Linder Kemm, the head of the paladins, can be found in the Magister's Barracks. The paladins recaptured them from the magisters during the riots. We should talk to Kemm about Dallis: perhaps he knows what she intends to do in Arx and why she needs Etheran.
Kemm confirmed that Dallis had arrived in town aboard the Mister Terror. But where she went next, he does not know. He wants to find Raymond, the head of the White Masters. If we find Raymond ourselves, we can figure out where Dallis is right now.
We found the magisters' barracks, their center of operations. The paladins plundered it and slew the magisters. We have to look around here.
We've discovered a secret vault under the Magisters' barracks - perhaps there we can find out what Dallis is up to and what she intends to do with Etheran.
After exploring the dungeons under the barracks of the masters, we found out that Dallis wants to get into the tomb of Lucian, located in the cathedral. We will have to do the same if we want to stop her - after all, Etheran is still in her hands, and the stolen Source too. Whatever she's up to, it's clearly some kind of dirty trick.
We found out that Vredeman is actually King Brakk, whom Dallis resurrected to help her find Etheran. We need to be extremely careful when we meet her face to face, since she is served by a mad sorcerer king ...
It turns out that Lord Arhu is the guardian of the cathedral. Anyone who wants to get into Lucian's tomb will have to ask for his help.
We've come to the cathedral, but to get to Lucian's tomb, we'll first have to survive a ritual called the Path of Blood. We have to figure out how to get through it.
Finds in the attic of Kemm's house:
Lord Arhu is missing. We need to find him - or find another way to get into Lucian's tomb.
We found Lord Arhu's diary. He seemed to be in doubt about Lucian's command not to let anyone into his tomb. Arhu did not understand the intentions of the deceased Divine and wondered what the Divine would say if he saw what the world had become in his absence.
We learned that both Dallis and Kemm independently demanded that Archu open the tomb of Lucian. He steadfastly refused, though apparently even he himself could not help them bypass all the defenses that guard the final resting place of the Divine. Arhu was obviously tormented by doubts about loyalty to Lucian's last will in these days, when the Void threatens the whole world.
Windego reveals that Linder Kemm made a vow to the God-King:
Kemm tried to stop us from releasing Arhu. It appears that he is a servant of the God King; he was instructed to learn from Arhu how to get into the tomb of Lucian.
We have found Lord Arhu. He told us everything he knew about how to get into the tomb of Lucian: we need to get past the statue of Lucian on the Path of Blood - with the help of some kind of amulet and the Scroll of Atonement. Both of these items can be obtained in the city, from the toy master Zanders. The amulet must be worn on yourself to be charged with Source, and then placed in a hidden mechanism on the Path of Blood. After that, you should read what is written in the Scroll of Atonement, and the passage will open. He also warned us about the dangers of the Death Room, where there are many levers, most of which activate traps. You need to pull the five levers that form the word "right" in order to pass without interference. However, said Arhu, no one knows how to neutralize all the traps to the very tomb of Lucian. There are still many dangers out there.
If Arhu dies:
In a small camp off the coast, we found a source puppet hiding. She told us that she had fled from the "death room" under the "great hall of lamentation and song." Is she talking about the cathedral? ..
The Source puppet mentioned that there are many levers in the room she came from that lead to death, but only a few say "right". She told us that we must acquire the right to freedom. What does it mean?..
The word “RIGHT” was engraved on the body of the Source puppet. Maybe it has something to do with where the puppet came from...
Sanders, a toy dealer, was involved in designing the protective devices around Lucian's tomb. We must learn everything from him.
Toy dealer Zanders told us how to complete the first part of the Path of Blood. We need an amulet filled with Source and a scroll of Atonement. The scroll should lie in a locked writing desk on the second floor of Zanders' house - the password is "Giyor". When we find both of these items, we can use them in the cathedral to open a secret passage. You need to look for a hidden mechanism next to the statue of Lucian.
We have received the scroll of Atonement.
We received the Source amulet. In order for it to begin to act, it must be filled with the power of the Source and put on.
We filled the amulet with Source.
We stand at the beginning of the Path of Blood. Will we be considered clean and righteous, will we be allowed to pass? ..
Walk the Path of Blood:
We broke into Lucian's Tomb but didn't find Dallis or Etheran there. Is she ahead of us?
We managed to solve the riddle and moved on.
The talking door warned us that we would die if we tried to get to Lucian's tomb and ordered us to leave.
We entered a large room with many levers... and very unfriendly Source puppets.
Pulling the right lever, we were able to go further.
We've penetrated what by all accounts must be Lucian's tomb.
Detailed walkthrough of side quests in Divinity: Original Sin 2 in the city of Arx
When you get to the bridge at Arks, the fiend vampires will appear. Defeat them and receive a reward from the captain of the paladins.
Go to the courtyard of the barracks of the masters, you will meet a woman who will ask you to save his wife - a paladin who is about to be executed for not following orders. Approach Lord Kemm and convince him to spare this paladin (or do the necessary investigation). Later, you can meet the freed paladin in the Magisters' Prison to receive the quest "Linder Kemm's Hideout" from him.
If you saved the paladin from execution in the quest of the same name, then you will meet him (actually - with her) a little later in the master's prison. She will tell you that Lord Kemm has his own secrets. If you free Vindego during the Mercy Is Power quest, you'll find out that Lord Kemm is secretly working for the God King. There is an artist in the Arx city square who paints pictures about the war. Use a ghost spell to see the spirit of his father standing nearby. Talk to the artist's father to find out that Lord Kemm has a unique collection of paintings in storage.
Entrance to the Thieves Guild
At the sewers thieves guild, you can buy the painting you want (from the kids) if you can convince them. You can learn about the location of the entrance to the Thieves Guild from a little girl from the school. The entrance to Lord Kemm's vault is in his garden. You need to pull the hidden lever to open the hatch.

Desired lever
After you pull the lever, enter the vault through this hatch.

Hidden hatch
Inside Kemm's hideout, there are several automatons patrolling the area. Either sneak past them or fight them (you need to kill them with a source of lifesteal). At the end of the vault, activate the ghostly vision and place the painting you bought from the thieves guild in the empty frame (where it was stolen from). This will open the secret room.

Putting the painting back
Inside the room, there is a painting called "Responsibility" (rough translation). Take it with you, leave the room, and then activate the book on the right shelf.

The book that opens the passage
Behind the stone door is a hatch that will lead you to the God King Temple. After you complete the dialogue with the god king, interact with the sign on the ground. It says that only the king god knows the weight of responsibility. This is the clue that connects this place with the picture.
Place the painting "Responsibility" on the altar, which will lead to the opening of the hatch leading to the Arhu prison.

Putting a painting on the altar
Lord Arhu was imprisoned here by Lord Kemm. To free him, you need to use a ghostly vision and use the source of vampirism (in conversation) on two tormentors.

Destroy the tormenting spirits
Pay attention to the fact that the dagger lies on the statue, which is necessary for the Red Prince's quests.
Once Lord Arhu is freed, four Black Ring defenders will appear and attack you. A little later, Lord Kemm will also arrive, who will also have to be destroyed. If you want to keep Archu alive, it is advisable to keep him as far away from opponents as possible using teleportation. But if he dies, you can still talk to him by using Ghost Vision. After defeating Kemm and the Black Rings, Lord Arhu will tell you about how to solve the puzzle in the cathedral.
Lord Arhu is locked in Lord Kemm's vault. We offer you detailed instructions on how to get to Linder Kemm's hideout in the quest of the same name. First, visit the thieves' guild, which you learn about from the girl from the school, and buy the picture stolen from Kemm from the children. Move into the garden and look for a hidden lever that opens a hatch that will lead you to Kemm's vault.
Bypass opponents or defeat them using the source of lifesteal. At the end of the hideout, cast a ghostly vision and set the painting you got from the kids in the thieves guild to the empty frame. Go into the opened corridor, inside it find the painting "Responsibility" and take it with you. Interact with the book on the right shelves to open a passage further. Behind the stone door there will be a hatch that leads to the temple of the god king.
After talking with him, inspect the sign on the ground, and then place a painting on the altar with the name that is indicated there (responsibility). So you will get through the hatch to the prison in which Arhu is sitting. Use ghostly vision to locate the two spirits holding Arhu, then destroy them with a source of dampirism. Then take the dagger from the statue, which the Red Prince needs in his personal search, and then defeat all the enemies, including Kemm. Lord Arhu can be teleported away so that he is sure to survive. Or, if he does die, using a ghostly vision, communicate with the spirit of this person. This is how you will learn how to solve the puzzle in the cathedral.
In the master's vault, located under the barracks, you can find the book "Report on the Toy Dealer". This way you will learn more about this finder. Alternatively, in a conversation with the freed Lord Arhu, you will learn about a certain Jefferson, who must be contacted in order to get into the cathedral. Go to the toy store and convince him to help you. He will give an amulet that can store the source. You must fill the amulet with the source, and then return to Sanders.
When you do this, then re-chat with the seller of the toy shop. If you can convince him, he will say that you will need a scroll of atonement to enter the divine tomb. The scroll is in a locked table on the second floor of the store, and Sanders himself will name the password for it. If you can't convince the man, you'll have to sneak up to the second floor and break open the scroll box. An amulet and a scroll are needed in order to open the hatch in the cathedral.
When you get to the Magisters' Barracks, you'll see that the Paladins are busy looking for the Magisters' secret quarters. The hatch they need is hidden under some crates in the trap room.

Secret hatch location
You can try to convince a nearby spirit to point you to the correct hatch combination, but this is very difficult to do. The correct combination is actually related to the motto of the masters: mind, body, society and divinity.

First lever

Second lever

Third lever

Fourth lever
You will gain experience for solving the puzzle, and the spirit will disappear. Therefore, if you need a source, then apply lifesteal before solving the puzzle. Inside the vault, you will see four switches that are hidden behind the paintings. Remove them and activate them in the correct order according to the motto of the Magisters described above. Inside the secret room, read the report to gain experience, and if you use a ghostly vision, you will get additional information.
Here you will also find another report about a toy salesman. This will activate this quest. There are three geist on the second level of the master's vault. Kill them all, search and take away another book, which says that Dallis wants to resurrect ... (and we will not spoil it). At the same time, the quest "Revival of the King" will start.
On the second level of the masters' hideout, located under the barracks, you will find a book next to the table, which indicates who exactly Dallis wants to resurrect. Return to the Hall of Echoes and meet with Tarquin. He admits that he helped Dallis, and as compensation he will give you the Anathema (the BEST two-handed weapon in the game).
Enter the prison and talk to the paladins. You will learn that the magisters were investigating the disappearance of several prisoners who vanished from their cells under the magisters' barracks before the paladin uprising began. After you defeat Isbale in the Secrets of the Dwarfs quest, you can find the missing prisoners in her laboratory. They died because they were sucked out to receive the source.
In the camp of the leader of the Black Ring, you will find a letter that lies in the war room and talks about Vindego. You will meet this witch again in the inner basement of the master's prison on the island of Arks. To get there, you need to convince the paladins that you can resist her.
If you decide to save her, then you will need to donate enough items or coins to improve your relationship with her. After that, interact with the switch nearby to open the cage.
If you have a special blade needed for the Red Prince's quest (and you can find two blades - one whole and the other in parts), then you can free Vindego from the oath to the god king. But in this case, do not forget that if you have one blade, then you will not be able to save the Red Princess in the Red Prince's personal quest. If you do not have a blade, then Vindego will tell you that there is one in Lord Kemm's vault.
The name of the quest contains the name of the prisoner of the masters' prison, which you can get into through the sewers (first, use a ghostly vision in the masters' barracks, and then talk to Winslow and agree to help him find Banne). Banne's corpse can be found near the sewers. Use a ghostly vision to find his spirit and talk to him, after which you can go inside.

We talk with the spirit

sewer entrance
When you get to the cage with the boy, you will activate the ghostly vision and you will see dead seekers trying to keep the prisoner in the dungeon forever. You can leave them alone or break the boy's cage. He will turn into a crazy villain and attack you. If you leave this area without killing the boy, then when you revisit this place after a while, you will find that he has escaped.
In the western part of Arx, next to Lord Kemm's mansion, there is an antiques dealer waiting for a famous appraiser named Kat. Inside Kemm's mansion, you need to talk with expert Kat, and if you can convince her, she will ask you to find three valuable antiques stored in Kemm's hideout. Inside this hideout, there are several automatons that will have to be killed or bypassed. If you kill, then apply vampirism.

Painting location

Scroll location

Bowl location
As soon as you find three relics, then return to Kat for a reward.
In the southeast corner of this area is a school occupied by outcasts and excommunicated monks. If you talk to a little girl there and convince her, she will point out on your map the place where the thieves guild is located. Talk to another Griff, and if you tell about what is in Fort Joy, you will get experience points. Griff will ask you to help restore the school and drive out the enemies. You need to talk to Sister Shori and convince or force her to leave. After that, you can return to Griff for a reward.
There are several ways to activate this task. Either sneak into the wedding venue, get an invitation from a drunken dwarf located outside the building, or sneak through the backyard.

We make our way through the backyard
In addition, you can get here through the sewer.

Entrance through the sewers
When exploring the latter, be careful, as new opponents will appear there - fog spiders, which emit a poisonous fog after killing.
The feast was interrupted by an attack from the fiends of the Void. Examine the statues to find fiend traces next to the pipes. Talk to the dwarves for more information, and then activate the ghostly vision and see the wandering ghosts of the dead guests. Interact with the wedding cake and it will explode. Enemies will appear, and you will have to destroy them. After dealing with them, talk to the guards and find out exactly who sent this cake. It will turn out to be a certain doctor, who is also connected with Lowse's personal quest. Enter the sewers and then get to the royal courtroom.

illusory wall
Use ghostly vision to communicate with the spirit of the murdered Isbale and find out what is the reason for her anger. After searching the place, find the queen and decide what to do with her. An illusory door located nearby leads to the queen. On the other side of the lab there is another similar door, but behind it is a deadly trap.
This quest is connected to Lowse's personal task. When you get to Arks, you will find out that in the northeast there is a house of a powerful demon who has settled in a certain doctor. If you want to enter this house, then you will first need to do something - either kill Isbale on the quest "Secrets of the Dwarves", or release Lord Arhu from Kemm's prison. So you will receive an invitation from the doctor. Go to his black house and talk to the Ailment near the entrance.
Chat with the woman, she will take you to the demon dimension. Follow her and sniff the candles. Even after that, the boss's HP pool will be 11,000. Go inside and kill the nurse, and then talk to the Doctor. If you do not touch the nurses, then they will constantly restore his HP. Spend the source as soon as possible so that the doctor does not suck it out of you. One of the cabinets contains Quinn's armor, which allows your character to fly.
You will need a special dagger. You can either find it in Lord Arhu's prison, or collect it in parts (two in total) on the Nameless Island. Without it, it will be impossible to free the Red Princess. To get to the consulate, use a character with the best theft and lockpicking. Get to the fountain. You can find the key that opens the doors, you can break them open.
With the help of teleportation pyramids, you can move the entire group behind one character. In the end, activate ghostly vision to find the portal. Go through it to the arena, fight the reflections of the characters you met earlier. Destroy their mirrors beforehand, from afar, to avoid the battle, or do it during it (otherwise the reflections will respawn).
Go to the door, one of the heroes get to it during the battle to move the entire squad to a safe zone. Talk to the seeker near the portal and find out where the Red Princess is. If you have a blade, you can free her from her oath to the god king. With the fiery breath of the Red Prince, give birth to a dragon, and then leave the dream.
After character creation, you will awaken on the ship as a prisoner. You, like many other wizards, were sent to "cure" in Fort Joy due to the fact that you are a danger to others and to yourself. A certain witch deliberately used the power of the Source in the city to be caught and imprisoned with you, and now the intrigue continues.

You will find a collar on yourself that blocks the power of the Source. Talk to the warden to find out about the murder that took place in one of the cabins. Next, go to the crime scene and talk to the master. It turns out that someone managed to drop the collar, and then finished off the wizard from your brethren.
After that, go further into the ship and talk to other NPCs. Some of them (specifically - five people, if you also play as a hero with a backstory) are the most interesting, as they can become your companions in the future.
Get to the opposite side of the lower deck to start a dialogue in which the very witch from the prologue (it was she who managed to remove the collar and commit the murder) will summon a kraken-like creature, knock you out and disappear.

Waking up, you will see that most of the masters died. Examine future companions who have fallen into unconsciousness, and then rise higher. On the new floor, visit the lower room, the key to which hangs in the right corner (hold Alt to highlight items), and go inside. Negotiate with the masters there or kill them, then leave the room. Finally, visit the small room in the corner where Fein is sitting.
This is one of the companions that you may have noticed earlier in the form of an elf. The undead will refuse to go with you, so get out on the upper deck yourself.
Outside, you will see a summoned monster destroying the ship. Kill the fiends, and then run to the opposite side, where the lifeboat is located. You can either lower it right away, or tell them to wait and then return for potential companions. If you save them, then improve relations with them (they will survive anyway).
After the battle with the fiends, return to the boat. Alas, due to the delay, you will not have time to get out, but this will not affect anything, since the ship will sink anyway.
After the shipwreck, you will wake up on the shore. Go ahead and talk to baby Tom at the statue, which is a fast travel point. To use the teleport, simply open the menu and select the altars.
You won't be able to teleport anywhere now, so keep going. Soon you will find the Red Prince - one of the possible companions that you can take to your group. We did just that.

Next, you will stumble upon a black cat that will follow you. If you have the Animal Friend perk, you will be able to talk to him, but the cat will not tell you anything interesting and will follow you anyway. Make sure he doesn't die if you want to get the Summon Companion spell.
Climb up the broken bridge where you can pick up a shovel and a sleeping bag. The first one will make it possible to dig holes (in the absence of a shovel, a lizard can do the same), the second one will restore health and armor outside of combat.
Go forward, keeping close to the thickets, until you come across a cave. The entrance will be hidden by vegetation, so keep your eyes peeled. Inside, you will enter the "Secret Alcove" area, where Fane will be waiting for you.
Recruit him if you wish, and then make your way to the end of this section, where there is a waterfall with a chest. To pick up the last one, teleportation magic is needed (put a mark on the map near the chest, so as not to forget about it and return here in the future). Here, on the beach, deal with three turtles.
There are a lot of jobs in the city itself. You can talk to all NPCs, but only a quarter can tell something interesting.
First of all, turn right, where you can hear the crying of a woman. Here you will receive the task "A Mother's Nightmare". The woman Farrah cannot find her daughter Erma, and no one, they say, wants to help her. A nearby person will inform you that little Jet has died. Tell Farr about this to complete the quest.

After that, go up the stairs and approach Griff's mercenaries. Two gnomes playing cards will offer you to join - agree. If you lose, you can lose all things. True, you can also tell the cheaters that you have nothing, and then they will not touch you.
The task "Extortion" can be obtained to the left of the entrance. Resolve the conflict between an elf and a human, among which is another possible companion: Ifan. Accept him into the group or refuse the services, and then follow the elf if you decide to help her, or continue on your way.
Get to the city center where the kitchen is located. Here the head of the mercenaries Griff will tell you about the loss of his goods and point to the thief who is sitting in a cage. The thief will be an innocent elf named Amiro, who will ask you to rescue him.
Below the fortress, you will come across a fishermen's camp where Stingtail sleeps. The lizard is a soothsayer that the Red Prince needs on his personal assignment, which you should already know about if you accepted him into the group and talked to him. Nearby is Sybil - another potential partner, who, in turn, wants to finish off Stingtail.
If you accept both companions into the group, then you will have to decide which side to take. You can also talk to Stingtail in the presence of the Prince, and only then include Sybil in the party and complete her task.

Before killing the lizard by Sybil, inspect the nearest box, where the smell of oranges remains. Reprimand the lizard and demand the return of the loss. Once you have the orange, decide the fate of Stingtail of your choice.
Open the orange through the inventory to get the narcotic plant. Return this good to Griff, and then release Amiro. The elf will reveal to you the location of a secret path that will lead you out of Fort Joy, but it's too early to go there yet.
Not far from the Kitchen, you can find a hatch that will lead you to the Arena. Here you will receive the task "Fort Joy Arena", in which you need to defeat four opponents in one battle. Enemies will be the third level, so in the early stages it is better not to meddle here.
After completing the task, return outside and look for Blacksmith Neboru nearby. Upon learning that you have become a champion, she will agree to remove the collar from you (but not from your companions). You should not use this offer yet, as all masters will become hostile to you.

The task "Geist killer" is taken on the wall of the city. Talk to Master Arnica, who is trying to find a certain Migo. You will find the missing person below and to the right near the shore. It turns out that Migo was subjected to a corruption that turned him into a mad cannibal. It is not necessary to fight him, on the contrary, you can ask him for a ring (you need an Arnica flower), and then return the item to Arnica.
The girl will believe you that you have found her father, and then go to Migo. To complete the quest, visit them on the beach. By the way, the newly united family can simply be killed to pick up a good bib and ring.
The task "Looking for Emmy" is issued by a dog named Druzhok. My friend, if you are gentle with him, will show you the location of the key. Ask him about the key to find out about the missing Emmy - the dog that was taken by the masters. You will find the dog later when you get to the Fort Joy Prison.
Visit the cave where the elf invited you. Here, talk to Amiro if you have already saved him, as well as other inhabitants. The main elf, deprived of sight, is a soothsayer, and it is she who will tell you a lot of interesting things.
By the way, Amiro will ask you to tell other elves who live on the continent about them, but you will return to this task much later. Finally, Lois can interact with the diviner - another companion that you could find in the city near the tents with a fire.

Have a polite conversation with the lizard if you want him to show you his goods. Next, go deep into the cave, after removing or breaking the barricades, behind which lies a secret path. She will lead you to poisonous frogs - kill them.
The task "Jar of Withermoor's Souls" will be given to you by a child. Agree to play locks with him twice and find him. After that, find a small hole in the wall to activate a new cue: the child will tell you about a secret hatch that lies nearby. Go down the hatch.
You will find yourself in the Forgotten Tomb with a statue of Lord Withermoor. Pull the spear out of the chest of the statue, and then talk to her. Withermoore will ask you to find his soul in Brakk's phylactery, which you will get to later through the dungeon.

You will receive the Teleport task from Gavin. The guy will call you to a private conversation - agree if you want to get teleportation gloves. To do this, you will have to detach your portrait from the group and take the rest of the party away, and then talk to Gavin vis-a-vis.
On the second or third level, get to the beach on the upper left, where the crocodiles are. Kill them to get the above item. The next time Gavin will meet you at the exit at the top, where he will offer to leave the Fort. With the help of teleportation, you will make an escape, but soon Gavin will die. From his body you can pick up a good robe.
There are three ways to escape from the Fort, but each of them involves going through the prison:

The third option is the most complete, so it's best to go for it. In the tunnel you will find neutral fire slugs that were people in the past. Their queen was once the wife of King Brakk, known for his tricks - it was he who turned the queen and her subjects into slugs.
After the conversation, go upstairs to the cameras. A lizard is imprisoned in one of them, but it will not report anything interesting. Break through the door to go further. In one of the chambers, talk to Verdas, a dying elf. Examine the camera in the upper right and take the amulet from the body using the teleporter.
By the way, the leftmost cell, which cannot be opened, will become your home if you commit a crime and are captured.
Ultimately, you will reach the end of the corridor, where the masters want to eliminate the renegade. Kill them, take the key and go further. If you give Delorus the potion, he will tell you about the boat, which will help you leave the fort.
Inside the prison, you will find a bunch of monks - mindless creatures that were once living lizards, people, gnomes, etc. They will not attack you, so feel free to step forward.
In one of the rooms, find Emmy - the same dog that Druzhok told you about. If you inform her about Druzhka, then she and other dogs will not attack you. They can also throw a ball if you managed to find it earlier.

On the other side of this zone is the boat mentioned by Delorus. Tell the magisters the password (Delorus told you that too) to avoid the fight. After that, talk to the boy Khan, who will offer you to leave the Fort. For now, it's best to refuse.
On the right side of the zone is a torture chamber run by an insane sadist. You have a tough fight with the psychopath himself, as well as his monks.
Not only that, the caged golems will also resist you, but first they will have to break the cages (it will take 3-4 turns).
After the battle, take the Face Cutter from the corpse (Fane will come in handy), and then talk to little Trice. Here you can also unlock the eastern tunnel, which will lead you out of the Fort in the same way.

In the same area, to the left of the stairs up, go to a small altar, near which your perception skill should work. If you pass, you will discover a lever that will open a secret path to Brakk's Phylactery.
Kill the skeletons inside and take all the jugs. One of the jars belongs to Withermoore, whose quest you have already taken. The rest of the jugs will also come in handy, so it makes sense to save them. Before leaving, interact with the statue on the left (requires Perception above 14) to get Leggings of the Tyrant.
The stairs, as well as the left exit, will lead you to another part of the fort, where you will have to fight the masters.
In the courtyard, kill the masters and go upstairs. Examine the room and exit to the balcony, where you can activate the stairs that will lead you to the chambers of the masters.
If you leave the prison through the left entrance, you will find yourself in front of the gate. Step into the only possible turn, where there are even more masters. Kill them and save Paladin Cork. If you manage to save him, he will tell you that his order knew nothing about the atrocities of the masters. Otherwise, an elf in your group may eat part of his body to learn about a wizard named Arhu.

After that, visit the main hall inside the building, where the trial is taking place, led by Judge Orivand. Kill everyone.
After the destruction of all masters in the fort, leave the territory by any means. Pass the swamps and climb the hill where Zaleskar, the undead merchant, stands.
Go upstairs, keeping to the shore, until you stumble upon the Vindego witch. It was she who destroyed the ship, so it's time for revenge! After killing her, take the mask of Reincarnation - a valuable artifact for Fane and any other undead.
Not far from here, find a ruined tower, inside of which a thunderstorm is raging. Use teleportation on the items inside to move them down. In the bones of the corpse you will find the most valuable item, which is called Tyrant's Boots.
You will receive the task "Cornered" above from the broken bridge. Paladin Tarlin will inform you about the Screaming One that hangs on a pillar. It is impossible to pass through this creature in the usual way, as it will instantly destroy you. It is necessary to kill the Screamer using a wand with the Purification ability, or the Helm of King Brakk, which has the same skill.
In the fiery ruins above, kill a group of magisters, and then another one that is trying to defeat the paladin Gareth. It is in your interest to keep him alive, as it depends on him whether you remove the collars or not. However, if he dies, there will be other ways.

You will receive the “Armory” task nearby, looking into the basement. You will enter the armory of Brakka, where the half-dead master Sang is located. Corruption consumes him, so do him a favor and kill him. From him, you can learn that the nearest lever is cursed, which makes it impossible to use.
Use the Source skill "Blessing" to clear the lever and move on. Inside, you'll find Brakk's Helm and an endless Source cistern.
Leave the dungeon and step along the bridge. At the dead end, search the skeleton. Keep walking until you reach the road next to which is the blind Magister Lok.
You can not kill him if you agree to surrender. This will be followed by an attack of enemies, during which Lok will be hostile to both you and the monsters. You can deliberately not hit him, after which, when the enemies die, the battle will stop, and Lok will let you go.
At the end of the road, talk to the bear cub who lost his mother. You will find her body a little further, but you can’t tell about this bear. Frighten him or inspire him.
Quest "Flaming Pigs": from the center of the map, go down until you reach a burnt village with strange pigs. The poor animals are engulfed in flames that cannot be extinguished in the usual way, so you must think of something. With the friend of animals perk, you can find out that pigs are actually people, and Brakk is responsible for this curse.
To heal the pigs, you must learn the Blood Rain spell and cast it on them. When the surface around is saturated with blood, use the power of the Blessing Source on it to create a sacred fire that will extinguish the damned.
When one pig is healed, you will find an undead lizard named Scapor. He is a kind of beholder who watches the execution of the curse. He will have to fight.

After that, you can stumble upon the last pig, which is located in the north at the entrance to Dragon Beach. To save her, advise her to visit the Sanctuary of Amadia and take a dip in the pond there. When the job is done, she will become one of the merchants and offer you interesting goods.
On the way through the center of the location, you will stumble upon a group of fiends, whose bodies expel infected blood after death. Be careful with her, as she applies a painful "debuff" for several turns.

Next, you have to fight the monster Moloch of the Void, who, along with other creatures, will decide to finish off the Red Prince, and at the same time you. Combat can feel like a real challenge if you haven't found good gear yet and are low level.
On the eastern road through the forest you will get to the southern coast. There you will be attacked by two poisonous and one fiery salamander. Again, the battle will be difficult if you are below level five.
Not far from the place of the battle, you will find the Baharu lizard, which guards the approaches to the Sanctuary of Amadia. If you have already rescued Gareth or have previously rescued the Khan boy (the boat is in prison), then she will give you a vine that you can climb.
The Red Prince, by the way, will ask for the opportunity to talk with Bahara, since she is a clairvoyant.
If you have already rescued Gareth, then you will find him on the territory of the sanctuary. Talk to the locals, as each of them has interesting information and some are merchants.

You will receive the “Healing Touch” task a little higher in the Sanctuary of Amadia, where a certain Simone is trying to heal the wounded soldiers. To complete the quest, use some kind of healing spell on all the fighters.
The quest "Eternal Admirer" is issued by the priestess Gratiana, guarding the statue of Amadia. After talking with the priestess, you can talk directly to the face of Amadia in the form of a stone, and how the visit to this place ends depends on the lines you choose.
If you are rude, then a fatal battle will ensue, but if you answer with respect, then Amadia will call you the chosen ones, and the pond around will be covered with a sacred flame.
On the assignment "King Brakk's Treasury" you must visit the cave, the entrance to which is located near the shore near the Sanctuary of Amadia. Inside, you will meet a brute undead named Trickster, who will insult you and tell you that you will not be able to go any further.
There are boxes next to the Trickster, each of which will simply freeze you if you activate them. At first glance, there is nowhere to go from here, but the solution is simple and lies in the illusion - just step on the abyss behind the boxes so that the invisible bridge appears.
Behind the bridge, you will have the first battle with the Trickster, who will create two illusions to help him. After the battle, you will enter a hall with a statue in the center, as well as many doors that are traps.

Behind the next door you will have another battle with the Trickster. This time there will be more opponents, but do not forget that the location, limited at first glance, is dotted with invisible bridges that you can use. After killing the Trickster, pick up the Cursed Ring.
Advice: keep in mind that putting on the ring will make you cursed and get the corresponding hunched animation. Moreover, if you remove the ring, then your characteristics will drop and remain reduced until the item is put back on. To get rid of the curse, the ring must be transferred to one of the companions, but it is better not to use it at all.
At the end of the dungeon, a real treasure trove awaits you with heaps of excellent items, gold and phylacteries. Urns, mind you, can be swallowed or broken. The Trickster Urn is connected to an enemy already known to you, who, as it turns out, did not really want to harm you, but the curse of Brakk makes him guard the treasury.
You can take Gratiana's Urn to the priestess herself in the Sanctuary of Amadia to find out the truth about her. The last three urns are connected to the Necromancer Skeletons from the Gargoyle Labyrinth.

The quest "Champion of the Gods" is activated at the end of the room with the help of a statue. Using it, (only the main character) you will be transported to the "Halls of Echo" - the other world, where you have to talk face to face with your god (each race has its own deity). Here you will be taught the skill of the Source "Blessing" and indicate the further goal.
Higher from the beach with salamanders, walk along the rocks until you find creepers. On them you can climb the plateau leading to the eastern shore.
The task "Gargoyle's Labyrinth" is located here. At the building with many doors and traps, you will find a gargoyle that will offer you to go through the labyrinth. If you put on the Ring of Brakk, then the statue will take you for the king himself and immediately transfer you to the end.
To complete the maze, you will have to split the group (detach the portraits on the left of the screen from each other so that the chains break). In the first room, stand on the stove so that a skull appears on the altar nearby - an item that allows you to open doors in the labyrinth.

After the first use, the skull disappears, so for each door you have to look for a new one. Now open the door on the left and get to the hatch, which will throw you upstairs. Be careful as there are many traps around. With one character, stand on the slab to open the door, with the second one go inside and stand on the slab, with the third - take the skull from the altar.

Unlock the doors on the right, which will lead you to the main building. This is where the gargoyle can immediately teleport you if you show her the ring. However, such a trick still does not save you from collecting valuables in the maze on your own.
Before entering the building, you can open other rooms. The third one, which is located next to the room where you opened the blue door, can only be accessed by teleportation.
The fourth door leads to the right door at the entrance to the labyrinth, where you will find a portal on a small ledge. To get there, use the teleport. Next, you will be transported to another platform with a portal that will lead you to the "Realm of Orobas".
Inside this small location, you can use the teleport again to collect valuable items.
Finally, in the center of the labyrinth are three burning skeletons and a cursed Historian. Kill the first and help the last by removing the damage from him using the method already known to you: blood and blessing.
The task "A Fate Worse than Death" is activated inside the building, which is in the labyrinth. In the right room, you will come across skeleton necromancers playing cards, which you will have to fight. After the battle, if you have already obtained the jugs from the Treasury of Brakk, break the phylacteries of this undead, otherwise they will resurrect again (this will continue indefinitely).
After picking up the key from the body, go through the only door. Inside, activate the plate with the iron crate from the adjacent room, as the regular ones will quickly burn out.
After that, you will find yourself in a spacious room with many rooms, each of which is worth exploring.
At the end, you will run into a magical shield, which can be unlocked both with the help of the power of the Source (answer option in the dialogue), and with the help of Withermoore, which will come here if you helped him in the past.

Behind the gate, collect all the valuables, including the Tyrant's Gloves. Before leaving, look into the closed recess on the right, where the well is located. Throw 150 gold at him to get a good item.
The task "Deprived of the Source Dragon" is taken to the right of the plateau in the east. Here you will find a frozen area, in the center of which the Winter Dragon Slane has sprawled. Break the chains that bind him, and then talk.
From Slaine, you will learn about a certain witch who charmed him in the past, and then deceived him, bound him and began to use him as a source of energy. Go in search of a witch, who is located in a nearby cave (the entrance looks like a huge skull).

After passing the traps in the cave, you will soon reach the witch Radeka. If you start to fight her and refuse to deceive Slane, then in this case you will have to fight both Radek and three bugs and dead people. It makes sense to place part of the group at the beginning, as the bugs will appear there and start attacking you from afar.
Radek herself uses necromancy spells, so get ready for charms and other tricks.
Pick up the wand from the body of the witch and return it to Slane. The dragon will thank you and say that he will come to the rescue when you do not wait for him. By the way, Slane can be killed, but rest assured, the dragon will not give up so easily.
You will receive the Call to Arms quest from the druid Immit, who will inform you about the Screaming. You may have met one of them before, and you probably know that the only way to kill a Screamer is with the Purify spell. A little further you will meet Gareth and his group, who are preparing to attack the Magisters.
You can start preparing for the attack yourself. To do this, after saving Gareth, visit the Sanctuary of Amadia and inform the locals about the success. After that, the strange companion of the gnome will be able to remove the collars from all your companions, and then all the refugees of the Sanctuary will go towards the ship.

On the spot, the refugees will set up camp and will be waiting for you. To let them through, you must destroy the Screaming blocking the way, using the appropriate wand or the ability on Brakk's helmet. Finally, a dragon can also help you if you have previously freed it.

After that, the refugees, led by Gareth, will go towards the ship, but you will have to divert the attention of Bishop Alexander to yourself. Just go down to the pier to start the fight.
It is worth noting that the battle is going to be incredibly difficult (you have not yet encountered such difficulties on the island). In addition to the bishop himself, Geist and four masters of different classes will confront you.
After two moves, a hostile side will join the battle, namely the Void Worm - a huge creature with a lot of health, which will not leave you a 1 on 1 chance. The easiest way is to take your group away while the masters and the worm destroy each other, and then deal with winner.
When the battle is over, you will meet the elf Ailment. Before you go with her, make sure that you have completed all your tasks on the island, as it will be impossible to return here.
On the ship you will face a new difficulty: it turns out that the ship is alive, as it was made of elven wood. You need to convince the ship to take you.
Explore the upper deck first, and then go down to the next level.
Gather all the companions and continue down to the lower decks until you reach the cage with the surviving Bishop Alexander. He's unconscious, so you won't be able to talk to him. However, get the guard to let you through and then rip the necklace off Alexander's neck.
At the same level, you will find a mirror that allows you to change the appearance, characteristics and abilities of both the protagonist and named companions for free.

On the opposite side, you will hit the door. Before you open them, look for a diary nearby that contains the code word "Resilience". Return to the door, insert Alexander's necklace, and then speak the password.
In Dallis's cabin you will meet a certain Tarkin - a mysterious necromancer with ambiguous answers. Decide for yourself whether he helped Dallis intentionally or under duress, and then make the appropriate choice - kill or spare (for Tarkin's mercy, an achievement is issued).
After that, explore the cabin. By the bed you will find a mechanism that will remove the closet and open the mysterious button - it will unlock the door from the treasury. Now pick up the pyramid near Tarkin and use it to move to the hidden room below.
You have to defeat two serious opponents - Geists. When the battle is over, pick up the book with the song and return to the upper deck. You just have to sing the text in front of the ship, and then he will agree to transport you. The ailment will say that your next target is the city of Driftwood, where Meister Siva lives.

On the way, you will be attacked by Dallis along with a mysterious hooded wizard. You will have a difficult battle against bloodhounds, masters, geists, who cannot be defeated at high difficulty levels.
Moreover, the mission will not require you to complete victory - you only need to hold out for five moves, protecting the Ailment, which will then take you to a safe place.

During the fight, immediately run towards Ailment, because the enemies will do the same. Protect her with healing spells, apply armor with a geomancer, restore magic shields, in general, do everything so that she does not die.
Especially watch out for geists and a warrior with a two-handed sword, as their blows can mow down 250-300 health at a time (we recall that Ailment has only 700 plus armor).
The task "To the Halls of Echoes" is activated immediately after teleportation. This time you will see all the gods, but in a non-trivial position: they will all be hung on the Void Tree.
Bless your god with the magic of the Source, and then talk with him. It turns out that you are the last hope of the gods, moreover, you have to become the Chosen One and lead your race.
The task "Sharp Awakening" is completed quickly. After the Ailment brings you back, you will finally reach land and disembark. A little higher, look for a gnome who is fighting a giant insect. They will disappear right in front of you, and then the battle with fiends will follow.
On the "Plundered Caravan" quest, you will find a place of massacre, where fiends attacked a caravan with people and dwarves. One dwarf will survive, so you can talk to her and find out what happened. Next, having received the necessary information, present it to the guards at the gate so that they let you into Driftwood.

From the beginning of the location, you can turn right to the raised bridge, where the boy Barrin is standing. He will ask you to save his mother on the mission "They Shall Not Pass", which you can do both in the future and now using teleportation.
If you want to complete the task now, then just go to the cliff and use teleportation to move three companions with a wizard to the boat from below (the spell's distance is close enough).
On the way towards the city, you will come across a chicken coop and hens, who, if you talk to them, will tell you about the stolen eggs. The task "When to count the chickens" will begin. Head a little north of Big Margin, sticking to the shore to find the monster. Kill him and explore the area - one surviving egg will be found nearby, which must be taken to the hens.
In the future, the task will continue if you return here again. The chicken will hatch and kill all the chickens, after which you can take it with you. All that remains is to take Squeaker to the bridge with the paladins, behind which there is a magic rooster. Near the last one, your chicken will turn into a monster, so you will have to kill him.
The task "The Law of the Order" is issued in the city. Get to the main street with merchants, and from there turn towards the coast, towards the piers. There, talk to Master Raymond, who will find you suspicious. In a conversation, mention that you want to join the order, and then Raymond will fall behind you.
As a result, the master will give you a letter, thanks to which you will receive immunity: none of the guards will dare to touch you. When Raymond leaves, talk to Julian to learn about the missing masters. The quest will continue later.

The task "A man and his dog" is taken on the square. Just talk to the beggar, next to which the dog is sitting. Even without the Animal Friend perk, you can simply turn the dog's collar out and find out that needles are sewn onto the item, because of which the animal suffers. Reprimand the beggar by driving him out of the city or by robbing him.
If you are kind to her, you will find out that she is the mother of the same crazy master from whom you had to kill in the prisons of Fort Joy.
After that, have a few words with Garvan, who will give you the task "Losses in the ledger". The last is to look for valuable cargo, for which you will go a little later.

Then talk to Lovrik if you want to use intimate services. From him you can buy a night with a lizard - an expert in alcove affairs, which is located on the third floor.
After a stormy night, you will find yourself in the same trousers and at the sight of a crossbow. If the Red Prince seizes the opportunity, then the lizard will turn into the Red Princess and there will be no attack.

The task "Grief will not flood" is taken on the second floor of the same tavern. Talk to Captain Ableweather, who will tell you about the shipwreck. After that terrible night, she can neither sleep nor eat, as terrible sounds haunt her.
In the other room, interact with the sleeping adventurer to get some recipes from him. You can also open his chest and take valuable items.
In the basement of the tavern you will find the entrance to the cave. The bully gnome will not let you in just like that, so you have to fork out fifty coins. Inside, you will find a separate tavern selling smoking blends.
First, talk to the lizard Ganges if you have the Red Prince in your party. Next, go to the teleportation statue, near which two pressure plates are hidden - stand on them to unlock the secret room on the side.

On the left you will find the headquarters of the head of the local dwarves named Lohar. The latter conflicts with the masters, which you will learn from him. Also, the dwarf will ask you to help him with the disappeared dwarf Mordus, who has sunk into the water, and now no one can find him.
Before leaving the tavern, talk to Dorothea Luxurious to accept the quest Web of Flesh Desires. The girl will offer you a kiss around the corner - agree if you want to redistribute your characteristics a little.
Before interacting, you will have to disconnect your companions and report to the meeting alone.
Dorothea will turn into a giant spider, after which you can either kill her or take a kiss. In the latter case, you will get the opportunity to add two points to any characteristic, while losing a physique unit.

Finally, at the top of the location lies the Driftwood Arena, where, like in Fort Joy, you have to defeat local champions. You will have to fight against five enemies, moreover, your eyes will be blindfolded, which will significantly affect accuracy and reduce the ability distance to a minimum.
Outside, to the right of the tavern, is Driftwood Prison. In it, you can talk to the boss to agree on a reward for finding the killer of the masters.
In the basement of the same building, talk to the bored master, who is fed up with his work. Leave him or convince him to leave the place he hates.
The mission "Missing Magisters" develops further. Visit the fish warehouse near the port where the inspection is taking place. The Magisters, as you will learn, suspect that the junk dealer is hiding the true killer.
But do not think that the masters are right, as the elf Stuart, sitting near the tavern, will inform you that the real criminal is among the visitors of the tavern.
In the warehouses, talk to the boss, who will refuse to give you valuable information. After that, find the dwarf Cannox and convince him that you need to find the suspect. Say that you managed to escape from Fort Joy, and then the dwarf will open up to you. It turns out that the criminal is hiding in a barrel.

Before that, you can look into the cellars of the warehouse, where the masters cannot find the entrance. In one of the rooms, simply move the barrels and use the hatch. Below you will find a spacious basement with traps - bypass them and get to the end of the room.
Open barrels marked with a cross, from which poison will flow. Ultimately, you will come across a barrel with Source weapons, and then you will be attacked by fiends.
You will conclude that in fact, behind the rotten fish in barrels lies a powerful weapon, as well as the fog of death, with which the dwarf queen wants to conquer the world.
In the right room near the shore, open the barrel to find Higba the Junkman. Help him get out of the encirclement without getting caught by the masters. If you get caught, then you will either have to fight, or hand over Higba with giblets. After a successful escape, the junkman will say his thanks and again whisk into the barrel. He will also reveal to you that he got the cheeks of the murdered masters from the cook Wivlia.
Visit the cook and accuse her of the murders. It turns out that she really cut out law enforcement officers, and then chopped them into soup. However, it will not be possible to immediately plant it, since there is no hard evidence.

The Lost and Found quest is taken west of the building with the fish. At the shore, talk to Lagan, who has lost his wedding ring. Offer your help and find the ring by simply holding Alt. When you do this, fiends will attack you - kill them.
Now you can continue the quest "Abrupt Awakening". Visit the house near the entrance to Driftwood, where a girl is playing on the porch. From her you will learn that the masters took Siva to the scaffold.

Leave the city the same way you entered, and then go a little higher to find the scaffold. Approach Siwa and free her, then kill all the masters. Next, return to Siwa's house, talk to her and go down to the basement.
You have to perform a rite that will call on God. Do the following in the order described:
After that, a god will appear who will teach you a new Source ability called Spirit Gaze, which allows you to see ghosts. Go back and use the skill to see Magister Harrick.
Then you can continue the mission "Missing Magisters". Visit the tavern again and use the learned skill. Talk to the first spirit to find out that the cook killed him. Now the spirit cannot leave in peace, as the ring keeps it here.
With the help of a robber character, sneak into the left room while the maniac is in another. There, open the board in the floor and pull out the hand on which the desired ring is located. If you take this evidence to the head of the prison, he will immediately send a subordinate to arrest the cook.
Alas, but this master expects the same fate as all the others. If you tell everything to Stuart, then he will be able to return to the ranks of the masters. Finally, by showing the ring to the killer, you will provoke a fight. When she dies, pick up a sheet with the names of the victims and give it to the boss.

Before leaving Driftwood, you can feed the cat with Rotten Void-Corrupted Fish. After such a meal, the animal will die, and a spirit will appear in its place. Talk to the ghost to get the achievement.
Shortly after leaving the city, you will be attacked by dwarfs who have gone crazy. Kill them and move on. You will come across a lone statue, next to which are constantly extinguished torches. Ignite them separately will not work, so use the fire AOE spell.
Further on the shore you will find a lamp with a genie. With dexterity above 20, you can convince him to fulfill one of your desires: to get rich (you will receive a stolen necklace that you need to sell as quickly as possible without catching the eyes of the guards), ask that enemies do not catch your eye (you will be permanently blinded), or ask for the power of the gods (lightning will kill you). Otherwise, you will have to fight the genie.

Continue along the west coast until you find a skull cave.
The mission "Shadow over Driftwood" takes place here. You have to fight with the void crawlers, of which there are incredibly many. The cave itself is quite large, so it will take a long time to wander. Moreover, it is dotted with minks (they allow you to quickly move around the location), one of which will lead you to four crawlers.
You can also just not climb into that hole and get to the very north of the cave, where the road leading to the abyss is located. You will be able to move your heroes across the abyss using teleportation to immediately be in the place where the game would throw you in the future with the help of the four fiends described above, and fight the enemies with the whole team.
After exploring the entire cave, get to the center with the wreckage of the ship, where the dwarf Mordus is located (it was Lohar who asked him to find). Mordus will turn out to be an undead necromancer, so get ready for a desperate battle.
If one of your heroes dies during the battle, then Mordus will immediately absorb his Source and turn into a huge fiend that cannot be defeated at current levels if you play on tactical difficulty or higher. To defeat Mordus, try to kill him first and as quickly as possible.

After the battle, Mordus will remain alive and will ask you not to kill him. If you save his life, you can learn more about the magic of the Source. You can also find out information about the owner from him by threatening to kill him. As soon as Mordus starts talking, something will destroy him.
Before leaving, visit the room on the side, where the body of the gnome with the yellow stone is located. When you try to leave the room, a huge ship will break through the wall, in which there will be neutral crabs and a hostile shark. Kill the shark, pick up a hand from it and feed it to the elf to find out about the dead boy Joe.
It was him that the children were looking for on the shore of Driftwood on the instructions of Hide and Seek. Return to them if you want to complete the task.
After that, visit Driftwood again and look into Mordus' house. You could get here right after your date with Lohar, but in general there is no difference. If you visit Mordus' house after killing him, then you won't have to make an extra circle.

Inside the house you will stumble upon a dwarf - one of Lohar's workers. Tell her that you are working with her master to get inside, or just kill her. Explore the dungeon, release the imprisoned dwarves, and then approach the mysterious stone head in which you need to insert a yellow stone (you will find or have already found it after the battle with Mordus).
The task "Taste of Freedom" will start immediately after the secret entrance that opens. Inside you have to solve a puzzle, which is presented on a 4x4 field. Use the power of the Source to go to the spirit world and see the right combination.
Facing the door to the treasury, standing in front of the field, activate the plates from top to bottom and from left to right as follows: first row third plate, second row second and fourth plates, third row second plate, fourth row fourth plate.
Next, you will find the undead chained to the table, as well as many vases. The undead will ask you to release it by activating the levers opposite. You can also just interact with one of the vases to start a fight.
A battle will follow in which the undead will help you. After that, talk to him and choose a reward. Keep in mind that the lich will offer you to increase one of the characteristics - agree immediately and do not ask questions, otherwise he will hand you a random book of skills and leave on his own.

Now return to Lohar and tell about Mordus. When you visited Mordus' dungeon, you found (at least you should have) a letter from the dwarf queen, which tells about her plans. If you first hand the letter to the masters, then a battle will follow when visiting Lohar. The letter can also be given to Lohar himself. One way or another, as a reward from both factions, you will receive a key to the chest.
The task "Competitors" takes place on the bridge on the left side of the location, which is guarded by the troll Grog. To pass, you will have to give him five thousand gold, or eliminate his competitor.
Both trolls are distinguished by a large amount of health, and also have an ability that regenerates six thousand health per turn (they will only activate it during the first turns).
Fire works well against Grog, while poison works well against Marg. After killing one troll, the other will refuse to let you through, so you have to fight twice.

The task "Aggressive capture" is activated on the bridge with the troll. You will find bodies of the dead and bloody footprints that will lead you to the area with the chest that Garvan mentioned (on the task "Losses in the ledger". Use the Source spell to talk to the ghost Liam.
It turns out that Garvan killed him for self-interest and no such monsters attacked him. In order for the spirit to find peace, it is necessary to take revenge on the killer.
Killing Garvan is quite difficult, since he is in the city and never leaves it. If you don't want to become a criminal and end up in jail, just find the poisoned food and feed him with it. To do this, visit the toilet behind the tavern, in one of which there is a suffering person. He will tell you the recipe for spoiled food: meat stew and poisoned mackerel with emptiness.
The first can be purchased in a tavern, while the second is in abundance in warehouses. Create food and give it to Garvan so that he runs to the toilet, where you can finish him off.
Go to the bridge to the north, where the paladins are encamped. Talk to Tom Hardwin, who will ask you to bring the white masters to clean water. Go to the mines to the east and follow the deeds of the masters.
On the "Buried Past" quest, you will stumble upon Gareth (if he survived in the first location), who has captured and wants to kill Master Jonathan. If you wish, ask Gareth to spare this criminal.
The Ugly Duckling quest takes place in a nearby meadow. There you will find the sick bird Ferno, which is actually a phoenix. Burn the bird to heal it. In place of the charred creature, an egg will remain, which can be left in inventory for the future or eaten on the spot.

On the quest "Bestiality Conversation" you will stumble upon talking cows, who are actually bewitched people. Naturally, cows will need your help in killing the evil sorceress.
Explore the witch's house (the key is in the thickets below) by capturing her eye. For the development of further events, it is necessary to kill Alice Alisson, which you will be able to do a little later.
Finally, there are scarecrows in the meadows, each of which are opponents. As soon as you talk to one, everyone else will come to life and pounce on you. The battle, keep in mind, is going to be difficult, as the Scarecrows have a passive skill "Horror", which sends enemies into a stampede without the possibility of further control if the target has no magical protection.
On the east coast, move south until you reach the cemetery. The task "Family business" is given by Tarkin (if he was spared on the ship). The necromancer will need you to go down to the Surrey Crypt and get the artifact there. Inside, you'll have to solve the lever puzzle using ghost vision.
Three knife switches will only work after you stand on the pressure plate in the very last room. Number combination: 2-1-3.
The task "Stranger in a foreign land" is issued in the north by the ghost of Vilnx Kriva. The lizard wants you to bury her according to her own customs, that is, to be cremated. Pull your foot out of the grave, then hurl it into the flames of the dragon statues.

Continue your journey. Nearby you will find a platform of stone, which is guarded by four ghost gnomes. The Featherfall bird is sitting there, feeding on its owner. Part of the body of the latter can be eaten by an elf to learn the ability for necromancy Bone Cage.
Nearby is a bench where you will see Zimsky's ghost. Interact with him to increase your luck stat by one and get a flask of Source.
Next, you will stumble upon a watchdog named Andras. Andras is guarding the grave and won't let you in. If you try to get through, then you will have to fight the monster Kedelon Bonebreaker, as well as a bunch of skeletons that this warlock dog will summon.
A little higher on a hill, you will find the burial place of Victor Flynn with a note saying that he faked his death. Alas, he still failed to escape death - his skeleton lies in the crypt.

The task "Servants involuntarily" is activated in the cemetery. Silent servants roam here, about which Farima the watchman will tell you. It turns out that master Riker controls the servants, so in order to free the poor puppets, you will have to kill him.
The task "Shelter of Heroes" is issued immediately. Get to the center of the cemetery and open a small crypt where four famous warriors are buried. In each grave lies a clue to the treasure they left behind in the world.
By the way, if you open all four coffins, then the heroes will rise up and fight you. The first three caches of Garrick, Hull and Bromley are located above and to the right at the exit from the cemetery, in the north at the entrance and to the left, not far from the sawmill, respectively.
The task "A generous offer" is taken near a living estate, the door of which will speak to you. If you confess that you are awakened, then she will let you through. Inside, you will find Master Riker, who will give you an assignment to find the tablet in the Black Mines location.

The task "Snake tongue" is issued in the master's house. After interacting with the silent salamander, return to the graveyard and look for a burning chest near two statues. Move the box towards you using teleportation or telekinesis to open it. It turns out that the password to the chest is made in the old language of the lizards, which the silent salamander knows about. The Red Prince can unlock the stash in the same way.
"Existential Crisis" - a task that you will receive above and to the right in the cemetery. A voice will be heard near one grave - dig it out to rescue the skeleton philosopher. Crispin will ask you three burning questions that will need to be answered.
Without exception, all answers must contain the "Undead" tag, so put either Fane or an ordinary undead on your side for a verbal duel. If you lose, one of your companions will die.
Near the cliff on the right side, visit the altar opposite the giant tree. Use the Source skill "Bless" on the altar to activate the event: the elf will drag your companion down.
Follow the disappeared to save him. Kill an elf without using poison skills on him, as they heal him.
The "They Shall Not Pass" quest continues. Pass the gated southern part of the cemetery using teleport or brute force. Below you will reach the very house where it was impossible to get at the beginning of the location, since the connecting bridge was raised.
As we mentioned at the same time, the barrier could be overcome with the help of teleportation. Otherwise, only the above option remains - to walk around.
To the right, at the edge of the location, you will find a path to the mine blocked by insects. Kill them and then talk to the spirits using Source magic.
Here the task “On the last gasp” will unfold, during which the masters will finish off ordinary peasants. If you do not intervene, then all five people will be executed, otherwise you need to attack the masters right away if you want to save everyone.

After the rescue, it turns out that another family member is in danger - a nephew. Go to the oil rig where he was hanged. Get to the top and talk to Master Jonathan, who will have to be killed immediately (after the first line) if you want to save your nephew.
Keep in mind that the entire district will come running to help Jonathan in the form of other masters. Not only that, the rescued will begin to use the magic of the Source, which will attract the attention of fiends from oil, which will then turn into fiery ones when the oil catches fire.
The quest "No Exit" is issued in the west of the fort, where a couple of masters are trying to burn down the house. You can kill the magisters to save the man inside, who turns out to be blue blood Owen Anchoret.
Finally visit the coast where the Screamers are. After the destruction, get to the buildings with the masters, in which they carry out operations to extract the Source from the magicians.
Deal with them and find a diary that tells you about a safe path to the Blackpits.
The task "Excavation" is already developing in the mines. The beginning of the cave is dotted with traps, so it's best to leave the whole team at the beginning, letting one thief go ahead, which is able to neutralize the whole path.
One way or another, soon you will reach the defeated master, after a conversation with which you will have to fight the fiends. Then go down into the mine. Inside, look into the side room, where there is a fragment of the column.

After a while, you will stumble upon a chicken that will inform you of a threat on the way - the Screamer. Finish him off normally or bypass him with teleportation.
In the ruins, look for a recess hidden in the wall, which opens with a key from the waterfall. Inside you will find the second fragment.
In the workshop, kill the masters or intimidate them to avoid a fight. Next, you need to restore the oil pump, having obtained information from the engineer of the Circle.
After blowing up the wall with barrels, you will reach the temple with statues of the ancient people, to which Fein belongs. Pick up the artifact that lies in the nearest boxes, and then step into the last room with the statues. From the diary of the digger you will learn about the correct order of activation of the statues; moreover, the necessary information is contained on the altar.
The activation order of the statues is as follows: the top one is the first, the second in the last row is the second, the second in the third row is the third, the second in the second row is the fourth, the first in the third row is the fifth, the first in the second row is the sixth, the first in the last row is the seventh .
After the puzzle, you will unlock the force field, behind which you will find an ancient tablet. This is followed by a real test in the form of a boss of the fourteenth level (if your level is lower, it is better to return here later). Ether Ether opposes your deities, but now she has just awakened, so you may have enough strength to defeat her.

After the battle, return to Master Riker. You will not find him on the spot, so visit his room, equipped with torture devices. Before handing the find to the master, ask him to teach you the new powers of the Source. Ultimately, a battle will follow that cannot be avoided.
In the master's house, the task "Opposites Attract" is also issued. To do this, simply draw a line of food between the turtle and the rat. Now you just have to visit the paladins on the bridge and tell them about the atrocities of the masters.
Behind the paladin bridge, you will receive the quest "Three Shrines", in which you will have to help live deer in the battle against their dead relative. To complete the quest, you need to visit two more similar places.
The task "Test of all seasons" is activated in a forest clearing, where you will find a bowl surrounded by trees-statues. To complete the quest, you will need to use certain spells on certain statues, as each of them represents a different season. Listen carefully to the riddle from the mysterious voice, and then the task will be simplified.

On the way down and to the left, deal with the opponents and talk to the undead named Viktor.
Quest "The Buried Past" continues. Gareth attends the funeral of his relatives under the protection of the paladins. Near Gareth, pick up the gloves of the culprit who killed his parents. Next, bypass the outpost in the form of paladins, agreeing with them or using brute force.
Inside you will find four assassins. Use your ghostly vision to talk to the dead relatives of Gareth, who live right there.
It turns out that they do not crave revenge, on the contrary, Gareth's peace is important to them. After that, Gareth will enter the room, who will decide to finish off the killers. Dissuade him from staying on the path of a hero, or give the go-ahead, and then Gareth will embark on the path of revenge.
Finally, the spirits will reveal to you the name of the main culprit - Master Jonathan. Kill him if you didn't do so earlier when visiting the Blackpits, and then bring Gareth the Magister's Ring.
The task "Dangerous for yourself and others" will start in the eastern part of the location, where you will find the healer Swann. From him you will learn about the dangerous infected Natalie, who is located in the basement. You can help her, but then you have to fight the monsters. Keep in mind that AOE spells will damage the girl.

On the way up, you will come across a sawmill and a gang of Lone Wolves. Use ghost vision to see how many restless souls are following them.
The spirit of the wizard will ask you to avenge him and finish off the mercenary, nicknamed True Eye.
Corbin Day, on the other hand, will complain about his slave fate and complain about the master Rust Anlon. You can finish off the last one in the future, thereby freeing Corbin.
The Spirit of the Black Widowmaker will tell you about the treacherous murder: his partner Serpent Root poured poison on him. The girl will refuse to confess what she has done, so you can kill her.
The Spirit of the Gravedigger will tell you about Dremosek, who finished him off. Visit the latter and use the answer option tagged "Mystic" to make her see the Gravedigger in her dreams. After that, Dremoseka will show you the location of the treasure.
The task "A log like a log" takes place here. You need to visit the sawmill and talk to the log. An elven piece of wood will ask you to pay for it with the lumberjack who cut it down. You will find the woodcutter at the bottom of the location, however, he will also be dead. To destroy his spirit, use the Soul Absorption skill.
The task "Valuable booty" is taken from the head of the mercenaries Rust Anlon. In captivity, he contains Saheila, already familiar to you, so he will have to be finished off. Not only that, Sybil would want the same. If you kill Rust, then from that moment on, all the mercenaries of the brethren will become hostile to you.

After the sawmill, visit the clearing to the east by breaking the gate. There you will find Sadhi - the Red Princess, with whom your red-skinned comrade can retire. This will be followed by a battle with the killers, and the princess will disappear again.
Above and to the right you will find riddled soil, broken into small patches of land. To move, use teleportation or wings.
Next, you will reach a lonely hut where Almira and Mical are located. Together, the couple left the hot spot, but it was not without damage. You won’t be able to cure Mikal just like that, because there is a curse around him.
The source of corruption is the dragon, which you will find above and to the right of here. Finish him off and return for your reward.
In the future, you will meet a couple on a ship. Then Almira will ask you for another service, which is to find the tablet. In the past, you could already get it on the instructions of Riker.
A zombie named Eithne is a librarian. If you convince her that you are not a member of the Black Circle, then she will allow you to buy books with various abilities of the schools of Necromancy and Transformation.
Get to the ruins in the center where Hannag lives. The magisters are trying to kill the lizard, so help her if you want to get an additional slot for the Source abilities. Next, Hannag will tell you about his student, who may soon be executed. If you manage to rescue him, then she will make you a student, if not, she will only hand over a book about the Source.

The "Three Shrines" quest continues nearby. You will find a monster surrounded by wolves, which will increase its strength. The monster needs to be stunned every turn, as it is quite capable of killing your entire group at once.
In the north of the location, you will stumble upon the corpse of a witch named Alice Alisson. The body flies on the cross and is quite capable of fighting, moreover, one of its abilities - a passive aura - takes away four hundred HP each turn from the entire squad. A dangerous opponent, so don't even think about fighting him if your level is below 15.
After the kill, visit Alice's hut, which is located in the meadows. In her chambers, you will find the ingredients with which you can create a potion (witch's eye, mushroom and catalyst) to heal people turned into cows.
On the other side of the bridge you will find a lonely house, next to which there is a cage with two demons. Their current owner is Jaan - the same master of the Source that you have already encountered more than once. Find and kill the Imp located on the Isle of the Blood Moon for him if you want to more fully master the power of the Source.

On the shore you will meet the Dead Ferryman, which transports everyone to the same island. Any character other than the undead will not survive this journey, as it passes through the fog of death.
To overcome the obstacle alive, use the following trick: separate all the heroes from the one character that you are going to use the boat. When he is dead on the other side, the rest of the living party members will immediately teleport to him.
Step down and to the right until you reach the demons led by the Lawyer. Immediately you will find the familiar Ailment, which teleports without talking. Next, you can make a bet with the gnome who just spoke with Ailment, arguing with him for five hundred coins.
The lawyer will offer to teach you new features of the power of the Source, but in return he will ask for a counter service - to kill the Black Circle group. You will find the targets in the center of the island, after which the Advocate will reveal the location of the Nameless Island to you.

Next, you can finish off the Lawyer, as Jaan asked you to. As a reward, you will receive an increased Source resource. Jaan will also need you to find the Advocate's owner by asking the spirits on the island about his name.
Find a bridge assembled from fragments, and then a map with statues, an archive and a forge marked on it. The quest "Forgotten and Damned" is activated.
Go up and to the right and at the turn find the loosened earth, under which the hatch is hidden. You will find yourself in the Archives, where the ghostly rector of the library is located. Behind one of the cabinets you will find the Anathema weapon part, as well as a new fast travel pyramid and a special book with a spell to quell the flames, which you will need to destroy the statues.

Near the statues you will find cages with demons. Before you open them, look into the world of ghosts and negotiate with the spirits of the guards in order to get the go-ahead for the release of prisoners. You have to defeat a baby, a gnome and a lizard, each of which uses demonic abilities.
The task on this part of the land is coming to an end, so it's time to set sail. For the next trip, you need to open three additional slots for the Source abilities, learn the skill "Draining the Source", find the location of the mysterious Nameless Island, solve Gareth's dilemma, and also (optionally) complete the personal quests of the companions.
Keep in mind that Source slot upgrade opportunities can be easily missed. There are four characters in total who can help you in this matter: Mordus, Riker, Hannag and Jaan - remember these names.
You will receive the ability to extract the Source from Siwa when you open the above cells.
Finally, the location of the island can be opened by the Lawyer, God (according to the ritual in Siwa's hut), as well as Ailment. When all conditions are met, return to the ship and order to sail.
This part of the land is a whole battlefield, where masters and paladins are constantly fighting on the one hand, and the Black Circle on the other. Your task is to visit all seven Divine temples and complete the tests there. When the deed is done, you will be able to proceed into the bowels of the mysterious Academy.

Chat without leaving the ship with the succubus Almira, who wants to find two pieces of the Redeemer. Also here you will find Master Delorus, whom you met back in Fort Joy. He can become a companion, but his level is too low for full-fledged battles.
The first sanctuary represents the people, and here you will stumble upon a confrontation between the masters and members of the Black Circle. Choose a side, and then take part in the battle. After the battle, activate the altar by a human so as not to get a "debuff", or by another race, but then you will become blind for a while.
Go upstairs and to the left until you come across a Cheka detachment. If you convince them that you are the incarnation of Almira, then there will be no battle.
Inside the temple will be flooded, which was done by order of the Cheka. You can cancel the order and send the entire group off the island. After that, find the key that will allow you to unlock the secret path to the Armory with valuable items.
On the same shore you will find the Gloomy Cave, where you can find powerful weapons. By picking up the Blade of Eternals, you will provoke an attack by apologists.
Inside the Imp Sanctuary, you will find that the required item is missing from the altar. Go to the ghostly world and talk with the spirit of the imp, who will reveal to you the reason for the loss - it turns out that the members of the Black Circle stole the crystal.
Head west until you come across two mongrels who have found a strange stone. Kill them or just throw meat at them to get the desired crystal. Now you can use the altar.

Activating the altar will take you to the miniature world of Zantezza. First place the boxes on the nearest plates. Go further, bypassing the blocked doors with the help of teleportation.
To speed up time, use the hyperactivity device in the hall on the right. The other device will start the kill protocol, so don't touch it. Finally, in the center you will find the core, which you need to get to as quickly as possible, otherwise you will die.
After that, advance along the northern path to find the Cheka group. Kill them and take the Dark Mirror from the head.
On the approaches to the temple you will be met by elves. To avoid a fight, tell them that you are awakened or that you are doing the will of the masters.
Here you will also learn that Bishop Alexander went after you and has already landed on the island. You will find him at the very top of the elven sanctuary in the company of Gareth, who wants to kill him. Help Alexander, who is separated from the Sledgehammer, or complete Gareth's revenge and finish off the bishop.

Another task will be given to you by Sybil, if she is in the group. The tree in the temple will tell her to take the life of the Prince of Shadows. When you leave the temple, Saheila's friend will advise you to destroy the Tree so that the elves finally gain freedom. Decide what to do.
The sanctuary of the ancient people is located in the lower left corner of the island. You can get there only along the vines up, which will lead you to the temple floating in the sky.
On the spot, overcome all obstacles and crevices, using the various blessings of Amadia. On the way, if Fane is part of your group, you will receive unique gloves. Get to the center and interact with the altar.
Get to the shrine and interact with the altar. No complications. To the east of the temple, you will find the lizard Prince of Shadows, which was hunted by Sybil throughout the game. She will go into a trance due to the lizard's magic, so you will have to sing a song to her. A battle will follow in which you have to fight with the invisible.
Finally, the Red Prince can also interact with the Prince of Shadows. After the kill, move to the ghostly world to find out the reason for the hunt for the Red Prince. It turns out that your partner and Princess Sadha can give offspring in the form of real dragons, which is by no means tempting to know the lizard empires.
On the way to the sanctuary, overcome all the crevices with the help of magic. Inside, defeat the cursed warrior of Dune, and then fulfill his request - absorb him. After starting, go around the temple from the north and talk to the undead. She will ask you to finish off the damned gnome.
On the task of "White Face" you have to finish off the leader of the Black Circle of the same name. Use the black mirror to pretend to be White Face's subordinates in order to safely get to his hideout, which lies to the left of the Temple of the Moon near the mountain.
The entrance will be protected by the troll Circle, with which it is impossible to compromise. There is no point in fighting him honestly, so just teleport him into the lava.
In the cave you will see an altar that cannot be interacted with. Dispel the illusion behind him by using Alexander's hood, and then finish off the leader.
In the Cheka camp, you can find a friend of Vindego, who could have been killed back in Fort Joy. One way or another, she will have to deal with it again.
Now that all the temples are activated, head to the Sanctuary of the Moon. Inside you will find seven pillars, each representing a different deity. Each of the seven represents either the Sun (light) or the Moon (darkness), as you learned when visiting temples.
Expose the belonging of the gods to the luminaries, and then use the lever. To activate the lever, move the thing with a lightning bolt picture called the Phase Capacitor to the pressure plate.

If you wish, you can go a completely different way without activating the altars. To do this, visit the corner of the island on the lower right, where the islets are located. On them you can get to a separate land, where the hatch is hidden. It is he who will lead you to the halls of the Academy.
Inside the Academy, you will meet a fiend of the void, who will reveal to you that their true motives for his brethren lie in the desire to return the power illegally stolen by the gods.
Go into the hall, dotted with the bodies of teachers. They can be interacted with to enhance some stats in exchange for weakening others. Then find the panel and install the Phase Capacitor, which will start the beam. It is necessary to conduct a beam to the pole using mirrors.
In another room you will find the key to the room on the left with valuable cheeks. Near the pillar, which the beam should reach, install a couple more capacitors, and then interact with the lever. This will take you to the Hall of Heroes.

In the hall, you will meet all the story companions, as well as Gareth or the Bishop, depending on your choice. Agree to fight.
After that, a battle will begin in which all the elect will take up arms against you. Get to the key of divinity, which lies on the right. Ultimately, when you overcome the ordeal of the Guardians, you will be greeted by the long-forgotten Dallis Maul.
If you managed to change the Bishop to your side, then she will immediately finish him off. Dallis then annihilates the key and escapes.
Finally, the destruction of the arena will follow, during which the battle will unfold. You will have to defeat your own copies in the form of divine avatars, as well as the Source Titan, which will appear at the end. When the deed is done, Ailment will appear and ask you to start the beacon - do this to leave the location.
Once on the ship, talk to Ailment. Your next target is Arx, where Dallis went.
Directly on the ship you will move to the hill. Pass the camp near the coast and get to the port. On the spot, it turns out that a kraken attacked the harbor. If you think that your strength is enough to destroy 18 levels, then give him a fight.

After that, search the shipwreck and find the key. Also talk to the ghosts to learn about Dallis, who rushed to the tomb of Lucian himself. Defeat the vampires by helping the paladins let you into Arx.
In the city center, find the artist and use ghostly vision to talk to the spirit. The latter will reveal to you that the local prince owns a rare painting.
When you visit the nobleman's residence, you will stumble upon Kat, who will hint at the paintings in the same way and offer you help. On the top floor, get ready to meet the guards; in the hall there is a key that can be transferred to you only with the help of telekinesis. Finally, you will find the treasured path to the basement outside the house.
The Execution mission will begin with a series of executions: the paladins will kill the masters, wanting to find the secret members of the Black Circle. Talk to Marie, who will ask you to rescue de Selby. The latter violated discipline and refused to carry out executions, so she herself ended up on the scaffold. The only way to save her is to kill the local head of the paladins.

On the mission "The Power of Mercy", visit the prison on the lower level of the city. Deal with the guards, and then find a cage with an old acquaintance of Vindego. If you release it, then you will learn a new spell that allows you to turn fiends into allies. She will also reveal to you that the local paladin leader Kemm is secretly working for demons.
The task "The last stronghold of the masters" is activated in the barracks. In the ghostly world, look for Marvell, who lives in the kitchen. Beside him, clear the way from the boxes and use the hatch.
By the way, on the hatch there will be a password in the form of four phrases, two of which can be found in the next room (others will have to be selected by random).
On the lower level, look for a secret button to get into the vault of the masters. Next, to unlock another secret, remove all four paintings, behind which there will be buttons. As a result, you will find yourself in a new room where the ghost of Hux lives. Here, pick up the key and go down to the next level through the closed hatch.
In the end, you will stumble upon Master Raymond surrounded by geists - kill him. Next, examine his documents and read the information about Dallis, which contains all the plans of the masters. It turns out that they set out to destroy the Source, Divinity and the Void itself, for which they have already recruited Tarkin, whom you know. The latter took care of the resurrection of King Brakk.

Return to the city and go up and to the left, where the burning part of the city is located. Visit the lizard embassy, where you can find a mysterious portal.
To the right of the city, explore the apartments of the craftsman Sanders, who makes toys. One of the toys came to life and disappeared - you will find it near the pier and learn that there are corpses in Zanders' basement. Visit his house again, and then talk to the master himself and decide his fate.
Then visit the library where the History Dock Hubert will examine you. Correct answers: House of Dreams, 1234, Tenax and Cassandra. If you answer correctly, Hubert will ask you to go down to the basement with him, where he will open a new story and hand you a book of talents of your choice. There is also a chest, the key to which is in the previous room.
On the assignment "What the doctor ordered" you will visit the Black House, where Deva lives. If you defeated the White Face on the island of the Blood Moon, the doctor will let you inside. Next, Deva will offer you a deal: half of the divine power on your part, help in the battle against Dallis - on his. Keep in mind that the deal will definitely have consequences. If you refuse, you will discover that behind the mask of the doctor lies the powerful demon Adramalich.
The task "Secrets of the Dwarves" is activated when you get close to the area of the dwarves. Make your way to their courtyard from the east, teleporting to the balcony of the house of the wisest. Immediately you will find stones that will help you get to the other side.
On the spot, you will find the place of the already completed wedding, which has taken the form of a massacre. If you activate the cake, there will be a battle with toys that will pop out of it. There you will also find a message from Dev. Before leaving, examine the bodies to find the key.
Take a look at the house where the newlywed Isla Gall settled down. On the top floor, you will run into her dad, Michel, who is about to leave Arx. Next, look into the kitchen and take the Lulabelle wine to unlock the secret passage.

You will find yourself in a sewer full of spiders - kill them. Next, visit the right side of the dungeon, where there is a brotherhood of child thieves that play you against the troll. When the battle is over, take the Strange Painting, which is the very rare image.
Ultimately, you will find yourself in the secret abode of Queen Justinia in the company of Isbale. If you released Vindego after the interrogation, then you learned that Isbale was hanging out with demons. That is why you can now hand her over to Justinia, after which the latter will refuse to stand up for Isbale in battle. After the battle, talk to Justinia and decide her fate.
Before leaving, you can visit the branch of the sewers, which will lead you to the prison. There you will stumble upon the boy Karon, who is awakened. If you return here again after some time, you will not find Karon on the spot, but you will find him in the western part of Arx, where he will massacre.
Visit the temple and talk to Avenni to get the key to Arhu's private rooms. After exploring the chambers, at the exit you will find paladins who will accuse you of killing Arhu. Finish them off or try to negotiate peace.
On the opposite side of the temple, talk to the dog Charlie to find out about the true culprit in the loss of Arhu. It turns out that Kemm, whom you know, is behind the crime.
Speak with Lyle to learn about the Path of Blood Pilgrimage. It turns out that only an absolutely sinless person can overcome it. Come inside.
Along the way, you will come across a statue of Lucian, who will ask four questions. It doesn't matter if you answer honestly or lie, because if you really committed crimes, then the statue will instantly destroy you. If there are sins behind you, then you can use the trick: return to the ship, take an "empty" companion who has not yet participated in your adventures, and then bring him here and it is for them to pass the test.

Next you will find a puzzle with pipes. It is necessary to hold liquids of three different colors in three bowls on the opposite side. As a result, it turns out that one liquid is missing - use the "Blood Rain" over the center of the platform, and then bless the blood with the Source skill.
After solving the problem, continue on your way. Behind the door you will find minions of the Source, which are easy to kill, but pointless, as they are reborn. To overcome this challenge, you must dial the right combination of levers. Each of the levers represents a separate letter, and you need to collect the word "RIGHT".
The task "The End of Times" is the final one. Ailment and Tarkin will stand by your side. In the hall, talk to Lucian and Dallis. It turns out that the first staged his death in order to freely absorb the Source from the gods.
Dallis is the eternal one that has always worked for Lucian. Not only that, Fane is her father. Sledgehammer's ultimate goal was to completely consume the Source and move it to a safe place - one where the Void could not threaten it.

Next, you will have a battle with King Brakk. Leaders familiar to you will fight on his side, while Lucian and Dallis will fight on your side. You won't have to kill Brakk personally, as you won't have enough strength, so just try to survive.
Like if helpful
The Anathema achievement in Divinity: Original Sin 2 is unlocked by finding and recovering the legendary sword in the Family Business quest, which begins by meeting Tarkin at the cemetery gate east of Driftwood at (coordinates: X: 550, Y: 179) where the protagonist comes to after and . Tarkin tells about an object of incredible power that once belonged to the ancient Surrey clan. The scientist is not suitable for the role of an adventurer, so he will ask you to find and get Anathema from the family crypt of the founders of the cemetery. Grave of Joanna Surrey located in the southern part of Pogost and marked on the map with a yellow flag (coordinates: X: 550, Y: 100).
If Tarkin doesn't show up at the graveyard gate on the Churchyard, the game should be updated. The bug was fixed in the third major patch.


The door to the tomb is locked with a complex lock that can be opened with a key or hacked. Shadowy Tomb Key in the grave of Joanna Surrey is kept by Kvanna. The Tomb Raider is located in the crypt in the central alley, guarded by the dog Andras (coordinates: X: 552, Y: 138). At the sight of strangers, he will desperately defend the owner's territory. After we pull the lever at the entrance to the crypt and go down to the tomb. We rob the petrified Kvanna or first impose a "Blessing" and in a conversation we convince him to give the note and the key. The note contains the correct combination to solve the ghost panels puzzle. If the persuasion does not work, then everything will end in a fight. Kwanna can summon fiery skeletons and has resistance to air and fire - 80%, earth - 60%, and water - 20%. Having achieved our goal, we go to the grave of Joanna Surrey, open the lock and enter the tomb.


In the first room on the wall we find two square buttons. Both are located at different ends of the hall next to piles of skulls. With a high "Perception" they automatically appear at a close distance from the unit. After activation, a secret door will open to the white sarcophagus in the second room. We pass immediately into the third room, leave some heavy object on the pressure panel and return to the second room. When the gas goes, activate "", on the wall click on three panels in the following order: 2 , 1 , 3 . After entering the correct combination, the sarcophagus will move to the side and expose the hatch. We go down to the treasury. We examine the heaps of gold, take the money and talk with the spirit of Joanna Surrey. The anathema will be divided into two parts - handle And blade. From the sarcophagus pick up the handle and return to Tarkin at the main gate of the cemetery. There is no great need to fight with the revived "jade" guards, you can simply escape by climbing the stairs.


Tarkin will send for the second part of Anathema to Blood Moon Island, located north of Driftwood. A yellow flag with the label "Archive" will appear on the map. We get to the invisible bridge, turn on "Ghostly Vision", select a character with the teleportation skill, for example, for a warrior it can be "Phoenix Jump", for a robber "Tactical Retreat". "Ghostly Vision" lasts for 10 turns, the time counter is indicated next to the character's portrait. We move to the other side, at the entrance we talk with the Corrupted Pilgrim, who will ask to visit his master (). We run towards the altar of movement in the eastern part of the Island of the Blood Moon. We use fast travel and collect all the companions here at the altar, so as not to jump on the bridge with each character. We approach the ruins, inspect the area, for the entrance to the archive to appear, you need to have a developed “Perception” of 22 units. Drauden helps increase "Perception" by 2 units. The entrance to the Archive, which can be found in Maester Siva's house in Driftwood or in the cemetery. We come close to the arch in the wall to find a secret passage. The door will be highlighted in yellow. We go into the room and from the sarcophagus pick up the second part of Anathema. We take the blade to Tarkin on the "Lady Vengeance". The scientist is waiting for a gift right at the altar boat to quickly move around the locations. He will be delighted with the find and immediately get to work. He will ignore all questions about Anathema until the 4th act of the game.
In Arx we reach the barracks of the masters, in the kitchen behind the boxes we find a hatch. The correct cipher from the castle is indicated on the plate in the barracks. If the hacking skill is well developed, then the lock can simply be hacked. We go down into the hatch, in the corridor on the left side of the wall we find a button (high “Perception” is required), then we break open the second hatch and get into the library of masters. At the lower level, we select a note from the table and find out the secret of Tarkin (coordinates: X: 150, Y: 50). When meeting in the task "Revival of the King", the wizard will give Anathema. You should save the most powerful two-handed weapon until the fight with the Doctor and the Final, as you can't fix a broken Anathema.
Job interviews are not easy. If you want to apply for...

The colon warns of further clarification and clarification. This feature...

Pizza has long become popular far beyond its homeland. This dish...